DISASSEMBLY
Removal / installation · Vehicles built from Jun 2011
| 1. FIX FORWARD CLUTCH ASSEMBLY |

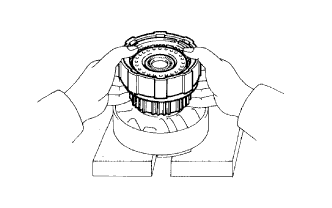  |
Place wooden blocks or equivalent to prevent forward clutch shaft from touching the work stand, and place the overdrive support on them.
Place the forward clutch in the overdrive support.
| 2. INSPECT PISTON STROKE OF FORWARD CLUTCH |
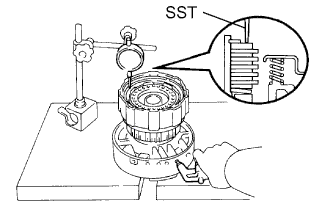 |
Using SST and a dial indicator, measure the direct clutch piston stroke while applying and releasing compressed air (392 kPa (4.0 kgf/cm2, 57 psi)).
- SST
- 09350-30020
(09350-06120)
- Standard piston thickness:
- 0.60 to 1.00 mm (0.024 to 0.039 in.)
If the piston stroke is still not as specified, select another flange.- HINT:
- There are 8 different flange thicknesses.
- Standard flange thickness:
No.
Specified Condition
No.
Specified Condition
90
3.0 mm (0.118 in.)
94
3.8 mm (0.150 in.)
91
3.2 mm (0.126 in.)
95
4.0 mm (0.157 in.)
92
3.4 mm (0.134 in.)
96
4.2 mm (0.165 in.)
93
3.6 mm (0.142 in.)
97
4.4 mm (0.173 in.)
| 3. REMOVE FORWARD CLUTCH DISC |
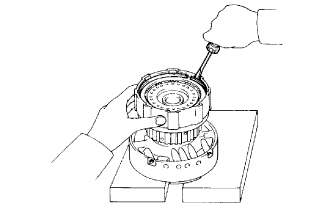 |
Using a screwdriver, remove the snap ring from the forward clutch drum.
Remove the flange, 6 plates and 6 discs.
Remove the cushion plate.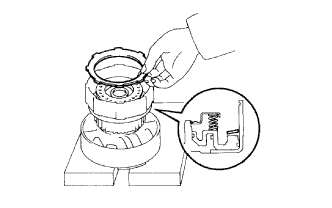
| 4. INSPECT FORWARD CLUTCH DISC |
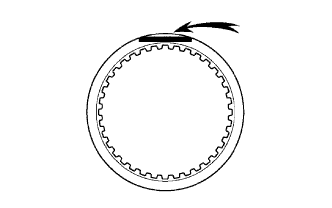 |
Replace all discs if one of the following problems is present: 1) a disc, plate or flange is worn or burnt, 2) the lining of a disc is peeled off or discolored, or 3) grooves or printed numbers have even a little bit of damage.
- NOTICE:
- Before assembling new discs, soak them in ATF for at least 15 minutes.
| 5. REMOVE FORWARD CLUTCH RETURN SPRING |
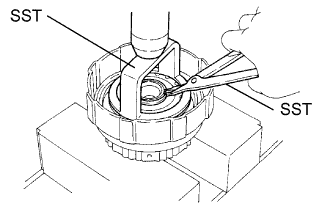 |
Place SST on the spring retainer, and compress the return spring with a press.
- SST
- 09350-30020
(09350-07040)
Using SST, remove the snap ring.
- SST
- 09350-30020
(09350-07070)
Remove the piston return spring.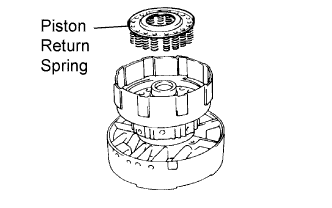
| 6. REMOVE FORWARD CLUTCH PISTON |
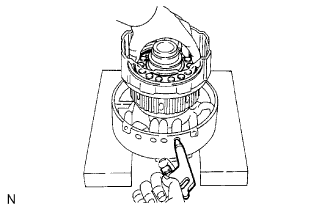 |
Place the forward clutch drum onto the overdrive support.
Hold the forward clutch piston by hand, apply compressed air (196 kPa (2.0 kgf/cm2, 28.5 psi)) to the overdrive support to remove the forward clutch piston.
Remove the forward clutch piston.
Remove the O-ring from the forward clutch drum.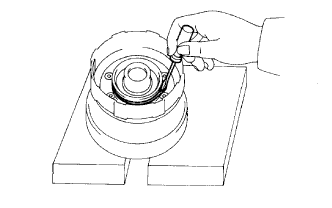
| 7. REMOVE FORWARD CLUTCH PISTON O-RING |
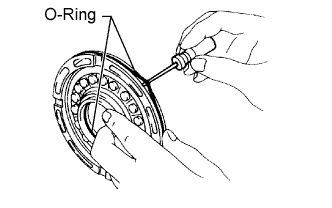 |
Using a small screwdriver, remove the 2 O-rings.
| 8. INSPECT FORWARD CLUTCH PISTON |
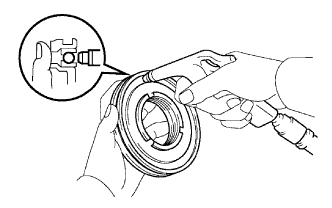 |
Check that the check ball is free by shaking the piston.
Check that the valve does not have leaks by applying low-pressure compressed air.
| 9. REMOVE INPUT SHAFT OIL SEAL RING |
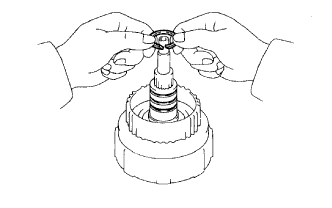 |
Remove the 3 oil seal rings from the forward clutch drum groove.
| 10. INSPECT FORWARD CLUTCH DRUM |
|
|
Using SST and a dial indicator, measure the direct clutch piston stroke while applying and releasing compressed air (392 kPa (4.0 kgf/cm2, 57 psi)).
- SST
- 09350-30020
(09350-06120)
- Standard piston thickness:
- 0.60 to 1.00 mm (0.024 to 0.039 in.)
If the piston stroke is still not as specified, select another flange.- HINT:
- There are 8 different flange thicknesses.
- Standard flange thickness:
No.
Specified Condition
No.
Specified Condition
90
3.0 mm (0.118 in.)
94
3.8 mm (0.150 in.)
91
3.2 mm (0.126 in.)
95
4.0 mm (0.157 in.)
92
3.4 mm (0.134 in.)
96
4.2 mm (0.165 in.)
93
3.6 mm (0.142 in.)
97
4.4 mm (0.173 in.)