INSTALLATION
Removal / installation · Vehicles built Jun 2011 – Jul 2012
Versions by build date: Jun 2011 – Jul 2012 Aug 2012 – Jul 2013 from Aug 2013
| 1.
INSTALL GLOW PLUG ASSEMBLY |
 |
Using a 12 mm deep socket wrench, install the 4 glow plugs.
-
Torque:
- 13 N*m{
133 kgf*cm
, 10 ft.*lbf
}
| 2.
INSTALL NO. 1 GLOW PLUG CONNECTOR |
|
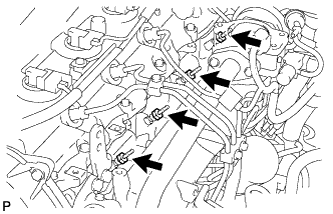
Install the glow plug connector by uniformly tightening the 4 nuts.
-
Torque:
- 2.2 N*m{
22 kgf*cm
, 19 in.*lbf
}
Install the 4 screw grommets.
Install the wire harness with the nut.
-
Torque:
- 2.0 N*m{
20 kgf*cm
, 18 in.*lbf
}
| 3.
INSTALL EGR VALVE ASSEMBLY
|
|
Install a new gasket and the EGR valve.
| 4.
INSTALL NO. 1 EGR PIPE SUB-ASSEMBLY
|
|
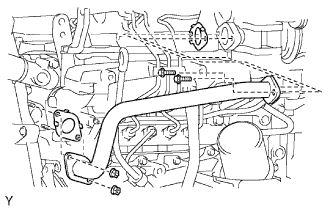
Install 2 new gaskets and the pipe with the 2 nuts and 2 bolts.
-
Torque:
- 13 N*m{
133 kgf*cm
, 10 ft.*lbf
}
- HINT:
- The gasket's claws should be on the pipe side.
| 5.
INSTALL INTAKE AIR CONNECTOR
|
|
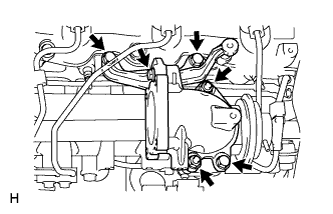
- Install a new gasket and the air connector with the 2 nuts and bolt.
-
Torque:
- 20 N*m{
204 kgf*cm
, 15 ft.*lbf
}
| 6.
INSTALL THROTTLE BODY BRACKET
|
|
Install the bracket with the 3 bolts.
-
Torque:
- 20 N*m{
204 kgf*cm
, 15 ft.*lbf
}
| 7.
INSTALL DIESEL THROTTLE BODY ASSEMBLY
|
|
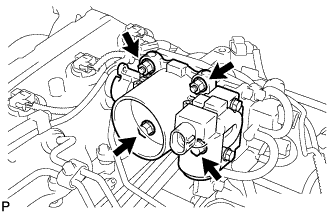
Install a new gasket and the throttle body with the 2 bolts and 2 nuts.
-
Torque:
- 20 N*m{
204 kgf*cm
, 15 ft.*lbf
}
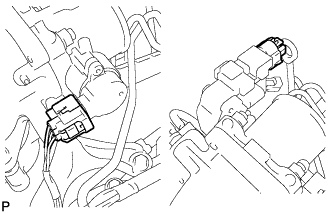
- Connect the 2 connectors.
| 8.
INSTALL VACUUM SWITCHING VALVE BRACKET
|
|
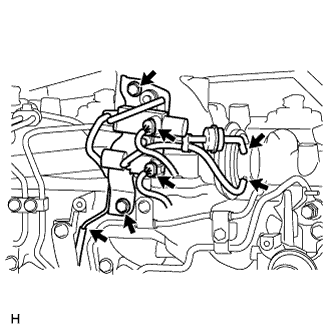
- Install the bracket with the 2 bolts.
-
Torque:
- 20 N*m{
204 kgf*cm
, 15 ft.*lbf
}
Connect the vacuum hoses to the 3 locations.
Connect the 2 connectors.
| 9.
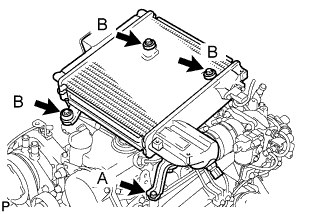
INSTALL CHARGE AIR COOLER
|
|
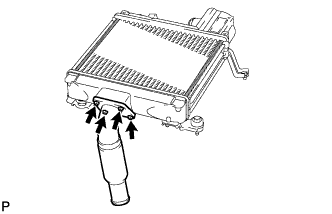
- Install a new gasket and the intake air connector with the 4 bolts.
-
Torque:
- 10 N*m{
102 kgf*cm
, 7 ft.*lbf
}
- Using a 22 mm deep socket wrench, install a new gasket and the IAT sensor.
-
Torque:
- 29.4 N*m{
300 kgf*cm
, 22 ft.*lbf
}
- Install the CAC with the 4 bolts.
-
Torque:
- 32 N*m{
326 kgf*cm
, 24 ft.*lbf
}
for bolt A
-
Torque:
- 12 N*m{
122 kgf*cm
, 9 ft.*lbf
}
for bolt B
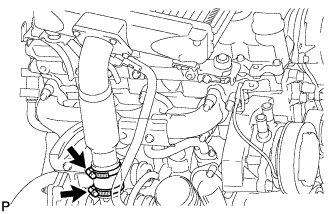
- Install a new No. 2 air hose and then tighten the 2 hose clamps.
-
Torque:
- 6.5 N*m{
66 kgf*cm
, 58 in.*lbf
}
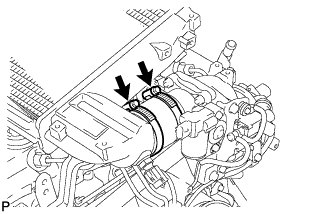
- Tighten the 2 hose clamps of the No. 1 air hose.
-
Torque:
- 6.5 N*m{
66 kgf*cm
, 58 in.*lbf
}
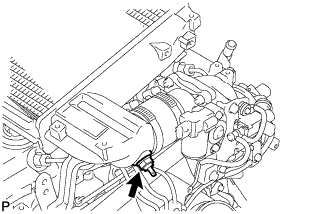
Connect the diesel turbo IAT sensor connector.
| 10.
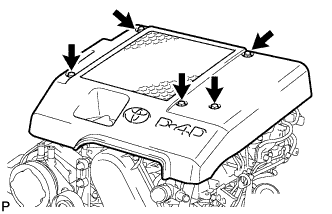
INSTALL NO. 1 ENGINE COVER SUB-ASSEMBLY
|
|
- Install the cover with the 3 bolts and 2 nuts.
-
Torque:
- 7.0 N*m{
71 kgf*cm
, 62 in.*lbf
}
| 11.
CONNECT CABLE TO NEGATIVE BATTERY TERMINAL |
|
| 12.
PERFORM INITIALIZATION |
|
Perform initialization (Click here).
- NOTICE:
- Certain systems need to be initialized after disconnecting and reconnecting the cable from the negative (-) battery terminal.