REMOVAL
Removal / installation · Vehicles built from Jun 2011
| 1. DISCONNECT CABLE FROM NEGATIVE BATTERY TERMINAL |

- CAUTION:
- Wait at least 90 seconds after disconnecting the cable from the negative (-) battery terminal to prevent airbag and seat belt pretensioner activation.
| 2. REMOVE NO. 1 ENGINE UNDER COVER |
Remove the 4 bolts and cover.
| 3. DRAIN ENGINE COOLANT |
Remove the radiator cap.
Loosen the cylinder block drain cock plug and radiator drain cock plug, and then drain the coolant.
- HINT:
- Collect the coolant in a container and dispose of it according to the regulations in your area.
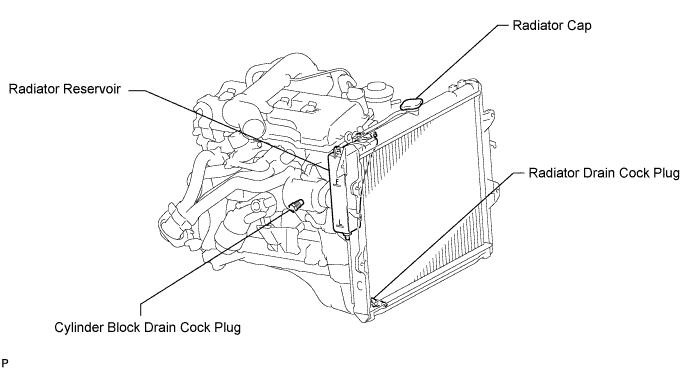

| 4. DISCONNECT RADIATOR HOSE INLET |
Disconnect the hose from the radiator tank upper and engine.
| 5. DISCONNECT RADIATOR HOSE OUTLET |
| 6. REMOVE AIR PUMP INLET (w/ Secondary Air Injection System) |
Remove the bolt and disconnect the pump inlet.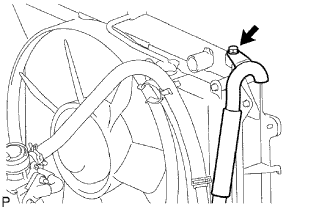
| 7. REMOVE FAN SHROUD |
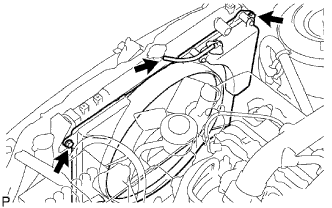 |
Disconnect the reservoir hose from the radiator tank upper.
Loosen the 4 nuts holding the fluid coupling fan.
Remove the drive belt.
Remove the 2 bolts holding the fan shroud.
Remove the 4 nuts of the fluid coupling fan, and then remove the shroud together with the coupling fan.
- NOTICE:
- Be careful not to damage the radiator core.
Remove the fan pulley from the water pump.
| 8. REMOVE GENERATOR ASSEMBLY |
Remove the nut, bolt and generator wire.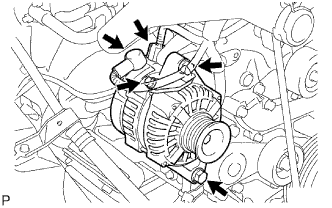
Disconnect the generator connector.
Remove the 2 bolts and generator.
| 9. REMOVE OIL LEVEL GAUGE GUIDE |
Remove the bolt and guide.
- HINT:
- Cover the guide hole to prevent foreign matter from entering it.
| 10. REMOVE NO. 1 IDLER PULLEY SUB-ASSEMBLY |
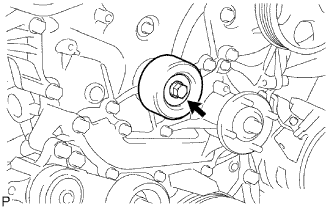 |
Remove the bolt, pulley plate, pulley and spacer.
| 11. REMOVE V-RIBBED BELT TENSIONER ASSEMBLY |
Remove the 3 bolts and tensioner.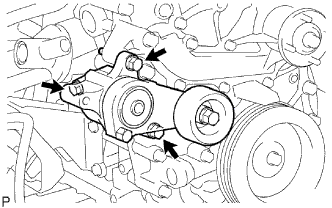
| 12. REMOVE WATER PUMP ASSEMBLY |
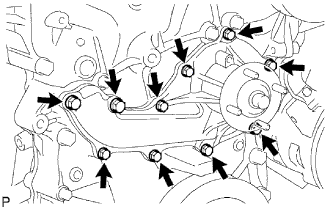 |
Remove the 10 bolts. Then remove the pump and gasket.