REMOVAL
Removal / installation · Vehicles built from Jun 2011
| 1. DISCONNECT CABLE FROM NEGATIVE BATTERY TERMINAL |

- CAUTION:
- Wait at least 90 seconds after disconnecting the cable from the negative (-) battery terminal to prevent airbag and seat belt pretensioner activation.
| 2. REMOVE NO. 1 ENGINE UNDER COVER (for 4WD) |
Remove the 4 bolts and under cover.
| 3. REMOVE NO. 2 ENGINE UNDER COVER (for 4WD) |
Remove the 2 bolts and under cover.
| 4. DRAIN ENGINE COOLANT |
- NOTICE:
- Do not remove the radiator reservoir cap while the engine and radiator are still hot. Pressurized, hot engine coolant and steam may be released and cause serious burns.
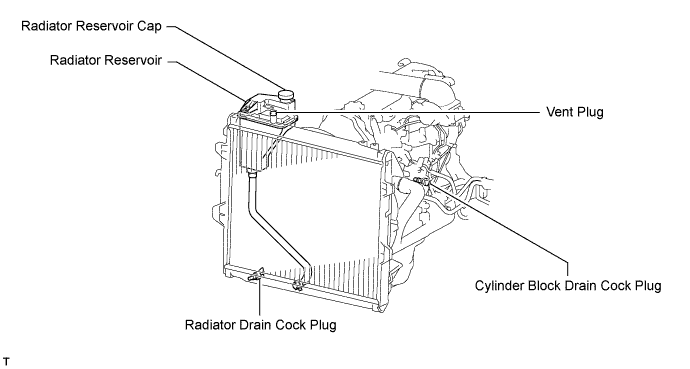
Remove the reservoir cap and, using a wrench, remove the vent plug.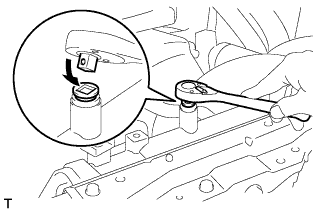

Loosen the cylinder block drain cock plug and the radiator drain cock plug and then drain the coolant.
- HINT:
- Collect the coolant in a container and dispose of it according to the regulations in your area.
| 5. DRAIN ENGINE OIL |
Remove the oil filler cap.
Remove the oil drain plug, and drain the oil into a container.
Clean the drain plug, and install it with a new gasket.
- Torque:
- 35 N*m{ 357 kgf*cm , 26 ft.*lbf }
| 6. REMOVE AIR CLEANER ASSEMBLY |
Disconnect the IAT sensor connector.
Loosen the air cleaner hose clamp.
Remove the 3 bolts and air cleaner.
| 7. REMOVE INTAKE PIPE ASSEMBLY |
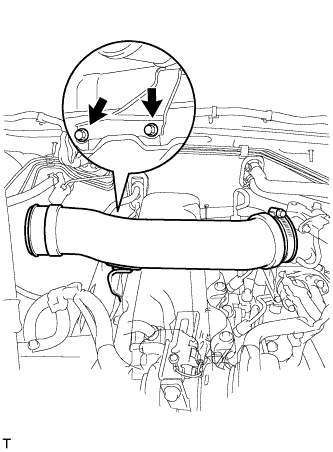 |
Loosen the intake pipe clamp.
Remove the 2 bolts and intake pipe.
| 8. REMOVE VANE PUMP V BELT |
Loosen the bolt A and nut B, and remove the V belt.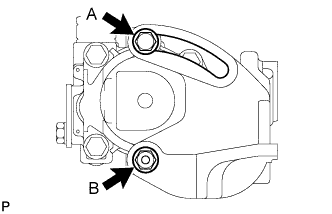
| 9. REMOVE COOLER COMPRESSOR V BELT (w/ Air Conditioning System) |
Loosen the nut A and bolt B, and remove the V belt.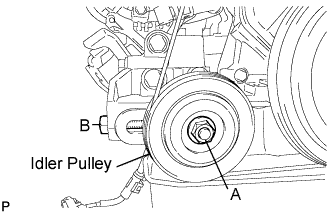
| 10. REMOVE FAN & GENERATOR V BELT (w/o Air Conditioning System) |
Loosen the bolts A and B, and remove the V belt.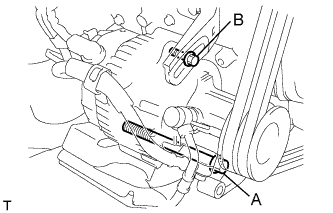
| 11. REMOVE FAN & GENERATOR V BELT (w/ Air Conditioning System) |
Loosen the bolts A and B.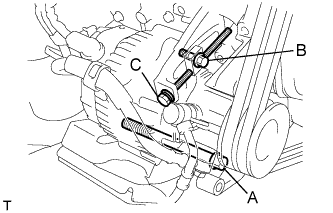
Loosen the adjusting bolt C, and remove the V belt.
| 12. DISCONNECT COMPRESSOR AND MAGNETIC CLUTCH (w/ Air Conditioning System) |
Remove the 4 bolts and disconnect the cooler compressor.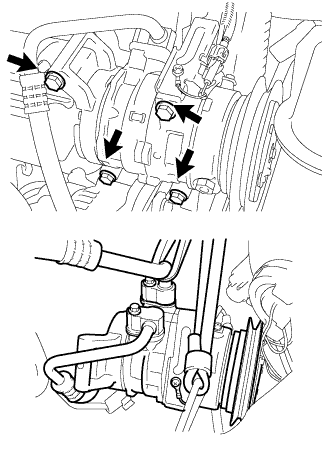
- HINT:
- It is not necessary to completely remove the compressor. With the hoses connected to the compressor, hang the compressor on the vehicle body with a rope.
| 13. REMOVE COMPRESSOR MOUNTING BRACKET (w/ Air Conditioning System) |
Remove the bolt and spacer.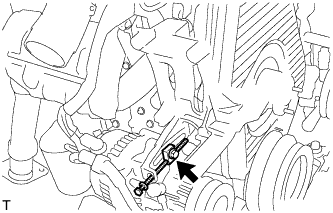
Remove the 4 bolts and compressor mounting bracket.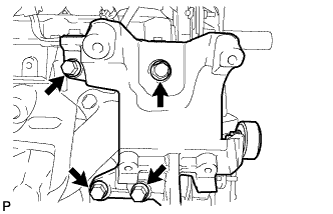
| 14. REMOVE VACUUM PUMP OIL INLET HOSE |
Remove the union bolt and 2 gaskets, and disconnect the vacuum pump oil inlet hose from the cylinder block.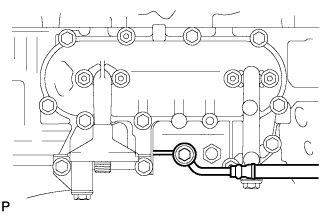
| 15. REMOVE GENERATOR WITH VACUUM PUMP ASSEMBLY |
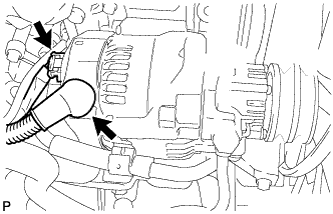 |
Disconnect the terminal cap.
Remove the nut and generator wire.
Disconnect the generator connector.
Remove the union bolt to disconnect the vacuum pump hose and remove the 2 gaskets.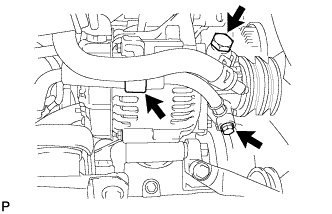
Remove the union bolt to disconnect the vacuum pump oil inlet hose and remove the 2 gaskets.
Detach the vacuum pump oil inlet hose from the cord clip.
Disconnect the vacuum pump oil outlet hose.
Remove the bolt and generator.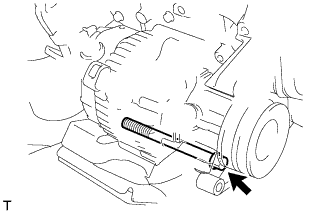
| 16. REMOVE NO. 1 EXHAUST MANIFOLD HEAT INSULATOR |
Remove the 3 bolts and heat insulator.
| 17. REMOVE FRONT EXHAUST PIPE |
Remove the front exhaust pipe (Click here).
| 18. REMOVE EXHAUST MANIFOLD |
Remove the 6 bolts, 2 nuts and manifold.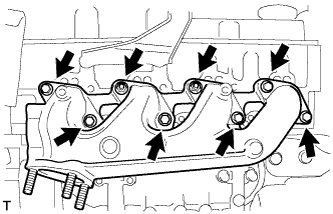
Remove the manifold gasket from the cylinder head.
| 19. REMOVE OIL FILTER SUB-ASSEMBLY |
Using SST, remove the oil filter.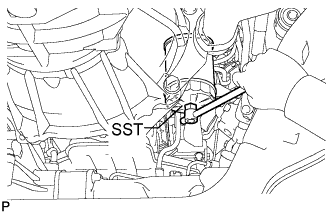
- SST
- 09228-44011
| 20. REMOVE OIL FILTER BRACKET SUB-ASSEMBLY |
Remove the 10 bolts, 2 nuts, oil filter bracket and gasket.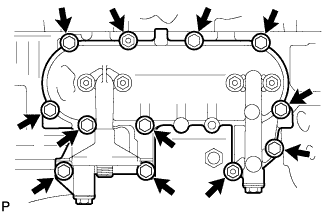
| 21. REMOVE OIL COOLER ASSEMBLY |
Remove the 4 nuts, oil cooler and 2 gaskets.