DISASSEMBLY
Removal / installation · Vehicles built from Jun 2011
| 1.
REMOVE GENERATOR PULLEY |
 |
Mount the generator in a vise between aluminum plates.
- Install SST 1-A to the pulley shaft.
- SST
- 09820-63011
(09820-06010, 09820-06021)
- HINT:
SST 1-A and B
|
09820-06010
|
SST 2
|
09820-06021
|
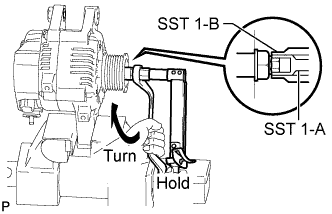
Install SST 1-B to SST 1-A.
Hold SST 1-A with a torque wrench and turn SST 1-B clockwise with the specified torque.
-
Torque:
- 39 N*m{
400 kgf*cm
, 29 ft.*lbf
}
- NOTICE:
- Check that SST is secured to the rotor shaft.
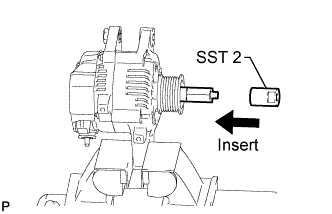
- Insert SST 2 and attach it to the pulley nut.
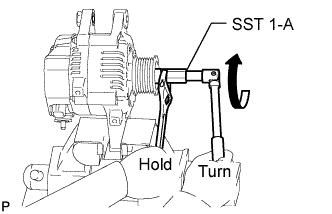
- To loosen the pulley nut, turn SST 1-A in the direction shown in the illustration.
- NOTICE:
- To prevent damage to the rotor shaft, do not loosen the pulley nut more than one-half of a turn.
Remove SST 2 from the generator.
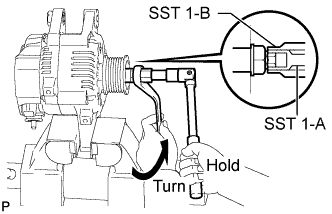
- Turn SST 1-B in the direction shown in the illustration and remove SST 1-A and B.
Remove the pulley nut and pulley.
| 2.
REMOVE GENERATOR REAR END COVER |
|
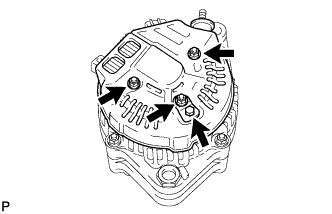
Remove the nut and terminal insulator.
Remove the bolt, 3 nuts, plate terminal and end cover.
| 3.
REMOVE GENERATOR BRUSH HOLDER ASSEMBLY |
|
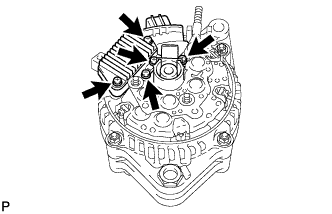
Remove the brush holder cover from the brush holder.
Remove the 2 screws and brush holder.
| 4.
REMOVE GENERATOR REGULATOR ASSEMBLY |
|
Remove the 3 screws and generator regulator.
| 5.
REMOVE GENERATOR HOLDER WITH RECTIFIER |
|
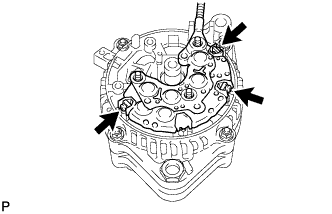
- Remove the 3 screws and holder with rectifier.
| 6.
REMOVE GENERATOR RECTIFIER END FRAME |
|
- Remove the 3 rubber insulators.
Remove the seal plate.
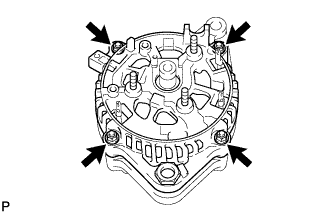
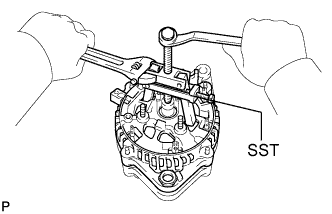
Remove the 4 nuts.
- Using SST, remove the rectifier end frame.
- SST
- 09286-46011
| 7.
REMOVE GENERATOR ROTOR ASSEMBLY |
|
Remove the generator washer from the rotor.
Remove the rotor from the drive end frame.
- NOTICE:
- Do not drop the rotor.