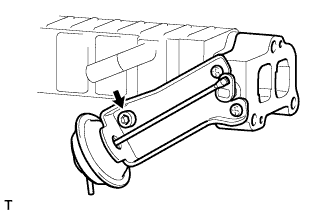
REMOVAL
Removal / installation · Vehicles built from Jun 2011
| 1. DISCONNECT CABLE FROM NEGATIVE BATTERY TERMINAL |

- CAUTION:
- Wait at least 90 seconds after disconnecting the cable from the negative (-) battery terminal to prevent airbag and seat belt pretensioner activation.
| 2. DRAIN ENGINE COOLANT |
| 3. REMOVE DIESEL THROTTLE BODY ASSEMBLY |
Remove the diesel throttle body (Click here).
| 4. DISCONNECT NO. 3 WATER BY-PASS HOSE |
Remove the clamp.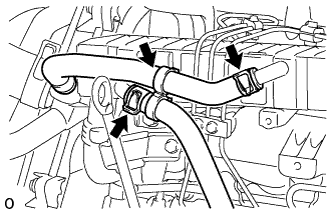

Disconnect the No. 3 water by-pass hose from the EGR cooler.
| 5. DISCONNECT NO. 4 WATER BY-PASS HOSE |
Disconnect the No. 4 water by-pass hose from the EGR cooler.
| 6. REMOVE INJECTION PIPE |
Remove the No. 1 to 3 injection pipe (Click here).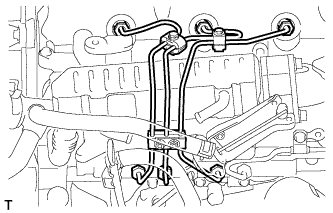
| 7. REMOVE VENTURI BRACKET |
Remove the 3 bolts and venturi bracket.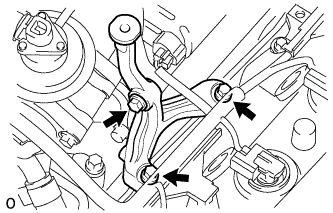
| 8. DISCONNECT NO. 3 WATER BY-PASS PIPE |
Remove the 2 bolts and disconnect the No. 3 water by-pass pipe with wire harness.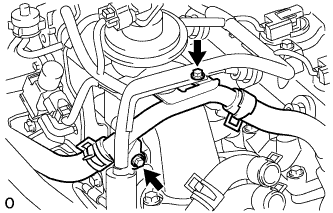
| 9. REMOVE ELECTRIC VACUUM REGULATING VALVE ASSEMBLY |
Disconnect the 2 connectors from the electric EGR control valve and E-VRV.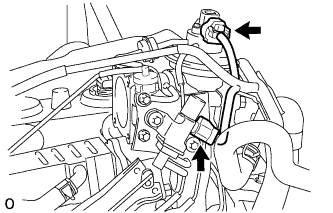
Disconnect the 5 vacuum hoses.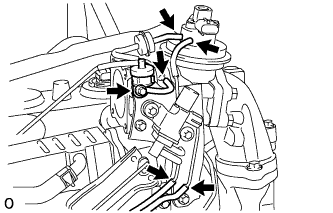
Remove the bolt and gas filter with the gas filter bracket.
Remove the 2 bolts and E-VRV's bracket with EGR vacuum damper.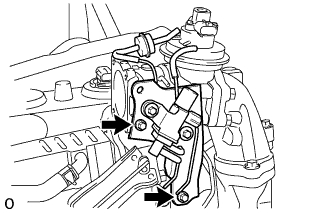
| 10. REMOVE NO. 2 INTAKE AIR CONNECTOR |
Remove the 3 nuts, No. 2 intake air connector and gasket.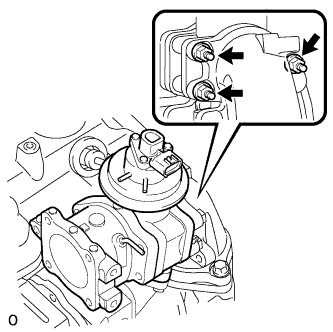
| 11. REMOVE INTAKE AIR CONNECTOR |
Remove the 3 bolts, intake air connector and 2 gaskets.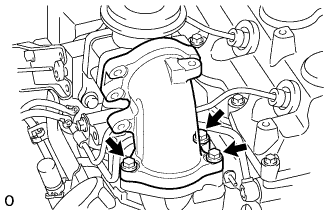
| 12. REMOVE ELECTRIC EGR CONTROL VALVE WITH NO. 2 EGR VALVE AND EGR COOLER |
Disconnect the vacuum hose from the No. 2 EGR valve.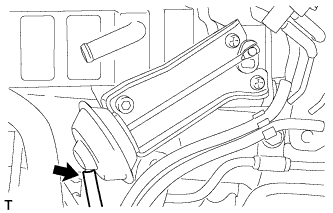
Remove the bolt, 2 nuts, electric EGR control valve with the No. 2 EGR valve and EGR cooler.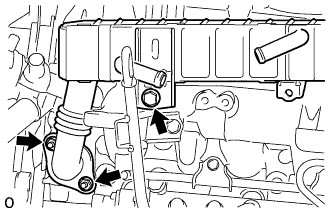
Remove the gasket from the cylinder block.
| 13. REMOVE ELECTRIC EGR CONTROL VALVE ASSEMBLY |
Remove the 2 bolts, electric EGR control valve and gasket.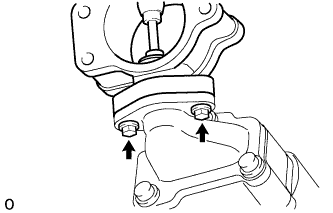
| 14. REMOVE EGR VALVE ADAPTER |
Using a 6 mm hexagon wrench, remove the 3 hexagon bolts, 3 plate washers, EGR valve adapter and gasket.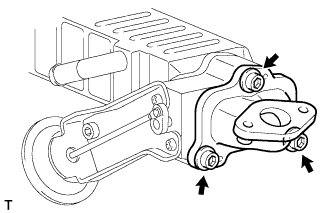
| 15. REMOVE NO. 2 EGR VALVE ASSEMBLY |
Using a 5 mm hexagon wrench, remove the hexagon bolt, No. 2 EGR valve and gasket.