REMOVAL
Removal / installation · Vehicles built from Jun 2011
- NOTICE:
- When replacing the injector, also replace the injection pipe.
- After removing the injection pipes, clean them with a brush and compressed air.
- When replacing the injector, also replace the injection pipe.
| 1. DISCONNECT CABLE FROM NEGATIVE BATTERY TERMINAL |

- CAUTION:
- Wait at least 90 seconds after disconnecting the cable from the negative (-) battery terminal to prevent airbag and seat belt pretensioner activation.
| 2. LOOSEN FUEL TANK CAP ASSEMBLY |
| 3. DRAIN FUEL |
| 4. REMOVE INTERCOOLER ASSEMBLY |
Remove the intercooler (Click here).
| 5. CHECK FOR INJECTOR COMPENSATION CODE |
- HINT:
- If the injector compensation code is not correctly registered, it may cause malfunctions.
Read the injector compensation code (Click here).
Check that compensation code of installed injector is same as code registered in ECM. If the code is not as specified, register the injector compensation code on the injector (Click here).
| 6. REMOVE NO. 1, NO. 2 AND NO. 3 INJECTION PIPE |
- NOTICE:
- After removing the fuel pipe, cover the outlets on the common rail with tape to keep out foreign matter.
- After removing the fuel pipe, put it in a plastic bag to prevent foreign matter from contaminating its injector inlet.
- After removing the fuel pipe, cover the outlets on the common rail with tape to keep out foreign matter.
Remove the 2 nuts and No. 3 injection pipe clamp.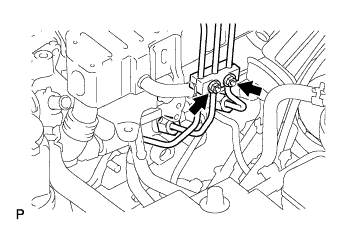

Remove the 2 bolts and 2 No. 2 injection pipe clamps.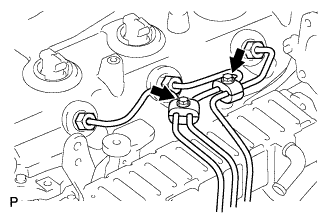
Using a 17 mm union nut wrench, loosen the union nuts and remove the No. 1, No. 2 and No. 3 injection pipes.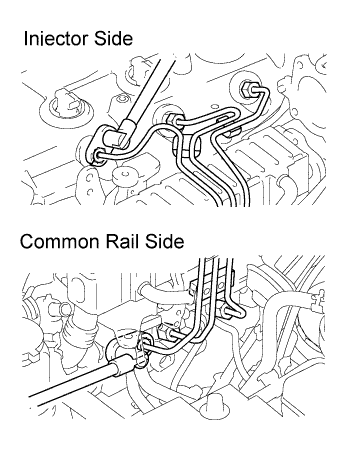
| 7. REMOVE EGR COOLER ASSEMBLY |
Remove the EGR cooler (Click here).
| 8. REMOVE NO. 4 INJECTION PIPE |
Remove the bolt and disconnect the injection pipe clamp.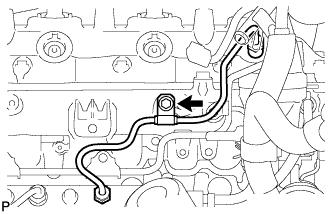
Using a 17 mm union nut wrench, loosen the union nuts and remove the No. 4 injection pipe.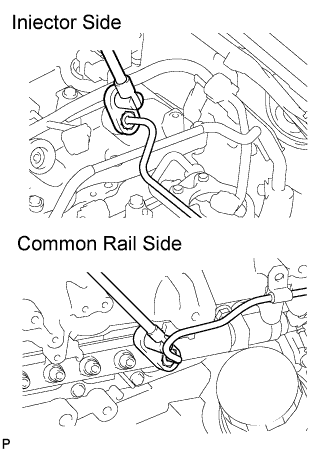
| 9. REMOVE CYLINDER HEAD COVER SUB-ASSEMBLY |
- NOTICE:
- If the cylinder head cover is removed, replace the 4 No. 3 cylinder head cover gaskets with new ones.
Remove the 3 bolts and disconnect the 4 connectors.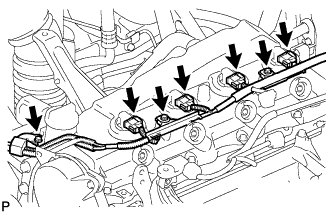
Using a small screwdriver, remove the holder seal by prying the portion between the holder seal and the cutout part of the cylinder head.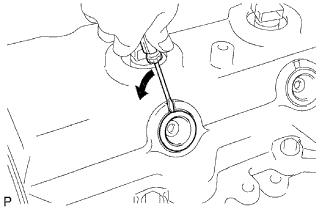
Disconnect the ventilation hose.
Remove the 10 bolts, 2 nuts, cylinder head cover and gasket.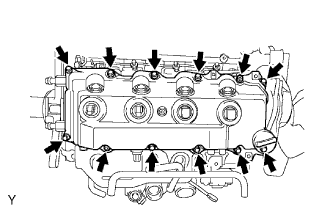
Remove the 4 No. 3 cylinder head cover gaskets from the cylinder head cover.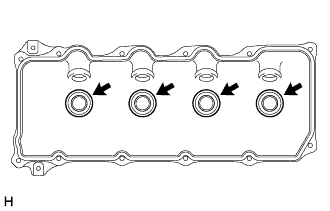
| 10. REMOVE INJECTOR ASSEMBLY |
Remove the union bolt, 4 hollow screws, 5 gaskets and nozzle leakage pipe.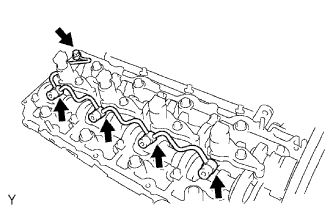
- NOTICE:
- When removing the nozzle leakage pipe, place a cushion under the pipe.
- Be careful not to deform or scratch the union seal surface.
- After removing the fuel pipe, put it in a plastic bag to prevent foreign matter from contaminating its injector inlet.
- When removing the nozzle leakage pipe, place a cushion under the pipe.
Remove the 4 bolts, 4 washers, 4 nozzle holder clamps and 4 injectors.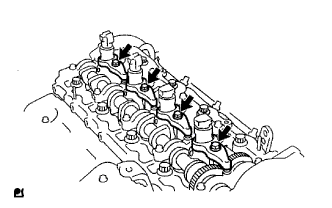
- HINT:
- Arrange the injectors, holder clamps, washers and bolts in the correct order.
Remove the O-ring and back-up ring from each injector.
Remove the 4 injection nozzle sheets from the cylinder head.