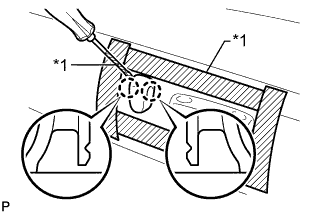
Apply protective tape around the front seat cushion shield.
Using a screwdriver, detach the 2 claws and remove the reclining power seat switch knob.
HINT:
Tape the screwdriver tip before use.
Text in Illustration
*1
Protective Tape
3.
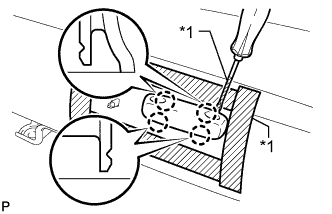
REMOVE SLIDE AND VERTICAL POWER SEAT SWITCH KNOB
Apply protective tape around the front seat cushion shield.
Using a screwdriver, detach the 4 claws and remove the slide and vertical power seat switch knob.
HINT:
Tape the screwdriver tip before use.
Text in Illustration
*1
Protective Tape
4.
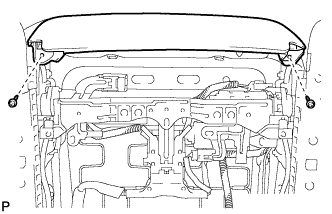
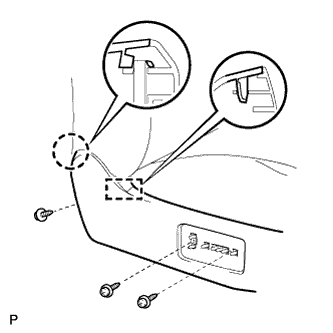
REMOVE FRONT SEAT CUSHION SHIELD RH
Remove the 2 screws.
Remove the 3 screws.
Detach the claw and guide.
Remove the front seat cushion shield RH.
5.
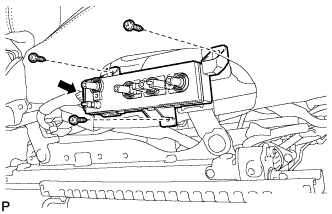
REMOVE FRONT POWER SEAT SWITCH RH
Remove the 3 screws.
Disconnect the connector and remove the front power seat switch RH.
6.
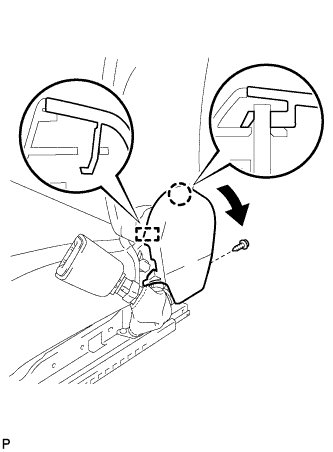
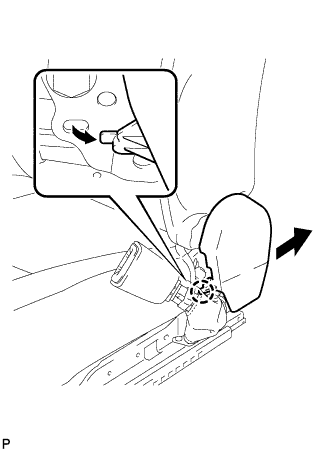
REMOVE FRONT SEAT INNER CUSHION SHIELD RH
Remove the screw.
Detach the claw and guide.
Pull the front seat inner cushion shield RH to detach the claw and remove the front seat inner cushion shield RH.
7.
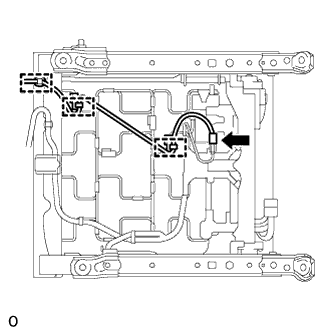
REMOVE FRONT SEAT INNER BELT ASSEMBLY RH
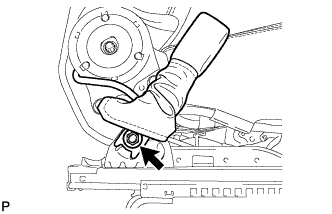
Disconnect the connector and detach the 3 clamps.
Roll up the front seat cushion cover LH.
Remove the nut and front seat inner belt assembly.
Remove the buckle cover.
8.
REMOVE FRONT SEAT CUSHION COVER WITH PAD
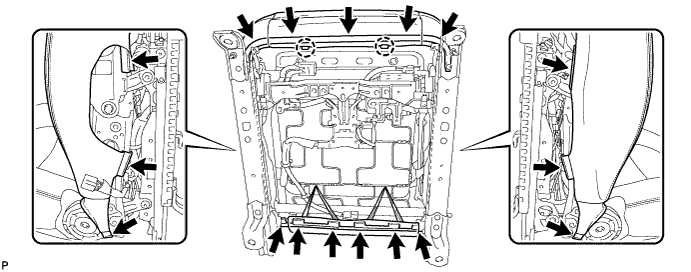
Remove the hog rings.
for LHD, w/ Seat Heater System:
Disconnect the 2 front seat cushion heater assembly LH connectors.
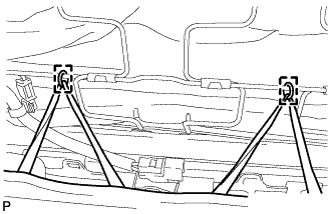
Detach the 4 front seat cushion heater assembly LH clamps.
Bend the 2 front seat cushion frame claws upward.
Detach the hooks and remove the front seat cushion cover with pad.
9.
REMOVE POWER SEAT MOTOR ASSEMBLY (for Slide)
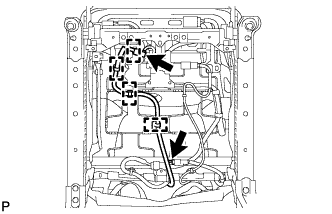
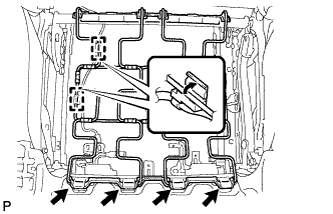
Detach the 2 wire harness clamps.
Detach the 4 clamps indicated by the arrows in the illustration and remove the seat cushion spring.
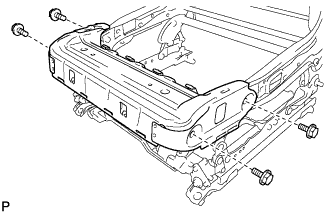
Remove the 4 bolts and seat cushion frame.
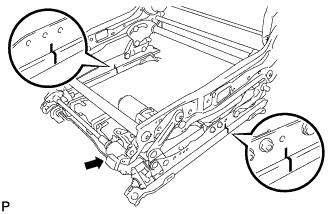
Put matchmarks on the seat track rail and sliding unit of the seat frame.
Disconnect the connector.
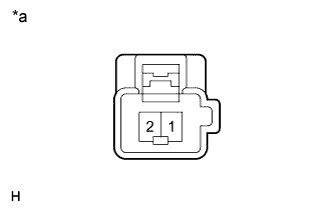
Connect the positive (+) battery terminal to terminal 1 of the power seat motor and the negative (-) battery terminal to terminal 2 and slide the seat to the foremost position.
Text in Illustration
*a
Component without harness connected (Power Seat Motor Assembly)
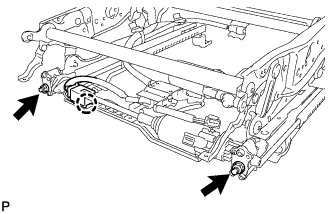
Detach the claw and disconnect the connector from the seat frame.
Loosen the 2 nuts.
Connect the positive (+) battery terminal to terminal 2 of the power seat motor and the negative (-) battery terminal to terminal 1 and slide the seat to the rearmost position.
Text in Illustration
*a
Component without harness connected (Power Seat Motor Assembly)
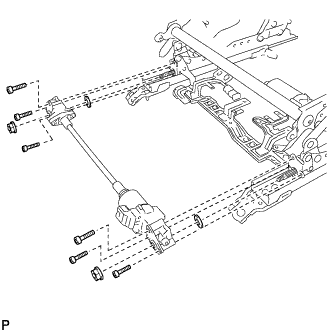
Using a 5 mm socket hexagon wrench, remove the 2 bolts.
Using a 4 mm socket hexagon wrench, remove the 4 bolts.
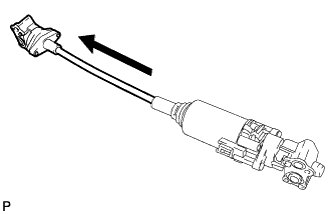
Remove the 2 nuts and power seat motor assembly (for Slide) together with the slide cable.
NOTICE:
Do not apply excessive force to the slide cable (do not bend the slide cable 60° or more).