REASSEMBLY
Removal / installation · Vehicles built from Jun 2011
- HINT:
- Use the same procedure for the RH and LH sides.
- The procedure listed below is for the LH side.
- Use the same procedure for the RH and LH sides.
| 1. TEMPORARILY INSTALL FRONT DISC BRAKE BLEEDER PLUG |

Temporarily install the bleeder plug to the cylinder.
- HINT:
- The bleeder plug will be tightened to the torque specification in the Bleed Air from Brake Line procedure.
| 2. INSTALL FRONT DISC BRAKE BLEEDER PLUG CAP |
| 3. INSTALL PISTON SEAL |
Apply a light coat of lithium soap base glycol grease to the entire inner and outer circumference of a new piston seal.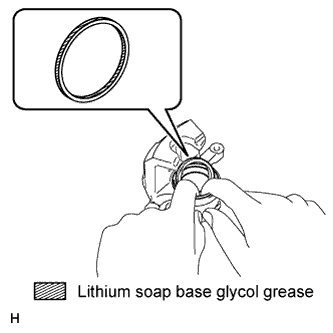

Install the piston seal to the disc brake cylinder assembly.
- NOTICE:
- Make sure the piston seal is securely installed to the groove of the disc brake cylinder assembly.
| 4. INSTALL FRONT DISC BRAKE PISTON |
Apply a light coat of lithium soap base glycol grease to the inner and outer circumference of a new cylinder boot, and the entire circumference of the top and bottom of the outer edge as shown in the illustration.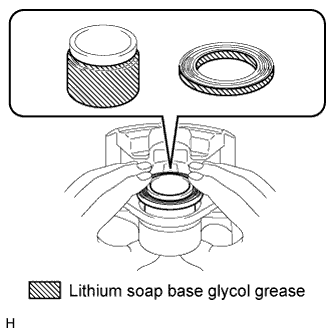
Apply a light coat of lithium soap base glycol grease to the entire outer circumference of the front disc brake piston where it contacts the cylinder boot and front disc brake cylinder.
Install the cylinder boot to the front disc brake piston.
Install the front disc brake piston to the front disc brake cylinder.
- NOTICE:
- Do not forcibly install the disc brake piston to the disc brake cylinder.
| 5. INSTALL CYLINDER BOOT |
Install the cylinder boot to the disc brake cylinder.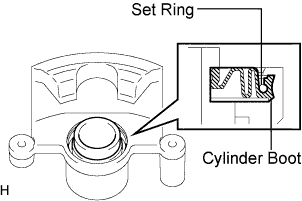
- NOTICE:
- Securely install the cylinder boot to the groove of the disc brake cylinder.
Using a screwdriver, install the set ring.
- NOTICE:
- Do not to damage the cylinder boot.