1GR-FE ENGINE MECHANICAL CYLINDER HEAD REPLACEMENT
PROCEDURE

 1.REPLACE VALVE GUIDE BUSH
Heat the cylinder head to between 80 and 100°C (176 and 212°F).
Place the cylinder head on wooden blocks.
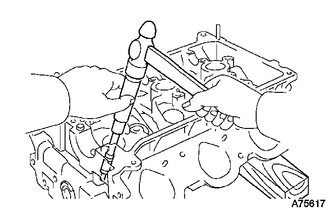
Using SST and a hammer, tap out the intake valve guide bushes.
- SST
- 09201-10000 (09201-01050)
09950-70010 (09951-07100)
Using a caliper gauge, measure the valve guide bush bore diameter of the cylinder head.
- Standard Bush Bore Diameter:
Item Specified Condition STD 10.285 to 10.306 mm (0.4049 to 0.4057 in.) O/S 0.05 10.335 to 10.356 mm (0.4069 to 0.4077 in.)
Select a new valve guide bush.
- New Guide Bush:
Item Specified Condition Bush Bore Diameter 10.285 to 10.306 mm (0.4049 to 0.4057 in.) 10.335 to 10.356 mm (0.4069 to 0.4077 in.) Bush to be Used STD O/S 0.05
If the bush bore diameter of the cylinder head is more than 10.306 mm (0.4057 in.), machine the bush bore diameter to 10.335 to 10.356 mm (0.4069 to 0.4077 in.) to install an O/S 0.05 valve guide bush.
If the bush bore diameter of the cylinder head is more than 10.356 mm (0.4077 in.), replace the cylinder head.
- New Guide Bush Diameter:
Item Specified Condition STD 10.333 to 10.344 mm (0.4068 to 0.4072 in.) O/S 0.05 10.383 to 10.394 mm (0.4088 to 0.4092 in.)
- HINT:
-
Different bushes are used for the intake and exhaust.
Heat the cylinder head to between 80 and 100°C (176 and 212°F).
Place the cylinder head on wooden blocks.
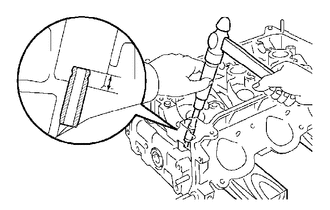
| *1 | Protrusion Height |
Using SST, tap in the valve guide bushes to the specified protrusion height.
- SST
- 09201-10000 (09201-01050)
09950-70010 (09951-07100)
- Protrusion height:
9.30 to 9.70 mm (0.366 to 0.382 in.)
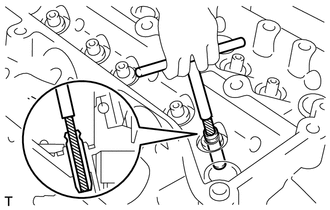
Using a sharp 5.5 mm reamer, ream the valve guide bushes to obtain the specified clearance.
- Standard Oil Clearance:
Item Specified Condition Intake 0.025 to 0.060 mm (0.000984 to 0.00236 in.) Exhaust 0.030 to 0.065 mm (0.00118 to 0.00256 in.)
2.REPLACE UNION
- NOTICE:
-
If a union is deformed or its threads are damaged, replace it.
Remove the 2 unions.
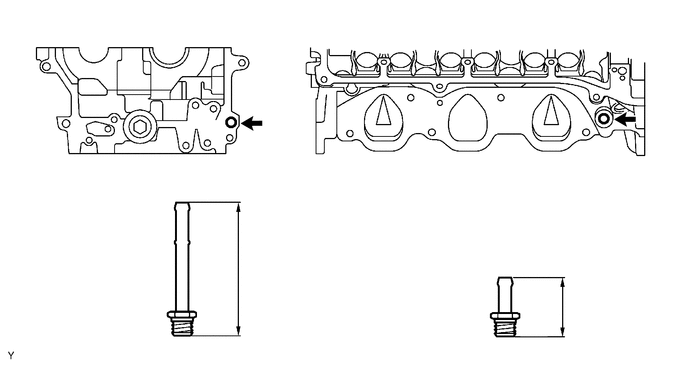
| *a | Front Side of RH | *b | Intake Side of LH |
Apply adhesive to 2 or 3 threads at the bolt ends of new unions.
- Adhesive:
Toyota Genuine Seal Adhesive 1324, Three Bond 1324 or equivalent
Using a 12 mm deep socket wrench, install the 2 unions.
- Torque:
- 15 N*m (150 kgf*cm, 11 ft.*lbf)
3.REPLACE TIGHT PLUG
- NOTICE:
-
If water leaks from the tight plug or the plug is corroded, replace it.
Remove the tight plugs.
Apply adhesive around new tight plugs.
- Adhesive:
Toyota Genuine Adhesive 1324, Three Bond 1324 or equivalent
Using SST and a hammer, tap in the tight plugs to the standard depth.
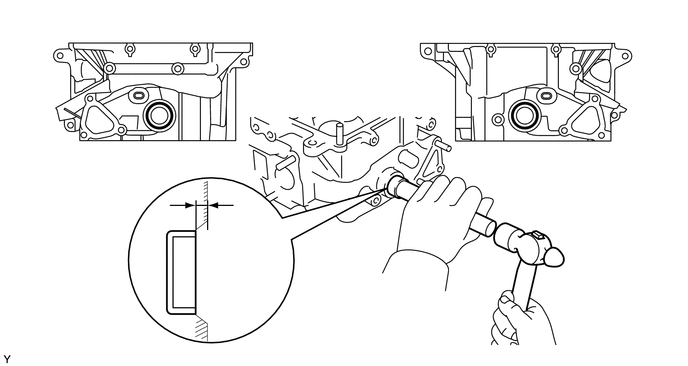
| *1 | Standard Depth | - | - |
| *a | RH | *b | LH |
- SST
- 09950-60010 (09951-00250)
09950-70010 (09951-07150)
- Standard depth:
1.5 mm (0.0591 in.)
4.REPLACE STRAIGHT PIN
- NOTICE:
-
If a straight pin is deformed, replace it.
Using a plastic-faced hammer, tap in new straight pins as shown in the illustration.
- Standard Protrusion Height:
Item Specified Condition Pin A 17.5 to 19.5 mm (0.689 to 0.768 in.) Pin B 7.5 to 8.5 mm (0.295 to 0.335 in.) Pin C 7.0 to 9.0 mm (0.276 to 0.354 in.)
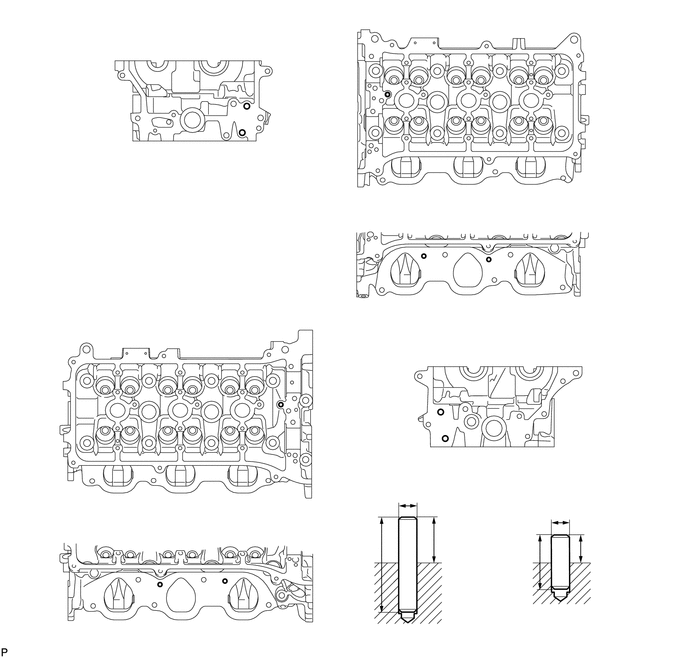
| *1 | Protrusion Height | - | - |
| *a | LH | *b | RH |
| *c | Front Side | *d | Upper Side |
| *e | Intake Manifold Side | - | - |
5.REPLACE RING PIN
- NOTICE:
-
It is not necessary to remove a ring pin unless it is being replaced.
Using a plastic-faced hammer, tap in new ring pins to the specified protrusion height.
- Standard protrusion height:
2.7 to 3.3 mm (0.106 to 0.0969 in.)
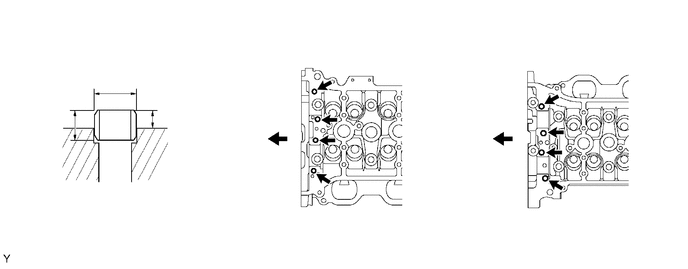
| *A | Engine Front | - | - |
| *a | RH | *b | LH |
| *1 | Protrusion Height | - | - |