1KD-FTV EMISSION CONTROL EGR COOLER(w/ Glow Plug Controller) REMOVAL
CAUTION / NOTICE / HINT
- NOTICE:
- ·
When replacing the injectors (including shuffling the injectors between the cylinders), common rail or cylinder head, it is necessary to replace the injection pipes with new ones.
·When replacing the fuel supply pump, common rail, cylinder block, cylinder head, cylinder head gasket or timing gear case, it is necessary to replace the fuel inlet pipe with a new one.
·After removing the injection pipes and fuel inlet pipe, clean them with a brush and compressed air.
PROCEDURE

 1. PRECAUTION
- NOTICE:
-
After turning the ignition switch off, waiting time may be required before disconnecting the cable from the battery terminal. Therefore, make sure to read the disconnecting the cable from the battery terminal notice before proceeding with work (See page General>INTRODUCTION>REPAIR INSTRUCTION>PRECAUTION).
2.DISCONNECT CABLE FROM NEGATIVE BATTERY TERMINAL
- NOTICE:
-
When disconnecting the cable, some systems need to be initialized after the cable is reconnected (See page General>INTRODUCTION>REPAIR INSTRUCTION>INITIALIZATION).
3.REMOVE DIESEL THROTTLE BODY ASSEMBLY
4.REMOVE NO. 1 ENGINE UNDER COVER
5.DRAIN ENGINE COOLANT
6.REMOVE FRONT WHEEL LH
7.REMOVE FRONT FENDER APRON SEAL UPPER
Remove the 5 clips and front fender apron seal upper.
8.REMOVE FRONT FENDER SEAL
Remove the 5 clips and front fender seal.
9.REMOVE ENGINE OIL LEVEL DIPSTICK GUIDE
for DPF:
Remove the engine oil level dipstick.
for i-ART:
Remove the engine oil level dipstick and gasket.
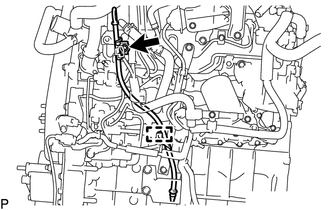
Detach the wire harness clamp.
Remove the bolt and engine oil level dipstick guide.
Remove the O-ring from the engine oil level dipstick guide.
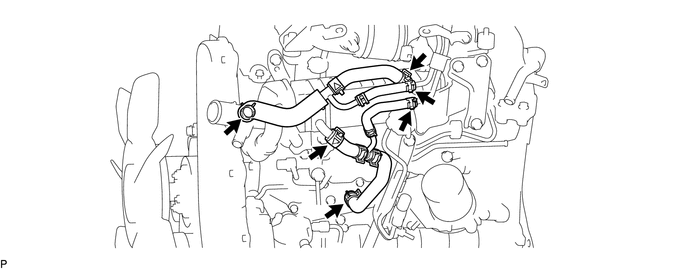
10.DISCONNECT WATER BY-PASS HOSE
Disconnect the 6 water by-pass hoses.
11.REMOVE MANIFOLD STAY WITH VACUUM SWITCHING VALVE
Disconnect the vacuum switching valve connector.
Disconnect the 2 vacuum hoses.
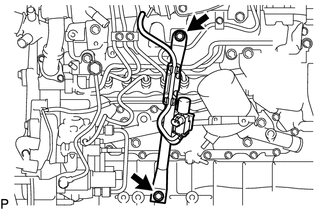
Remove the 2 bolts and manifold stay with vacuum switching valve.
12.REMOVE VACUUM SWITCHING VALVE
Disconnect the 2 vacuum hoses.
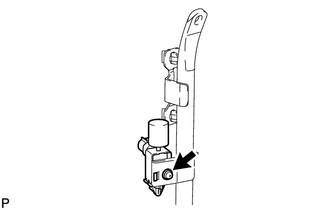
Remove the screw and vacuum switching valve.
13.REMOVE NO. 3 CYLINDER HEAD COVER SUB-ASSEMBLY (for DPF)
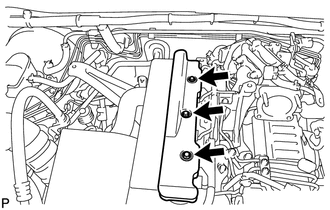
Remove the 3 bolts and No. 3 cylinder head cover.
14.REMOVE FUEL PIPE INSULATOR (for i-ART)
Remove the fuel pipe insulator from the fuel pipes.
15.REMOVE FUEL INLET PIPE SUB-ASSEMBLY
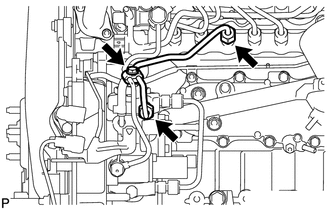
Remove the bolt and No. 2 injection pipe clamp.
Using a 17 mm union nut wrench, loosen the union nuts and remove the fuel inlet pipe.
16.REMOVE NO. 1, NO. 2 AND NO. 3 INJECTION PIPE SUB-ASSEMBLY
- NOTICE:
- ·
After removing the injection pipe, cover the outlets on the common rail with tape to keep out foreign matter.
·After removing the injection pipe, put it in a plastic bag to prevent foreign matter from contaminating its injector inlet.
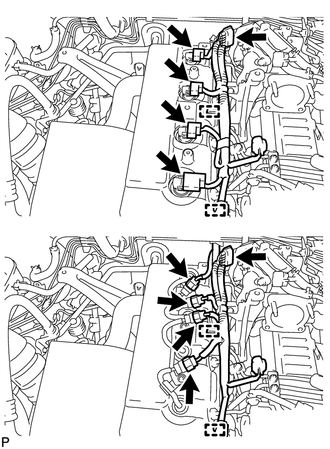
| *A | for DPF |
| *B | for i-ART |
Disconnect the 4 injector connectors and electric EGR control valve connector.
Detach the 2 wire harness clamps.
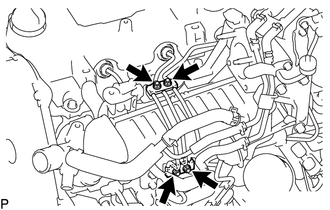
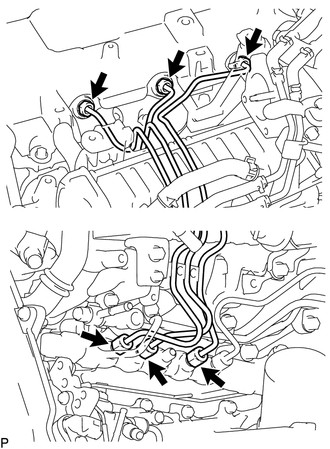
Remove the 4 nuts and 2 No. 3 injection pipe clamps.
| *a | Injector Side |
| *b | Common Rail Side |
Using a 17 mm union nut wrench, loosen the union nuts and remove the No. 1, No. 2 and No. 3 injection pipes.
17.REMOVE NO. 5 WATER BY-PASS PIPE
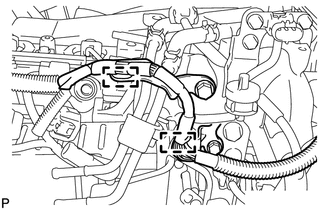
Detach the 2 wire harness clamps.
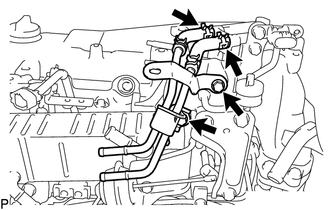
Disconnect the 2 water hoses from the electric EGR control valve.
Remove the 2 bolts and No. 5 water by-pass pipe.
18.REMOVE MANIFOLD ABSOLUTE PRESSURE SENSOR
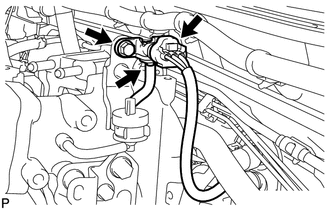
Disconnect the manifold absolute pressure sensor connector and vacuum hose.
Remove the bolt and manifold absolute pressure sensor.
19.REMOVE GAS FILTER BRACKET WITH GAS FILTER
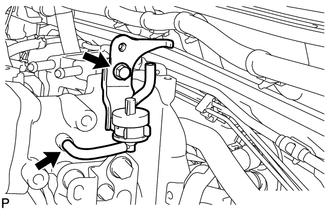
Disconnect the vacuum hose.
Remove the bolt and gas filter bracket with gas filter.
20.REMOVE WIRING HARNESS CLAMP BRACKET
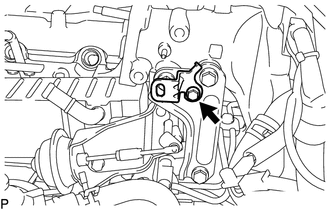
Remove the bolt and wiring harness clamp bracket.
21.REMOVE THROTTLE BODY BRACKET
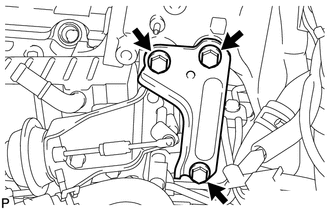
Remove the 3 bolts and throttle body bracket.
22.DISCONNECT ENGINE WIRE
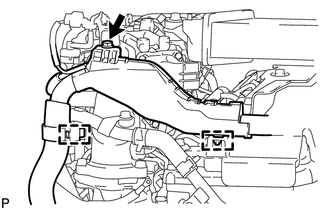
Detach the 2 wire harness clamps.
Remove the bolt and disconnect the engine wire.
23.DISCONNECT NO. 3 WATER BY-PASS PIPE
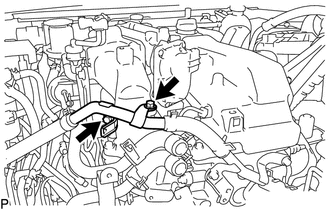
Remove the 2 bolts and disconnect the No. 3 water by-pass pipe.
24.REMOVE EGR VALVE BRACKET
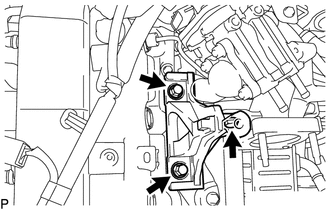
Remove the 3 bolts and EGR valve bracket.
25.REMOVE ELECTRIC EGR CONTROL VALVE ASSEMBLY WITH NO. 2 EGR VALVE AND EGR COOLER
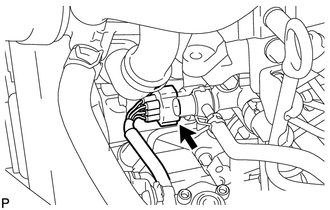
for DPF:
Disconnect the fuel pressure sensor connector from the common rail.
Remove the 5 bolts, 2 nuts and electric EGR control valve with No. 2 EGR valve and EGR cooler.
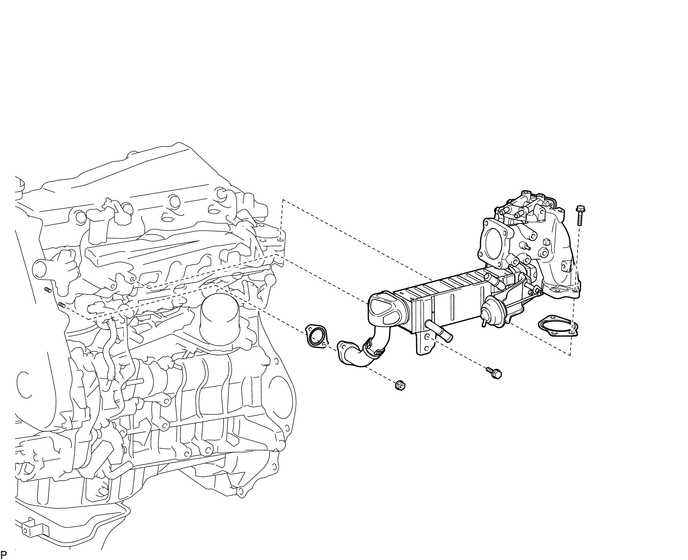
| *1 | Gasket | - | - |
Remove the 2 gaskets from the cylinder head and intake manifold.
26.REMOVE INTAKE AIR CONNECTOR WITH ELECTRIC EGR CONTROL VALVE ASSEMBLY
27.REMOVE ELECTRIC EGR CONTROL VALVE ASSEMBLY
28.REMOVE EGR VALVE ADAPTER
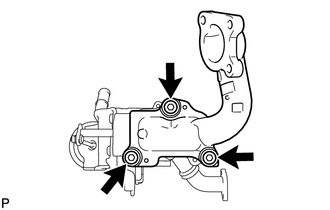
Using a 6 mm hexagon wrench, remove the 3 hexagon socket head cap bolts, 3 plate washers, EGR valve adapter and gasket.
29.REMOVE NO. 2 EGR VALVE ASSEMBLY
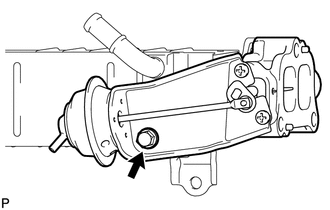
Remove the bolt, No. 2 EGR valve and gasket.
30.REMOVE EGR COOLER INSULATOR
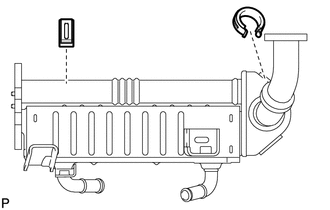
| *1 | No. 2 EGR Cooler Insulator |
| *2 | No. 1 EGR Cooler Insulator |
Remove the 2 EGR cooler insulators from the EGR cooler.