1KD-FTV STARTING STARTER(for DENSO Made) REASSEMBLY
PROCEDURE

 1.INSTALL STARTER CLUTCH ASSEMBLY
Apply high-temperature grease to the steel ball, return spring, clutch roller, retainer, pinion gear and idler gear.
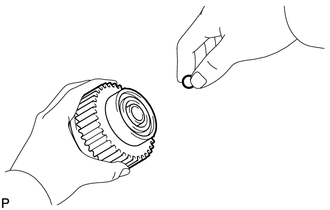
Insert the steel ball into the starter clutch hole.
Insert the return spring into the starter clutch hole.
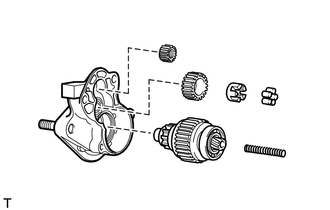
| *1 | Return Spring |
| *2 | Starter Clutch |
| *3 | Idler Gear |
| *4 | Pinion Gear |
| *5 | Retainer |
| *6 | Clutch Roller |
| *7 | Starter Housing |
Install the starter clutch, idler gear, pinion gear, retainer and clutch roller to the starter housing.
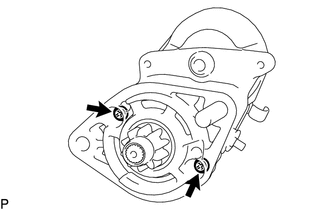
Install the starter housing to the magnet switch with the 2 bolts.
- Torque:
- 9.3 N*m (95 kgf*cm, 82 in.*lbf)
2.INSTALL STARTER ARMATURE ASSEMBLY
Apply high-temperature grease to the starter armature bearing.
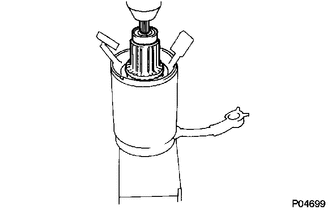
Using a press, press the starter armature into the starter yoke.
3.INSTALL STARTER BRUSH HOLDER ASSEMBLY
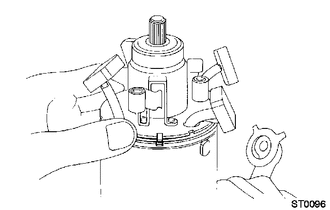
| *1 | Groove |
| *2 | Claw |
Align the claw of the brush holder with the groove of the starter yoke.
Place the brush holder on the starter yoke.
Install the 4 starter yoke brushes to the starter brush holder.
Using a screwdriver, pull back the spring.
Install the brush to the brush holder.
- NOTICE:
-
Make sure that the positive (+) lead wires are not grounded.
4.INSTALL STARTER YOKE ASSEMBLY
Install a new O-ring to the groove of the starter yoke.
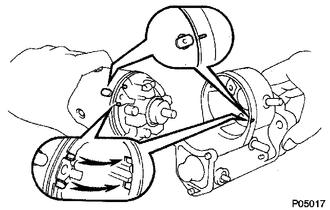
| *1 | Groove |
| *2 | Claw |
| *3 | Punch Mark |
Align the claws of the starter brush holder with the grooves of the magnet starter switch and install the starter yoke and starter armature.
Align the punch mark of the starter yoke with the line of the magnet starter switch.
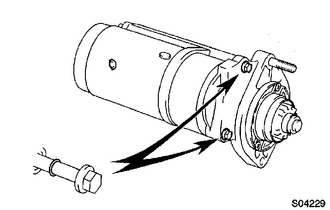
| *1 | O-Ring |
Install 2 new O-rings to the bolts.
Install the starter yoke with the 2 bolts.
- Torque:
- 13 N*m (130 kgf*cm, 9 ft.*lbf)
Connect the lead wire to terminal C with the nut.
- Torque:
- 5.9 N*m (60 kgf*cm, 52 in.*lbf)