CLUTCH CLUTCH UNIT INSTALLATION
PROCEDURE

 1.INSTALL CLUTCH DISC ASSEMBLY
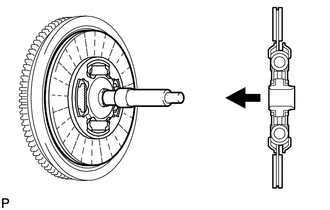
Insert SST into the clutch disc. Then insert SST (together with the clutch disc) into the flywheel.
- SST
- 09301-00110
- NOTICE:
-
Be sure to install the clutch disc so that it is facing in the correct direction.
2.INSTALL CLUTCH COVER ASSEMBLY
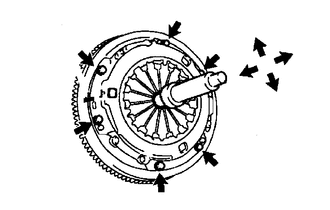
| *1 | Matchmark |
Align the matchmarks on the clutch cover and flywheel.
Tighten the 6 bolts as described below.
Determine the first bolt to be tightened by choosing the bolt closest to the knock pin.
Uniformly tighten the 6 bolts in diametrically opposite pairs relative to the position of the first bolt. Use the illustration as a reference.
Lightly move SST up and down, and right and left.
- SST
- 09301-00110
Check that the disc is in the center, and then tighten the bolts.
- Torque:
- 19 N*m (195 kgf*cm, 14 ft.*lbf)
3.INSPECT AND ADJUST CLUTCH COVER ASSEMBLY
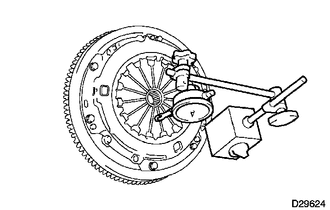
Using a dial indicator with a roller instrument, measure the diaphragm spring tip alignment.
- Maximum misalignment:
0.5 mm (0.020 in.)
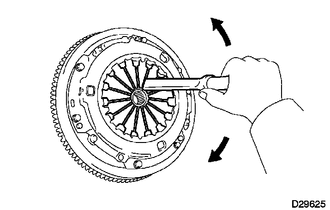
If the misalignment is more than the maximum, use SST to adjust the diaphragm spring tip alignment.
- SST
- 09333-00013
4.INSTALL RELEASE FORK SUPPORT
Install the release fork support to the manual transmission unit.
- Torque:
- for TR Engine series : 47 N*m (479 kgf*cm, 35 ft.*lbf)
- for 1KD-FTV, 2KD-FTV : 49 N*m (500 kgf*cm, 36 ft.*lbf)
5.INSTALL CLUTCH RELEASE BEARING ASSEMBLY
Install the release bearing hub clip to the clutch release bearing assembly.
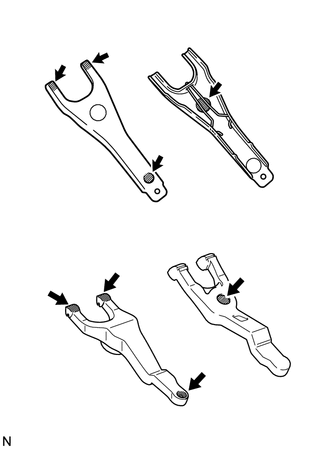
| *A | for TR Engine series |
| *B | for 1KD-FTV, 2KD-FTV |

|
Multemp 8158 grease or equivalent |
Apply Multemp 8158 grease or equivalent to the following areas:
The surfaces of the release fork that contact the release bearing.
The surfaces of the release fork that contact the push rod of the release cylinder.
The surfaces of the release fork that contact the release fork support.
- Grease:
Multemp 8158 grease or equivalent
Install the release fork sub-assembly to the clutch release bearing assembly.
Install the clutch release bearing assembly together with the clutch release fork sub-assembly to the clutch housing.
- NOTICE:
-
After the installation, move the fork forward and backward to check that the release bearing slides smoothly.
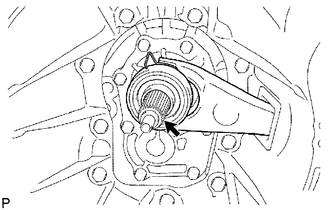
Apply the clutch spline grease to the spline of the input shaft.
- Grease:
Toyota Genuine Clutch Spline Grease or equivalent
6.INSTALL CLUTCH RELEASE FORK BOOT
7.INSTALL MANUAL TRANSMISSION UNIT ASSEMBLY
for R150/R151/R156: (See page Drivetrain>R150 / R151 / R156 MANUAL TRANSMISSION / TRANSAXLE>MANUAL TRANSMISSION ASSEMBLY>INSTALLATION)
for R150F/R151F/R156F: (See page Drivetrain>R150F /R151F / R156F MANUAL TRANSMISSION / TRANSAXLE>MANUAL TRANSMISSION ASSEMBLY>INSTALLATION)