R150F /R151F / R156F MANUAL TRANSMISSION / TRANSAXLE MANUAL TRANSMISSION UNIT DISASSEMBLY
PROCEDURE

 1.REMOVE FILLER PLUG
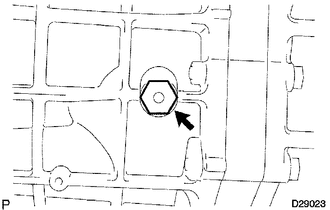
Remove the filler plug and gasket from the transmission case.
2.REMOVE DRAIN PLUG
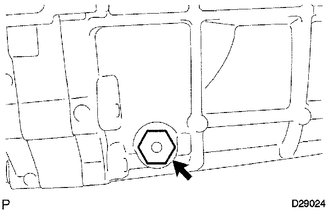
Remove the drain plug and gasket from the transmission case.
3.REMOVE CLUTCH RELEASE FORK BOOT
4.REMOVE CLUTCH RELEASE BEARING ASSEMBLY
5.REMOVE RELEASE FORK SUPPORT
6.REMOVE CLUTCH HOUSING
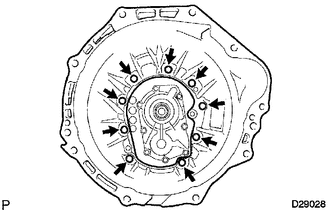
Remove the 9 bolts.
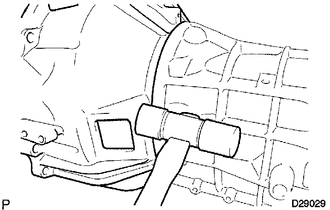
Using a plastic-faced hammer, tap off the clutch housing from the transmission case.
7.REMOVE BACK-UP LIGHT SWITCH ASSEMBLY
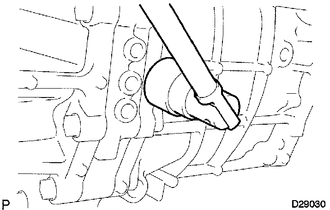
Using SST, remove the back-up light switch and gasket from the transmission case.
- SST
- 09817-16011
8.REMOVE RESTRICT PIN
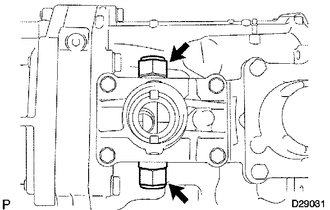
Remove the 2 restrict pins from the transfer adapter.
9.REMOVE CONTROL SHIFT LEVER RETAINER
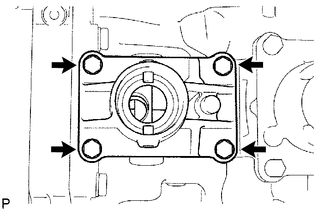
Remove the 4 bolts.
Remove the control shift lever retainer.
Remove the oil deflector.
10.REMOVE TRANSFER CONTROL SHIFT LEVER RETAINER
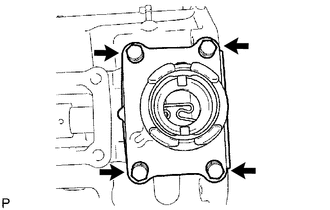
Remove the 4 bolts.
Remove the shift lever retainer from the transfer adapter.
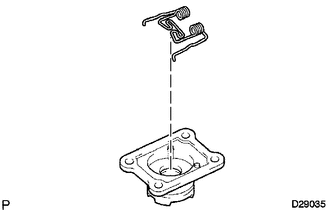
Remove the select return spring from the shift lever retainer.
11.REMOVE SHIFT AND SELECT LEVER SHAFT
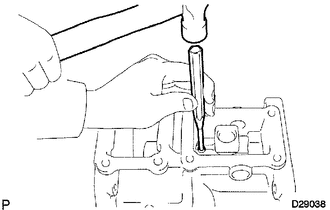
Using a 5 mm pin punch and a hammer, tap out the slotted spring pin from the shift lever housing.
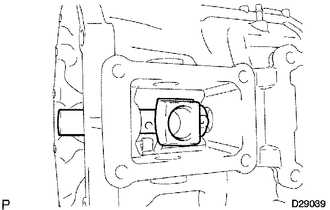
Remove the shift and select lever shaft and shift lever housing from the transfer adapter.
12.REMOVE TRANSFER ADAPTER
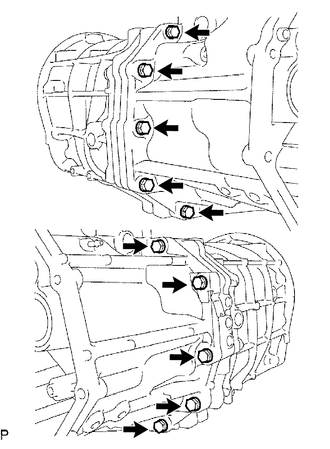
Remove the 10 bolts.
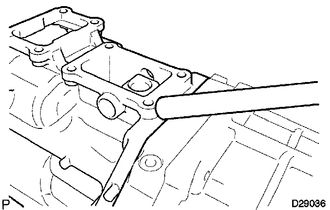
Using a brass bar and a hammer, tap out the transfer adapter from the transmission case.
13.REMOVE OIL RECEIVER PIPE
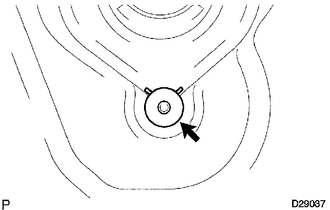
14.REMOVE REVERSE RESTRICT PIN
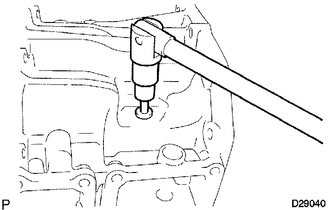
Using a T40 ''TORX'' socket wrench, remove the plug.
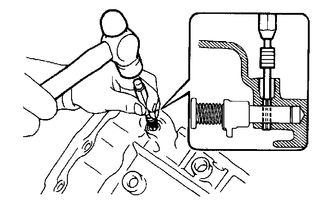
Using a 5 mm pin punch and a hammer, tap out the restrict slotted pin.
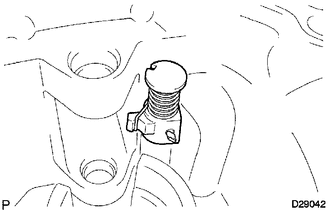
Remove the restrict pin.
15.REMOVE TRANSFER ADAPTER OIL SEAL
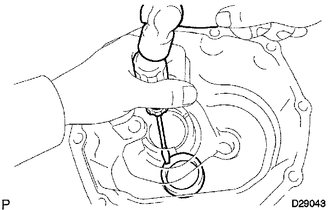
Using a screwdriver and hammer, tap out the oil seal from the transfer adapter.
16.REMOVE FRONT BEARING RETAINER
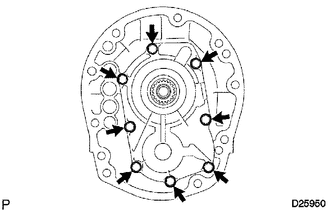
Remove the 8 bolts.
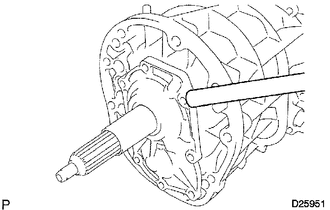
Using a brass bar and hammer, tap off the retainer from the transmission case.
17.REMOVE TRANSMISSION FRONT BEARING RETAINER OIL SEAL
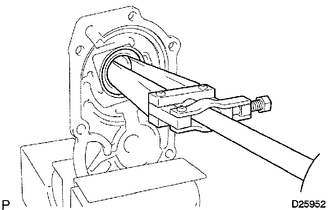
Fix the front bearing retainer in a vise.
Using SST, tap out the oil seal.
- SST
- 09308-00010
18.REMOVE FRONT BEARING SHAFT SNAP RING
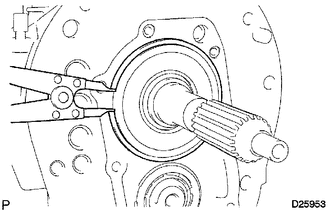
Using a snap ring expander, remove the snap ring from the transmission case.
19.REMOVE NO. 1 COUNTER GEAR FRONT BEARING SNAP RING
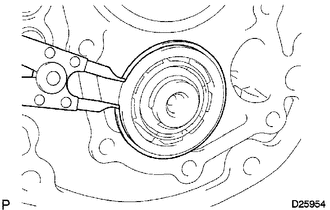
Using a snap ring expander, remove the snap ring from the transmission case.
20.REMOVE MANUAL TRANSMISSION CASE
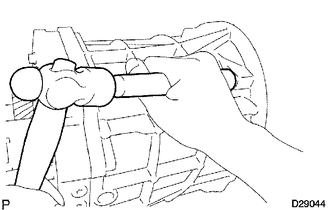
Using a brass bar and hammer, tap off the transmission case from the intermediate plate.
21.REMOVE TRANSMISSION MAGNET
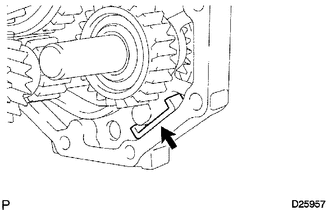
Remove the magnet from the intermediate plate.
22.SECURE INTERMEDIATE PLATE
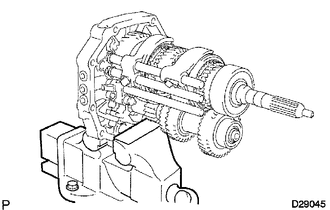
Secure the intermediate plate in a vise between aluminum plates.
23.REMOVE NO. 1 SHIFT DETENT BALL SPRING SEAT
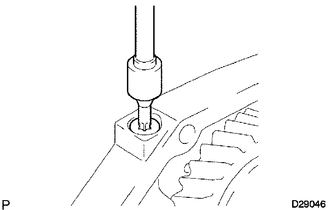
Using a T40 ''TORX'' socket wrench, remove the spring seat from the intermediate plate.
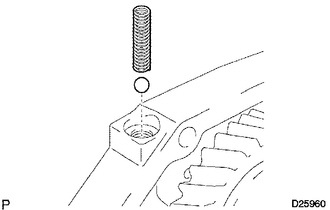
Using a magnet hand, remove the compression spring and detent ball from the intermediate plate.
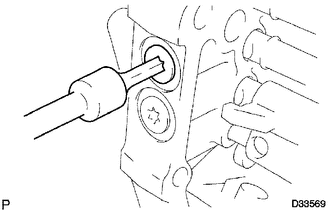
Using a T40 ''TORX'' socket wrench, remove the 2 spring seats from the intermediate plate.
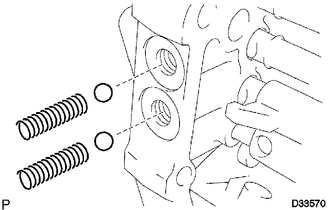
Using a magnet hand, remove the 2 compression springs and 2 detent balls from the intermediate plate.
24.REMOVE NO. 2 SHIFT FORK SHAFT
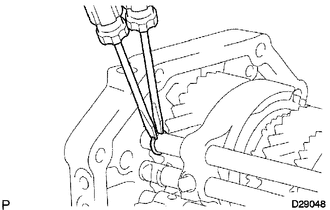
Using 2 screwdrivers and a hammer, tap off the snap ring from the No. 2 shift fork shaft.
- NOTICE:
-
Use a cloth to prevent the snap ring from flying off.
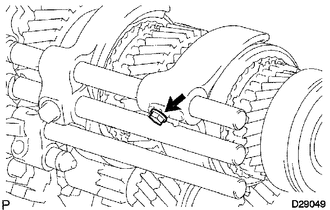
Remove the bolt from the No. 2 shift fork.
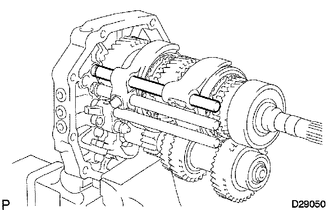
Remove the No. 2 shift fork shaft from the intermediate plate.
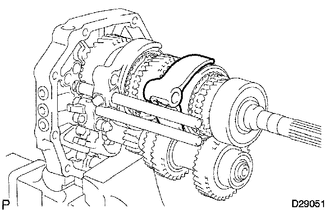
Remove the No. 2 shift fork from the No. 2 transmission hub sleeve.
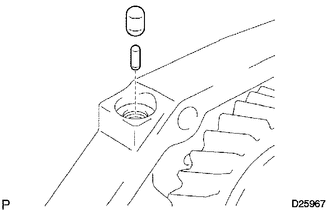
Using a magnet hand, remove the No. 1 shift interlock roller and shift interlock pin from the intermediate plate.
25.REMOVE NO. 1 SHIFT FORK SHAFT
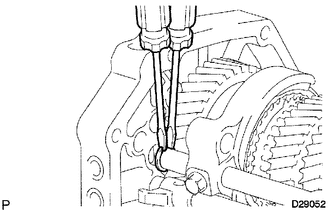
Using 2 screwdrivers and a hammer, tap off the snap ring from the No. 1 shift fork shaft.
- NOTICE:
-
Use a cloth to prevent the snap ring from flying off.
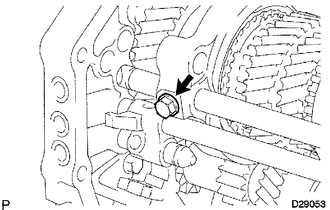
Remove the shift fork set bolt from the No. 1 shift fork.
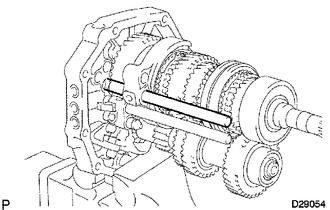
Remove the No. 1 shift fork shaft from the intermediate plate.
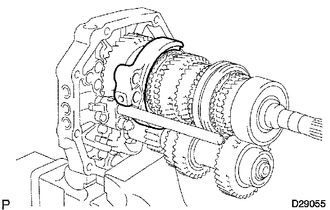
Remove the No. 1 shift fork from the reverse gear.
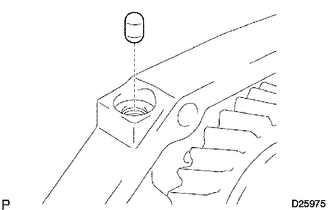
Using a magnet hand, remove the No. 1 shift interlock roller from the intermediate plate.
26.REMOVE NO. 3 SHIFT FORK SHAFT
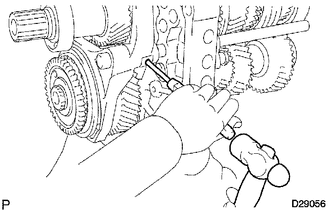
Using a 5 mm pin punch and hammer, tap out the shift fork set slotted spring pin from the No. 3 shift fork.
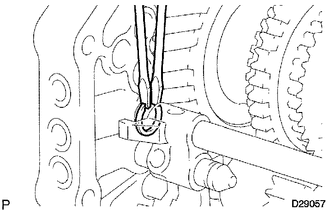
Using 2 screwdrivers and a hammer, tap off the snap ring from the shift fork shaft.
- NOTICE:
-
Use a cloth to prevent the snap ring from flying off.
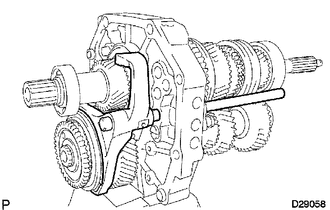
Remove the No. 3 shift fork and No. 3 shift fork shaft from the intermediate plate.
Using a magnet hand, remove the No. 1 shift interlock roller from the intermediate plate.
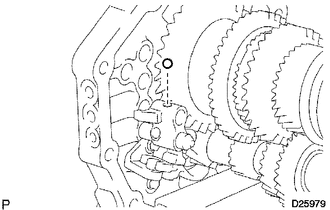
Using a magnet hand, remove the reverse shift fork ball from the reverse shift fork.
27.REMOVE NO. 4 SHIFT FORK SHAFT
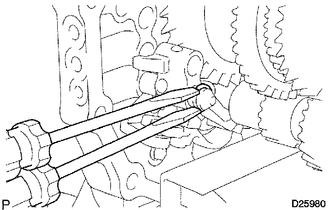
Using 2 screwdrivers and a hammer, tap off the snap ring from the No. 4 shift fork shaft.
- NOTICE:
-
Use a cloth to prevent the snap ring from flying off.
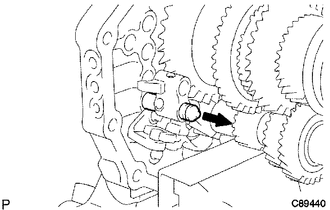
Remove the No. 4 shift fork shaft from the intermediate plate.
- NOTICE:
-
Cover the hole with a cloth to prevent the reverse shift fork ball from popping out.
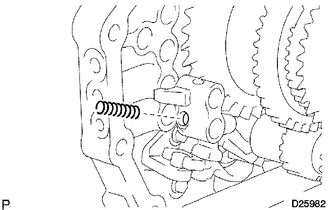
Using a magnet hand, remove the reverse shift fork return compression spring from the reverse shift fork.
28.REMOVE REVERSE SHIFT FORK
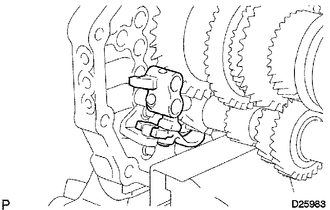
Remove the reverse shift fork with the reverse shift arm from the intermediate plate.
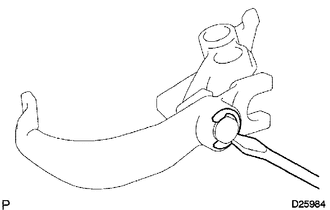
Using a screwdriver, pry out the E-ring and reverse shift fork from the reverse shift arm.
29.REMOVE REVERSE SHIFT ARM BRACKET
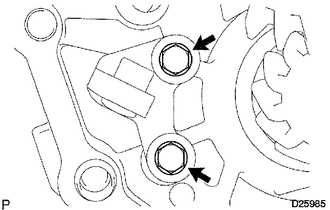
Remove the 2 bolts and reverse shift arm bracket from the intermediate plate.
30.REMOVE OUTPUT SHAFT BEARING SHAFT SNAP RING
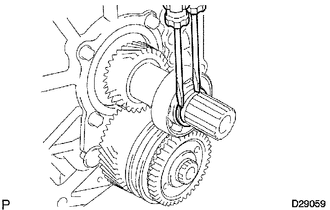
Using 2 screwdrivers and a hammer, tap off the shaft snap ring from the output shaft.
31.REMOVE OUTPUT SHAFT REAR BEARING
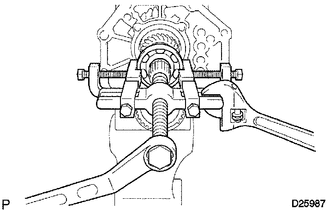
Using SST, remove the rear bearing and output shaft spacer from the output shaft.
- SST
- 09950-40011 (09951-04010, 09952-04010, 09953-04020, 09954-04010, 09955-04051, 09957-04010, 09958-04011)
32.INSPECT COUNTER 5TH GEAR THRUST CLEARANCE
33.INSPECT COUNTER 5TH GEAR RADIAL CLEARANCE
34.REMOVE COUNTER GEAR REAR SHAFT SNAP RING
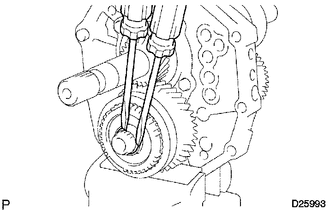
Using 2 screwdrivers and a hammer, tap off the snap ring from the counter gear.
35.REMOVE NO. 3 TRANSMISSION HUB SLEEVE
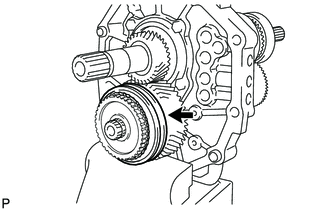
Remove the No. 3 transmission hub sleeve from the counter 5th gear.
36.REMOVE COUNTER 5TH GEAR
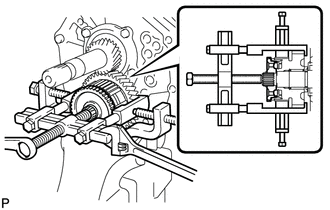
Using SST, remove the counter 5th gear together with the 2 No. 3 synchromesh shifting keys, 2 No. 3 synchromesh shifting key springs, No. 3 synchronizer ring and No. 5 gear spline piece from the counter gear.
- SST
- 09950-40011 (09951-04020, 09952-04010, 09953-04020, 09954-04010, 09955-04021, 09957-04010, 09958-04011)
37.REMOVE NO. 5 GEAR SPLINE PIECE
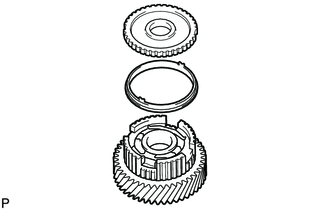
Remove the No. 5 gear spline piece from the counter 5th gear.
38.REMOVE NO. 3 SYNCHRONIZER RING
Remove the synchronizer ring from the counter 5th gear.
39.REMOVE COUNTER 5TH GEAR BEARING
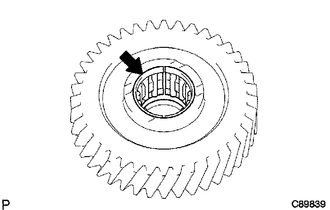
Remove the bearing from the counter 5th gear.
40.REMOVE NO. 3 TRANSMISSION HUB SLEEVE
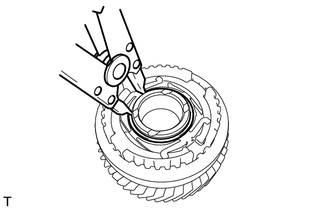
Using a snap ring expander, remove the snap ring.
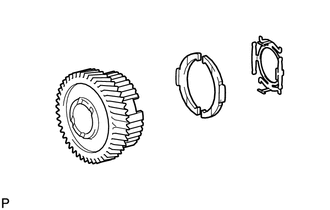
Remove the No. 3 transmission hub sleeve, No. 3 synchromesh shifting key spring and 2 No. 3 synchromesh shifting keys from the counter 5th gear.
41.REMOVE 5TH GEAR THRUST WASHER
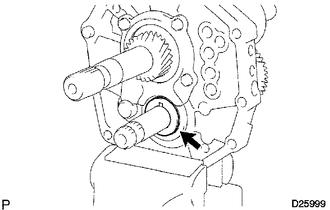
Remove the thrust washer from the counter gear.
42.REMOVE 5TH GEAR THRUST WASHER PIN
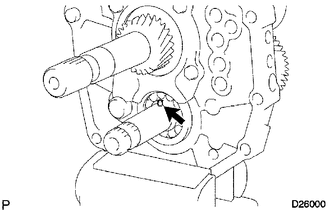
Remove the thrust washer pin from the counter gear.
43.REMOVE REAR BEARING RETAINER
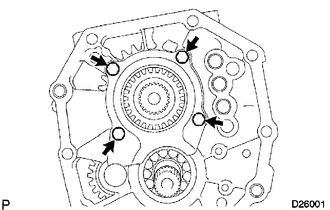
Remove the 4 bolts and bearing retainer from the intermediate plate.
44.REMOVE REVERSE IDLER GEAR
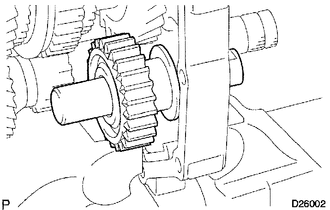
Pull out the reverse idler gear shaft from the rear side and remove the reverse idler gear from the intermediate plate.
45.REMOVE COUNTER SHAFT CENTER BEARING
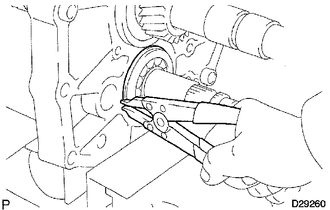
Using a snap ring expander, remove the snap ring.
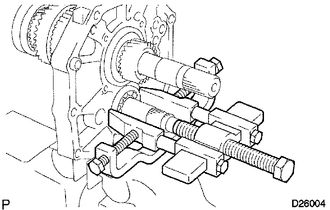
Using SST, remove the center bearing from the intermediate plate.
- SST
- 09950-40011 (09951-04010, 09952-04010, 09953-04020, 09954-04010, 09955-04011, 09957-04010, 09958-04011)
- HINT:
-
Remove the bearing while tapping the tip of the counter gear so that the counter gear does not hit the side wall of the output shaft gear by being pushed forward.
46.REMOVE COUNTER GEAR
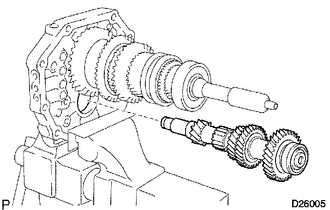
Remove the counter gear from the intermediate plate.
47.REMOVE INPUT SHAFT ASSEMBLY
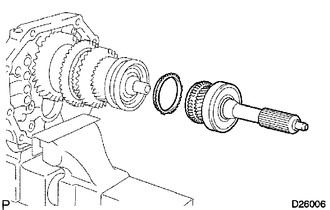
Remove the input shaft and No. 2 synchronizer ring from the output shaft.
- NOTICE:
-
Do not drop the input shaft bearing or No. 2 synchronizer ring.
48.REMOVE OUTPUT SHAFT BEARING SHAFT SNAP RING
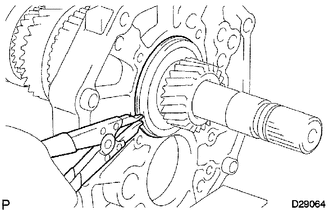
Using a snap ring expander, remove the snap ring from the output shaft.
49.REMOVE OUTPUT SHAFT ASSEMBLY
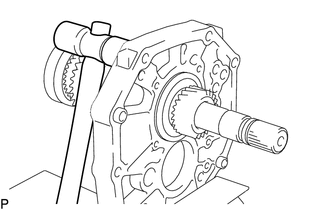
Using a plastic-faced hammer, remove the output shaft by tapping the intermediate plate.
50.INSPECT NO. 3 SYNCHRONIZER RING
51.INSPECT NO. 3 TRANSMISSION HUB SLEEVE
52.INSPECT COUNTER 5TH GEAR
53.INSPECT REVERSE IDLER GEAR SUB-ASSEMBLY
54.INSPECT REVERSE IDLER GEAR RADIAL CLEARANCE