DRIVE SHAFT / PROPELLER SHAFT FRONT PROPELLER SHAFT ASSEMBLY(for TDV Made) DISASSEMBLY
PROCEDURE

 1.REMOVE SLIDING SHAFT BOOT
Place matchmarks on the propeller shaft and sleeve yoke.
Using a side cutter or pliers, remove the small and large boot clamps.
Disconnect the boot from the sleeve yoke.
Remove the sleeve yoke, and then remove the boot from the propeller shaft.
2.REMOVE UNIVERSAL JOINT SPIDER ASSEMBLY
- HINT:
-
Use the same procedure for both universal joint spiders.
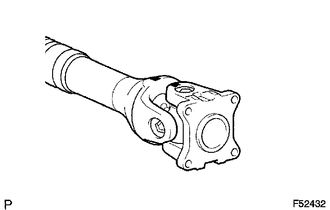
| *1 | Matchmark |
Place matchmarks on the flange yoke and propeller shaft.
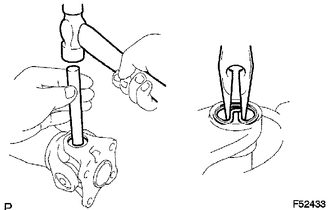
Using a brass bar and hammer, slightly tap in the spider bearing outer races.
Using needle nose pliers, remove the 4 snap rings from the grooves.
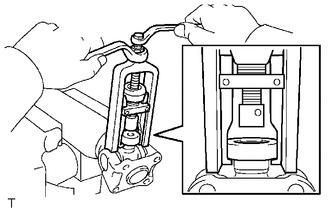
Clamp the propeller shaft in a vise between aluminum plates.
Using SST, push the sleeve yoke side spider bearing until: 1) the spider almost touches the sleeve yoke or propeller shaft, and 2) the spider bearing on the opposite side is partially pushed out.
- SST
- 09332-25010
- HINT:
-
Before installing SST, sufficiently raise the part labeled A. If part A is too low, SST may be difficult to install.
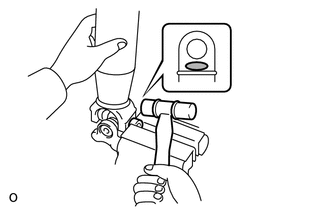
| *1 | Plastic-faced Hammer |
| *a | Hammering Point |
Clamp the pushed out spider bearing outer race in a vise between aluminum plates and tap the propeller shaft to remove the spider bearing.
- NOTICE:
- ·
Do not tap the shaft tube.
·Do not overtighten the vise.
- HINT:
-
Use the same procedure to remove the spider bearing from the opposite side of the spider.
Separate the flange yoke and spider from the propeller shaft.
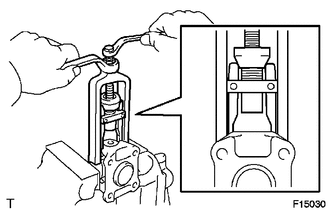
Reinstall the 2 removed spider bearings to the spider and clamp the spider bearings in a vise between aluminum plates.
- NOTICE:
-
Do not overtighten the vise.
Using SST, push the flange yoke side spider bearing until: 1) the spider almost touches the flange yoke, and 2) the spider bearing on the opposite side is partially pushed out.
- SST
- 09332-25010
- HINT:
-
Before installing SST, sufficiently raise the part labeled A. If part A is too low, SST may be difficult to install.
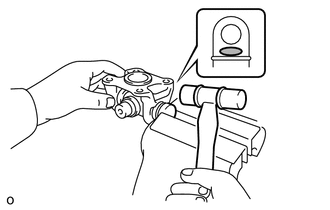
| *1 | Plastic-faced Hammer |
| *a | Hammering Point |
Clamp the pushed out spider bearing outer race in a vise between aluminum plates and tap the flange yoke to remove the spider bearing.
- NOTICE:
-
Do not overtighten the vise.
- HINT:
-
Use the same procedure to remove the spider bearing from the opposite side of the spider.
Separate the spider from the flange yoke.