THEFT DETERRENT / KEYLESS ENTRY THEFT DETERRENT SYSTEM Security Indicator Light Circuit
DESCRIPTION
When the theft deterrent system is in the disarmed state, the security indicator light assembly will blink continuously if the engine immobiliser system is set, or not illuminate if the engine immobiliser system is not set.
When the theft deterrent system is in the armed state, the engine immobiliser system is automatically set and the security indicator light assembly will blink continuously.
When the theft deterrent system is in the arming preparation state or alarm sounding state, the theft warning ECU assembly causes the security indicator light assembly to illuminate.
WIRING DIAGRAM
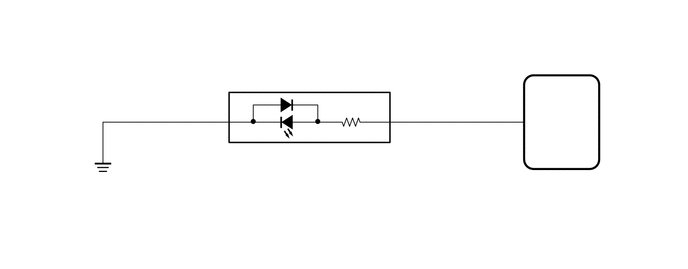
PROCEDURE
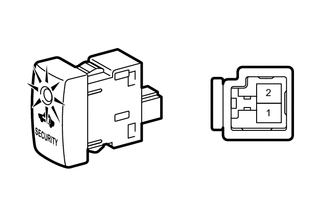
Remove the security indicator light assembly.
Click hereVehicle Interior>THEFT DETERRENT / KEYLESS ENTRY>SECURITY INDICATOR LIGHT ASSEMBLY>REMOVAL
Apply battery voltage between the terminals of the indicator, and check the illumination of the security indicator.
- OK:
Measurement Condition Specified Condition Battery positive (+) → Terminal 2 (LP)
Battery negative (-) → Terminal 1 (E)Illuminates
- NOTICE:
- ·
If the positive (+) lead and the negative (-) lead are incorrectly connected, the security indicator light assembly will not illuminate.
·If the voltage is too low, the security indicator light assembly will not illuminate.
- Result:
Proceed to OK NG
OK
NG
Click hereVehicle Interior>THEFT DETERRENT / KEYLESS ENTRY>SECURITY INDICATOR LIGHT ASSEMBLY>REMOVAL
Disconnect the G27 security indicator light assembly connector.
Disconnect the G29 theft warning ECU assembly connector.
Measure the resistance according to the value(s) in the table below.
- Standard Resistance:
Tester Connection Condition Specified Condition G27-2 (LP) - G29-27 (IND) Always Below 1 Ω G27-2 (LP) or G29-27 (IND) - Body ground Always 10 kΩ or higher G27-1 (E) - Body ground Always Below 1 Ω
- Result:
Proceed to OK NG
OK
Click hereVehicle Interior>THEFT DETERRENT / KEYLESS ENTRY>THEFT DETERRENT SYSTEM>PROBLEM SYMPTOMS TABLE
NG