EXTERIOR PANELS / TRIM ROOF DRIP SIDE FINISH MOULDING INSTALLATION
CAUTION / NOTICE / HINT
- HINT:
- ·
Use the same procedure for the RH and LH sides.
·The procedure listed below is for the LH side.
PROCEDURE

 1.INSTALL NO. 1 ROOF DRIP SIDE FINISH MOULDING CLIP
- NOTICE:
- ·
It is only necessary to perform this procedure when replacing a No. 1 roof drip side finish moulding clip with a new one.
·If installing new No. 1 roof drip side finish moulding clips, remove the adhesive remaining where the No. 1 roof drip side finish moulding clips will be installed on the vehicle body and clean the vehicle body with a non-residue solvent.
- HINT:
-
When installing the No. 1 roof drip side finish moulding clip, heat the vehicle body and No. 1 roof drip side finish moulding clip using a heat light.
- Standard:
Item Temperature Vehicle Body 40 to 60°C (104 to 140°F) No. 1 Roof Drip Side Finish Moulding Clip 20 to 30°C (68 to 86°F)
- NOTICE:
-
Do not heat the vehicle body or No. 1 roof drip side finish moulding clip excessively.
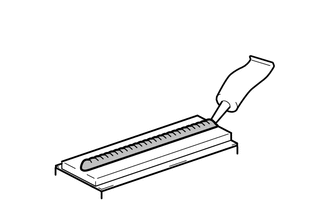
| *1 | Adhesive |
| *a | 2 to 3 mm Bead of Adhesive |
Apply a 2.0 to 3.0 mm (0.0787 to 0.118 in.) bead of adhesive (3M DP-105 or equivalent) to new No. 1 roof drip side finish moulding clips.
- HINT:
-
Adhesive strength (tensile strength): 13.7 MPa (140.0 kgf/cm2, 1991 psi) or more (when the temperature is 23°C (73°F))
Apply primer to the body where the No. 1 roof drip side finish moulding clip will be installed.
- NOTICE:
-
Do not let the primer dry.
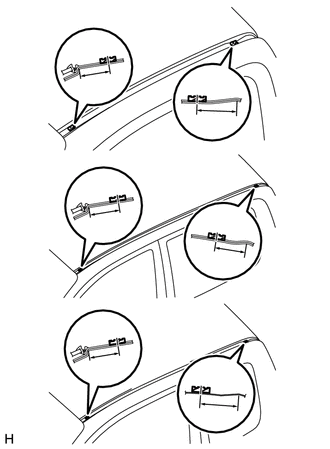
| *A | for Single Cab |
| *B | for Double Cab |
| *C | for Extra Cab |
While using the position shown in the illustration as a reference, place the No. 1 roof drip side finish moulding clip onto the roof panel. Then position and install the No. 1 roof drip side finish moulding clip after lightly pressing it so that the adhesive adheres to the primer.
- Standard:
Area Measurement (Reference Value) A 40.7 mm (1.60 in.) B 47.6 mm (1.87 in.) C 40.7 mm (1.60 in.) D 39.2 mm (1.54 in.) E 40.7 mm (1.60 in.) F 42.9 mm (1.69 in.)
- NOTICE:
-
Install the roof drip side finish moulding when 40 minutes or more have elapsed after pressing and installing the No. 1 roof drip side finish moulding clips.
- HINT:
- ·
Initial hardening time: 40 minutes
·Complete hardening time: 48 hours
2.INSTALL ROOF DRIP SIDE FINISH MOULDING LH
Attach the 2 clips to install the roof drip side finish moulding.