 |
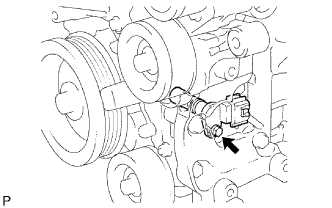
Apply a light coat of engine oil to the O-ring of the sensor.
CRANKSHAFT POSITION SENSOR > INSTALLATION |
| 1. INSTALL CRANKSHAFT POSITION SENSOR |
|
Apply a light coat of engine oil to the O-ring of the sensor.
Install the sensor with the bolt.
Connect the sensor connector.
| 2. INSTALL COOLER COMPRESSOR ASSEMBLY (w/ Air Conditioning System) |
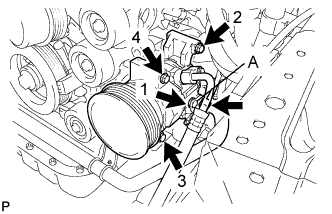 |
Temporarily install the compressor with the bolt labeled A.
Install the compressor completely by tightening the 4 bolts in the order shown in the illustration.
Connect the compressor connector.
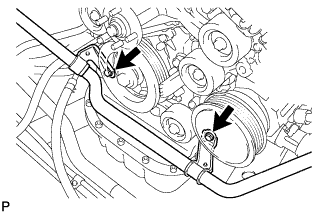 |
Connect the suction hose with the 2 bolts.
| 3. INSTALL GENERATOR ASSEMBLY (w/ Air Conditioning System) |
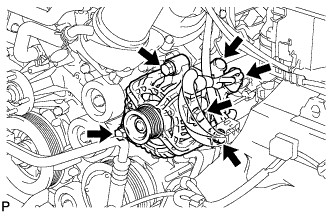 |
Install the generator and adjusting bar with the 2 bolts.
Install the generator wire with the nut.
Install the terminal cap.
Connect the generator connector.
| 4. INSTALL IDLER PULLEY (w/o Air Conditioning System) |
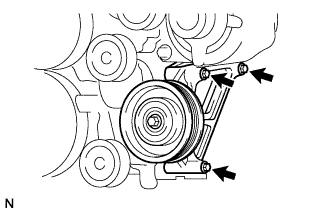 |
Install the idler pulley with the 3 bolts.
| 5. INSTALL DRIVE BELT |
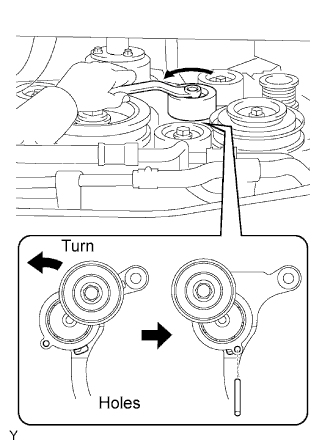 |
While turning the belt tensioner counterclockwise, align its holes, and then insert a bar of 6.0 mm (0.24 in.) into the holes to fix the belt tensioner.
Install the V-ribbed belt.
While turning the belt tensioner counterclockwise, remove the bar.
If it is hard to install the V-ribbed belt, perform the following procedure.
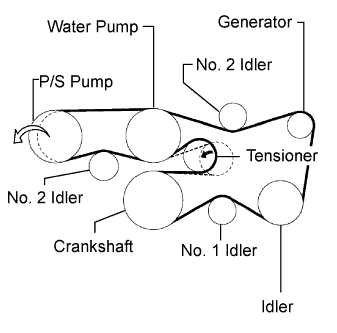 |
Put the V-ribbed belt on everything except the P/S pump as shown in the illustration.
While releasing the belt tension by turning the belt tensioner counterclockwise, put the V-ribbed belt on the P/S pump.
| 6. CONNECT CABLE TO NEGATIVE BATTERY TERMINAL |
| 7. PERFORM INITIALIZATION |
Perform initialization (Click here).