 |
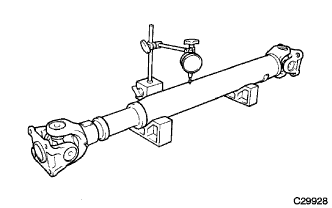
Using a dial indicator, measure the propeller shaft runout.
- Maximum runout:
- 0.3 mm (0.0118 in.)
PROPELLER SHAFT ASSEMBLY (except DANA Made) > DISASSEMBLY |
| 1. INSPECT REAR PROPELLER SHAFT ASSEMBLY |
|
Using a dial indicator, measure the propeller shaft runout.
| 2. INSPECT UNIVERSAL JOINT SPIDER ASSEMBLY |
Check the spider bearings for wear or damage.
Check each spider bearing's axial play by turning the yoke while holding the shaft tightly.
| 3. REMOVE UNIVERSAL JOINT SPIDER ASSEMBLY |
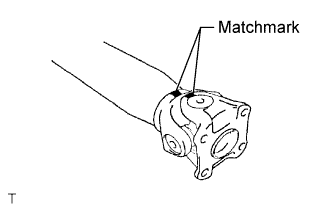 |
Place matchmarks on the yoke and shaft.
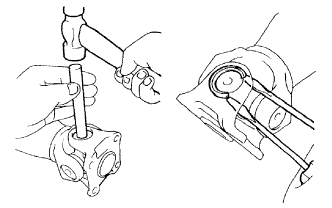 |
Using a brass bar and hammer, slightly tap in the spider bearing outer races.
Using 2 screwdrivers, remove the 4 snap rings from the grooves.
Clamp the shaft in a vise between aluminum plates.
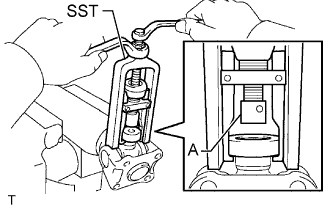 |
Using SST, push the yoke side spider bearing until: 1) the spider almost touches the yoke or shaft, and 2) the spider bearing on the opposite side is partially pushed out.
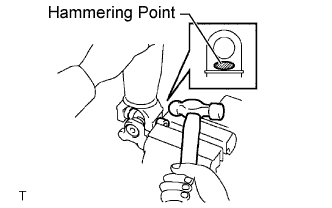 |
Clamp the pushed out spider bearing outer race between plates in a vise and tap the shaft to remove the spider bearing.
Remove the yoke and spider from the shaft.
Reinstall the 2 removed spider bearings to the spider and clamp the spider bearings between aluminum plates in a vise.
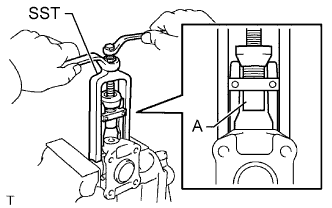 |
Using SST, push the yoke side spider bearing until: 1) the spider almost touches the yoke, and 2) the spider bearing on the opposite side is partially pushed out.
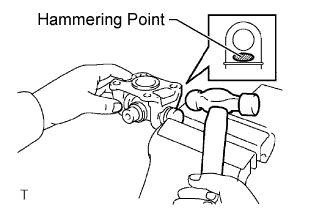 |
Clamp the pushed out spider bearing outer race between aluminum plates in a vise and tap the yoke to remove the spider bearing.
Remove the spider from the yoke.