 |
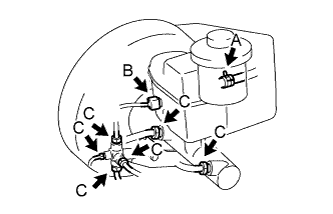
Disconnect the clutch reservoir tube labeled A from master cylinder.
BRAKE MASTER CYLINDER (for TASA Made) > REMOVAL |
| 1. DRAIN BRAKE FLUID |
| 2. REMOVE BRAKE MASTER CYLINDER SUB-ASSEMBLY (w/o ABS) |
|
Disconnect the clutch reservoir tube labeled A from master cylinder.
Disconnect the brake fluid level warning switch connector labeled B.
Using a union nut wrench, disconnect the 6 brake lines labeled C from the master cylinder and 4-way.
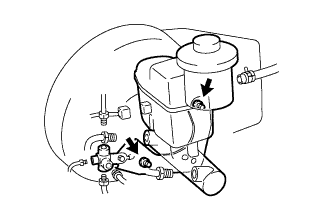 |
Remove the 2 nuts and bracket (with 4-way).
Pull out master cylinder from the brake booster.
Remove the O-ring from the master cylinder.
| 3. REMOVE BRAKE MASTER CYLINDER SUB-ASSEMBLY (w/ ABS) |
 |
for Manual Transmission:
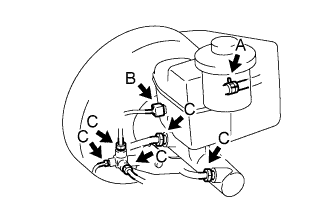
Disconnect the clutch reservoir tube labeled A from the master cylinder.
Disconnect the brake fluid level warning switch connector labeled B.
Using a union nut wrench, disconnect the 5 brake lines labeled C from the master cylinder and 3-way.
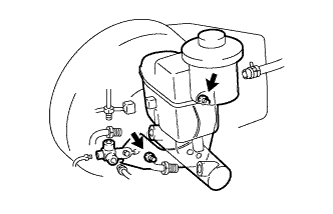 |
Remove the 2 nuts and bracket (with 3-way).
Pull out the master cylinder from the brake booster.
Remove the O-ring from the master cylinder.
| 4. REMOVE BRAKE MASTER CYLINDER RESERVOIR SUB-ASSEMBLY |
Remove the screw.
Remove the reservoir and 2 grommets from the master cylinder.