FLOOR SHIFT ASSEMBLY > INSTALLATION |
| 1. INSTALL FLOOR SHIFT ASSEMBLY |
|
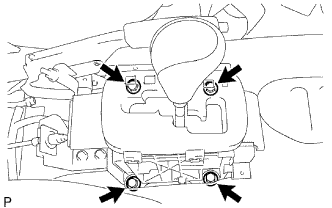
Install the floor shift with the 4 bolts.
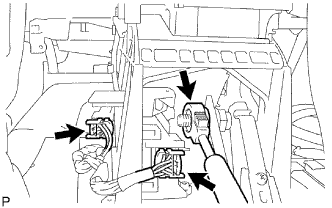 |
Connect the clamp and 2 connectors.
Move the shift lever to L.
Connect the transmission control cable.
| 2. CONNECT CABLE TO NEGATIVE BATTERY TERMINAL |
| 3. ADJUST SHIFT LEVER POSITION |
Move the shift lever to N.
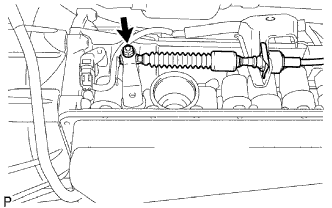 |
Remove the nut and disconnect the control cable.
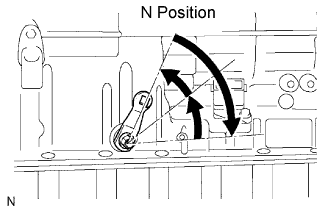 |
Turn the control shaft lever clockwise until it stops, and then turn it counterclockwise 2 notches to set it to the N position.
While holding the control shaft lever slightly toward the R position side, connect the cable with the nut.
| 4. INSPECT SHIFT LEVER POSITION |
When moving the shift lever from P to R with the ignition switch to ON and the brake pedal depressed, make sure that the shift lever moves smoothly and correctly into position.
Start the engine and make sure that the vehicle moves forward after moving the shift lever from N to D, and moves in reverse after shifting to R.
If the results are not as specified, inspect the park/ neutral position switch and check the shift lever.
| 5. INSTALL CONSOLE BOX ASSEMBLY |
| 6. INSTALL UPPER CONSOLE PANEL SUB-ASSEMBLY |
| 7. INSTALL PARKING BRAKE HOLE COVER SUB-ASSEMBLY |
| 8. PERFORM INITIALIZATION |
Perform initialization (Click here).