 |
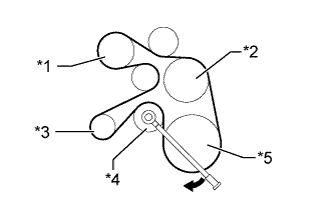
Rotate the tensioner pulley clockwise to loosen the belt and reduce the tension. Then remove the V belt.
| *1 | Cooler Compressor |
| *2 | Fan Pulley |
| *3 | Generator |
| *4 | Tensioner |
| *5 | Crankshaft Pulley |
COMPRESSOR (for 2KD-FTV) > REMOVAL |
| 1. RECOVER REFRIGERANT FROM REFRIGERATION SYSTEM |
Start the engine.
Operate the cooler compressor under the conditions shown below:
| Item | Condition |
| Engine Speed | Idling |
| Operating Time | 3 minutes or more |
| A/C Switch Status | On |
| Blower Switch Status | HI |
| Set Temperature | MAX COOL |
Stop the engine.
Recover the refrigerant from the A/C system using a refrigerant recovery unit.
| 2. REMOVE AIR CLEANER ASSEMBLY |
Disconnect the mass air flow meter connector.
Loosen the hose clamp.
Remove the 2 bolts and air cleaner.
| 3. REMOVE FAN AND GENERATOR V BELT |
|
Rotate the tensioner pulley clockwise to loosen the belt and reduce the tension. Then remove the V belt.
| *1 | Cooler Compressor |
| *2 | Fan Pulley |
| *3 | Generator |
| *4 | Tensioner |
| *5 | Crankshaft Pulley |
| 4. DISCONNECT SUCTION HOSE SUB-ASSEMBLY |
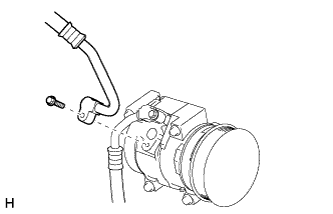 |
Remove the bolt and disconnect the suction hose sub-assembly from the compressor.
Remove the O-ring from the suction hose sub-assembly.
| 5. DISCONNECT NO. 1 COOLER REFRIGERANT DISCHARGE HOSE |
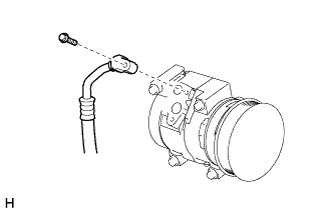 |
Remove the bolt and disconnect the No. 1 cooler refrigerant discharge hose from the compressor.
Remove the O-ring from the No. 1 cooler refrigerant discharge hose.
| 6. REMOVE COOLER COMPRESSOR ASSEMBLY |
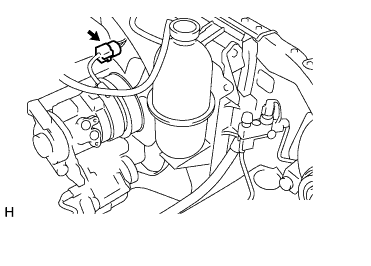 |
Disconnect the connector.
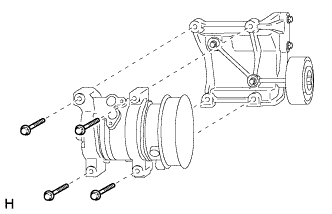 |
Remove the 4 bolts and cooler compressor assembly.