 |
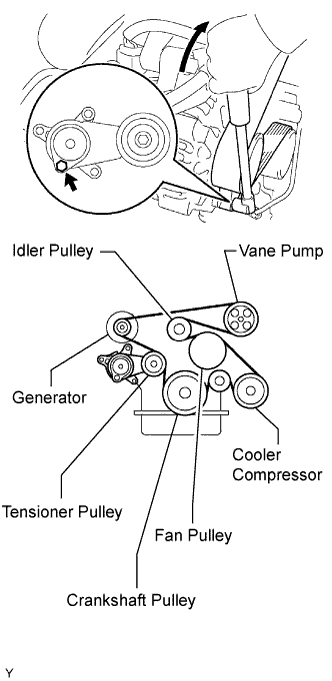
Install the drive belt to the pulleys except the V-ribbed belt tensioner pulley.
GENERATOR > INSTALLATION |
| 1. INSTALL GENERATOR ASSEMBLY |
Install the generator with the 2 bolts.
Connect the generator connector.
Install the generator wire with the bolt and nut.
Attach the terminal cap.
| 2. INSTALL DRIVE BELT |
|
Install the drive belt to the pulleys except the V-ribbed belt tensioner pulley.
Use the hexagon-shaped part indicated by the arrow in the illustration to move the tensioner pulley downward and then install the drive belt to the tensioner pulley.
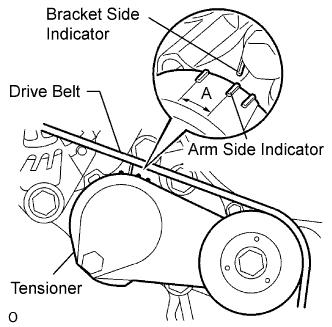 |
After a new belt has been installed, check that the tensioner indicator mark is within range A shown in the illustration.
| 3. INSTALL INTAKE AIR CONNECTOR AND AIR CLEANER ASSEMBLY |
Install the air cleaner and intake air connector assembly with the 4 bolts, and tighten the hose clamp.
Connect the mass air flow meter connector and harness clamps.
Connect the No. 2 PCV hose.
Connect the vacuum hose.
| 4. CONNECT CABLE TO NEGATIVE BATTERY TERMINAL |