VANE PUMP (for 1KD-FTV) > INSTALLATION |
| 1. INSTALL VANE PUMP ASSEMBLY |
|
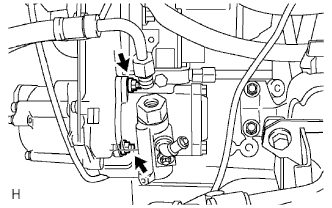
Coat a new O-ring with MP grease and install it to the vane pump.
Install the pump with the 2 nuts.
| 2. CONNECT PRESSURE FEED TUBE ASSEMBLY |
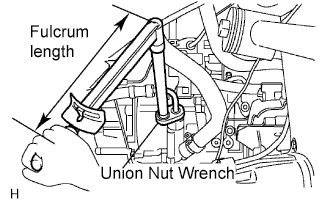 |
Using a union nut wrench, connect the tube to the vane pump with a new gasket and the union bolt.
| 3. CONNECT OIL RESERVOIR TO PUMP HOSE |
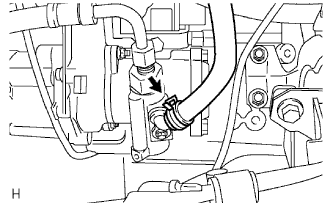 |
Connect the oil reservoir to pump hose with the clip.
| 4. ADD POWER STEERING FLUID |
| 5. BLEED AIR FROM POWER STEERING SYSTEM |
Check the fluid level.
Jack up the front of the vehicle and support it with stands.
Turn the steering wheel.
With the engine stopped, turn the steering wheel slowly from lock to lock several times.
Lower the vehicle.
Start the engine. Run the engine at idle for a few minutes.
Turn the steering wheel.
With the engine idling, turn the steering wheel to the left or right full lock position and hold it there for 2 to 3 seconds. Then turn the steering wheel to the opposite full lock position and hold it there for 2 to 3 seconds.
Repeat the step above several times.
Stop the engine.
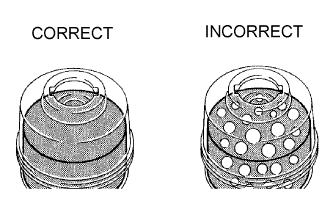 |
Check for foaming or emulsification. If the system has to be bled twice because of foaming or emulsification, check for fluid leaks in the system.
Check the fluid level.
| 6. CHECK POWER STEERING FLUID LEVEL IN RESERVOIR |
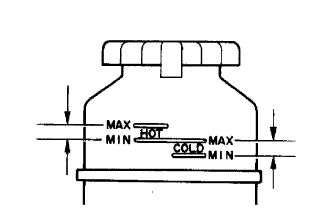 |
Keep the vehicle level.
With the engine stopped, check the power steering fluid level in the oil reservoir. If necessary, add power steering fluid.
Start the engine and run it at idle.
Turn the steering wheel to the left or right full lock position, and then turn the wheel to the opposite full lock position. Repeat this several times to raise fluid temperature.
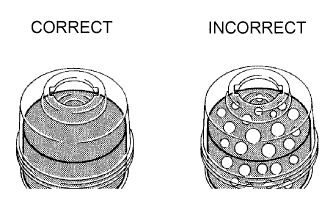 |
Check for foaming or emulsification. If foaming or emulsification is identified, bleed air from the power steering system.
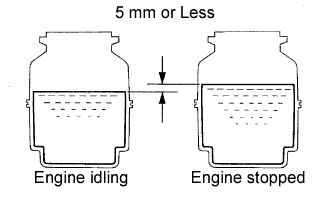 |
With the engine idling, measure the fluid level in the oil reservoir.
Stop the engine.
Wait a few minutes and remeasure the fluid level in the oil reservoir.
Check the fluid level.
| 7. INSPECT FOR FLUID LEAKS |
| 8. INSTALL FRONT SIDE MEMBER TO FRONT SUSPENSION CROSSMEMBER BRACE |
Install the crossmember brace with the 8 bolts.
| 9. INSTALL NO. 1 ENGINE UNDER COVER |
Install the engine under cover with the 4 bolts.
| 10. INSTALL NO. 2 ENGINE UNDER COVER |
Install the engine under cover with the 4 bolts.