 |
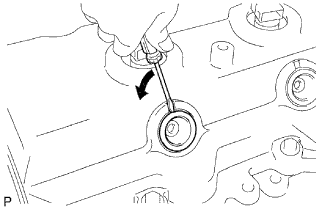
Using a small screwdriver, remove the nozzle holder seal by prying between the nozzle holder seal and the cutout part of the cylinder head cover.
ENGINE UNIT > DISASSEMBLY |
| 1. REMOVE OIL FILLER CAP SUB-ASSEMBLY |
| 2. REMOVE CYLINDER HEAD COVER SUB-ASSEMBLY |
Remove the 3 bolts and disconnect the 4 injector connectors.
|
Using a small screwdriver, remove the nozzle holder seal by prying between the nozzle holder seal and the cutout part of the cylinder head cover.
Disconnect the ventilation hose.
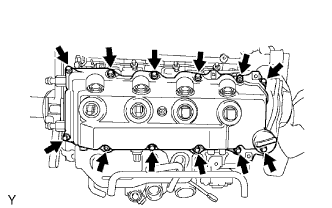 |
Remove the 10 bolts, 2 nuts, cylinder head cover and cylinder head cover gasket.
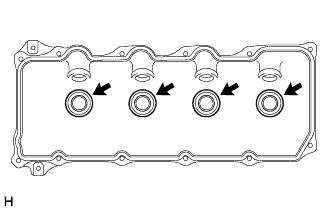 |
Remove the 4 No. 3 cylinder head cover gaskets from the cylinder head cover.
| 3. REMOVE INJECTOR ASSEMBLY |
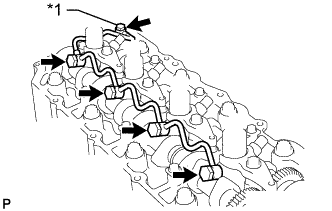 |
Remove the union bolt, 4 injector hollow screws, 5 gaskets and nozzle leakage pipe.
| *1 | Union Bolt |
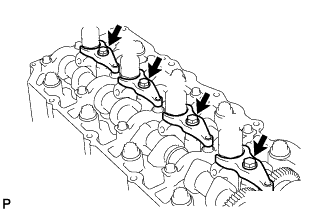 |
Remove the 4 bolts, 4 washers, 4 No. 1 nozzle holder clamps and 4 injectors.
Remove the O-ring from each injector.
Remove the 4 injection nozzle seats from the cylinder head.
| 4. REMOVE CAMSHAFT TIMING PULLEY |
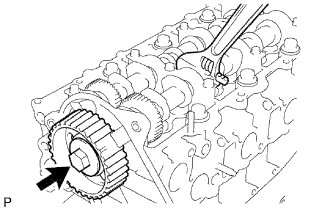 |
Remove the bolt of the camshaft timing pulley while holding the camshaft with a wrench.
Remove the camshaft timing pulley.
| 5. REMOVE NO. 2 TIMING BELT COVER |
Remove the 4 bolts, nut and timing belt cover.
| 6. REMOVE CAMSHAFT |
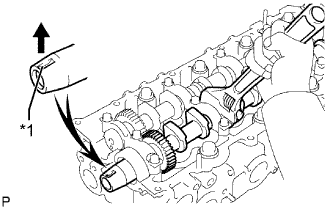 |
Turn the camshaft with a wrench so that the key groove of the camshaft faces upward.
| *1 | Key Groove |
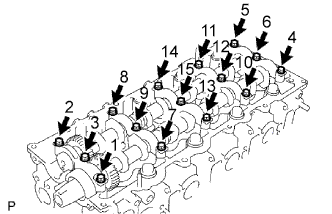 |
Uniformly loosen the 15 bearing cap bolts in several passes in the sequence shown in the illustration.
Remove the 15 bearing cap bolts, 5 bearing caps, oil seal and 2 camshafts.
| 7. REMOVE VALVE LIFTER |
Remove the valve lifters.
| 8. REMOVE CYLINDER HEAD SUB-ASSEMBLY |
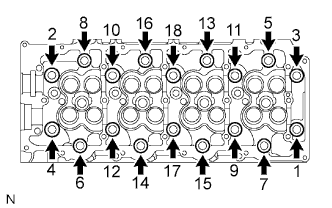 |
Uniformly loosen the 18 cylinder head bolts in several passes in the sequence shown in the illustration. Then remove the 18 cylinder head bolts and 18 washers.
Lift the cylinder head from the dowels on the cylinder block, and place the cylinder head on wooden blocks on a bench.
| 9. REMOVE CYLINDER HEAD GASKET |
| 10. REMOVE WATER PUMP ASSEMBLY |
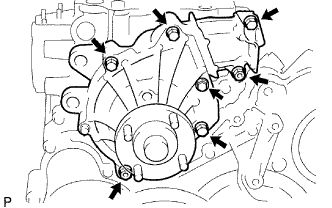 |
Remove the 5 bolts, 2 nuts, water pump and gasket.
| 11. REMOVE TIMING GEAR COVER |
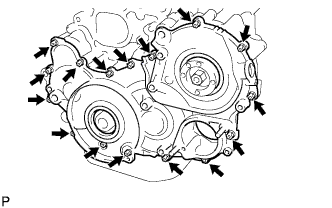 |
Remove the 14 bolts and 2 nuts.
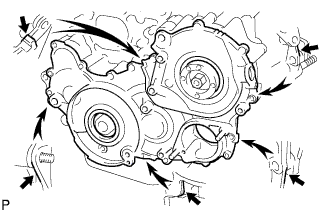 |
Pry the timing gear cover at the locations shown in the illustration and remove the timing gear cover.
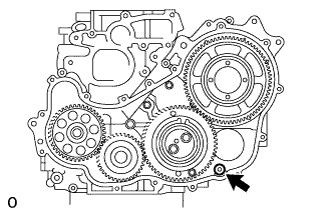 |
Remove the O-ring from the timing gear case.
| 12. REMOVE INJECTION GEAR |
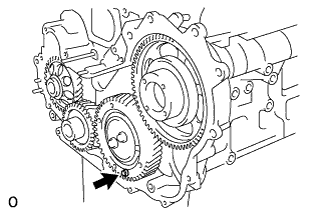 |
Secure the No. 2 idle sub gear to the No. 1 idle gear with a service bolt.
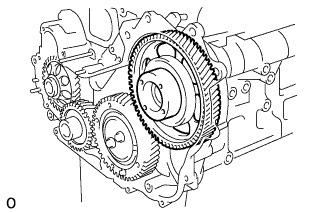 |
Remove the injection gear.
| 13. REMOVE NO. 1 CRANKSHAFT POSITION SENSOR PLATE |
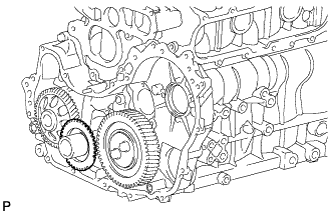 |
Remove the No. 1 crankshaft position sensor plate.
| 14. INSPECT BACKLASH OF CRANKSHAFT TIMING GEAR TO OIL PUMP GEAR |
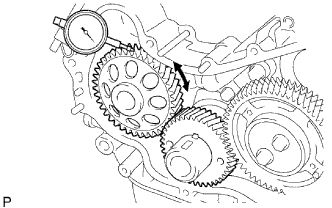 |
Using a dial indicator, measure the backlash.
| 15. INSPECT BACKLASH OF CRANKSHAFT TIMING GEAR TO NO. 1 IDLE GEAR |
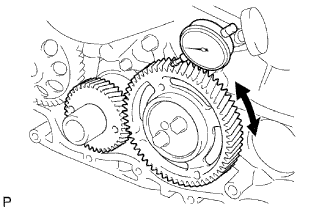 |
Using a dial indicator, measure the backlash.
| 16. INSPECT NO. 1 IDLE GEAR THRUST CLEARANCE |
Install the timing gear case, No. 1 idle gear and camshaft timing gear.
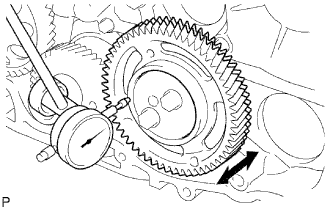 |
Using a dial indicator, measure the thrust clearance.
| 17. REMOVE CRANKSHAFT TIMING GEAR |
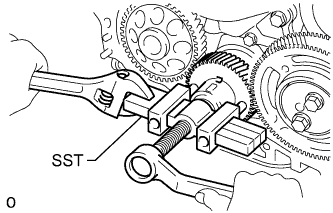 |
Using SST, remove the crankshaft timing gear.
| 18. INSPECT BACKLASH OF INJECTION GEAR TO NO. 1 IDLE GEAR |
Install the fuel supply pump with the 2 nuts.
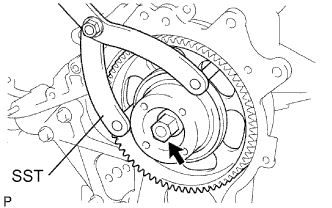 |
Using SST, install the injection gear with the nut.
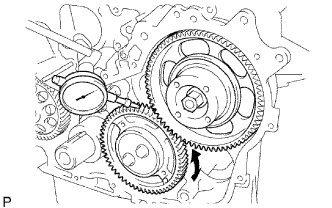 |
Using a dial indicator, measure the backlash.
|
Using SST, remove the nut and injection gear.
Remove the 2 nuts and fuel supply pump.
| 19. REMOVE IDLE GEAR THRUST PLATE |
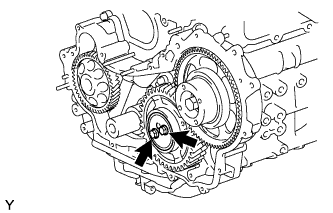 |
Remove the 2 bolts and idle gear thrust plate.
| 20. REMOVE NO. 1 IDLE GEAR |
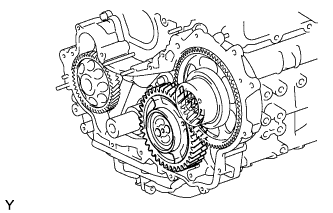 |
Remove the No. 1 idle gear together with the No. 2 idle sub gear.
| 21. REMOVE NO. 2 IDLE SUB GEAR |
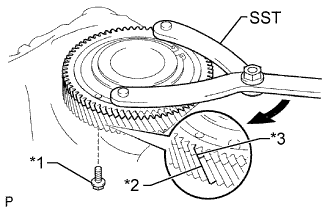 |
Using SST, turn the No. 2 idle sub gear clockwise and remove the service bolt.
| *1 | Service Bolt |
| *2 | No. 1 Idle Gear |
| *3 | No. 2 Idle Sub Gear |
 | Turn |
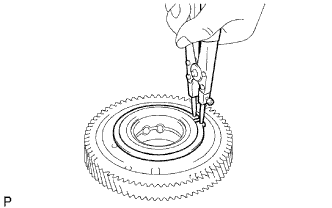 |
Using snap ring pliers, remove the snap ring.
Remove the wave washer, No. 2 idle sub gear and gear spring.
| 22. REMOVE NO. 1 IDLE GEAR SHAFT |
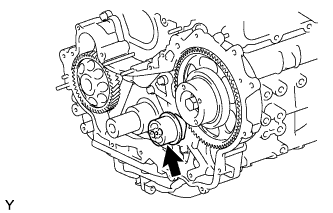 |
Remove the No. 1 idle gear shaft.
| 23. REMOVE OIL PAN SUB-ASSEMBLY |
Remove the 22 bolts and 2 nuts.
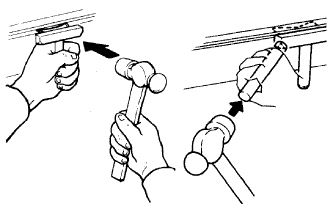 |
Insert the blade of an oil pan seal cutter between the oil pan and cylinder block, cut through the applied sealer and remove the oil pan.
| 24. REMOVE OIL STRAINER SUB-ASSEMBLY |
Remove the 2 bolts, 2 nuts, oil strainer and gasket.
| 25. REMOVE TIMING GEAR CASE ASSEMBLY |
Remove the bolt and No. 1 vacuum transmitting pipe.
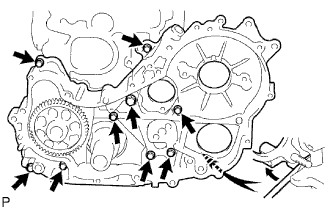 |
Remove the union bolt and 8 bolts.
Pry the timing gear case at the location shown in the illustration and remove the gear case and gasket.
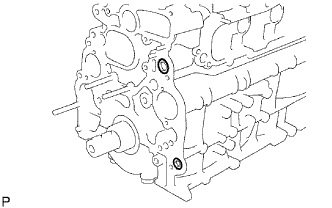 |
Remove the 2 O-rings.
| 26. REMOVE REAR ENGINE OIL SEAL RETAINER |
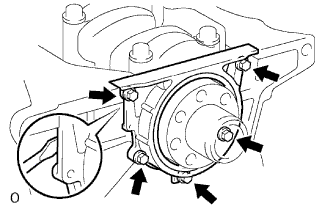 |
Remove the 5 bolts.
Using a screwdriver, remove the rear engine oil seal retainer by prying between the rear engine oil seal retainer and cylinder block.
| 27. REMOVE FRONT CRANKSHAFT OIL SEAL |
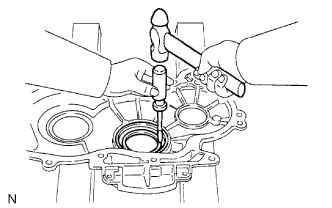 |
Using a screwdriver and hammer, tap out the oil seal.
| 28. REMOVE SUPPLY PUMP OIL SEAL |
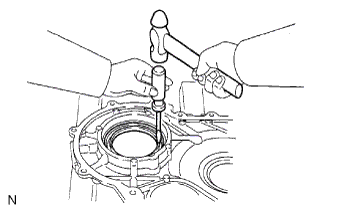 |
Using a screwdriver and hammer, tap out the oil seal.
| 29. REMOVE REAR CRANKSHAFT OIL SEAL |
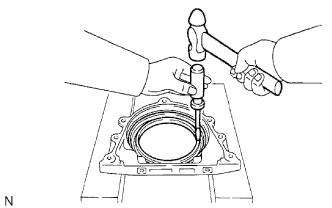 |
Using a screwdriver and hammer, tap out the oil seal.