 |
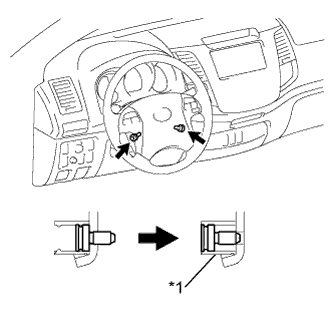
Using a T30 "TORX" socket wrench, loosen the 2 screws until the groove along the screw circumference catches on the screw case.
| *1 | Screw Case |
IGNITION KEY CYLINDER LIGHT > REMOVAL |
| 1. DISCONNECT CABLE FROM NEGATIVE BATTERY |
| 2. PLACE FRONT WHEELS FACING STRAIGHT AHEAD |
| 3. REMOVE STEERING PAD ASSEMBLY |
|
Using a T30 "TORX" socket wrench, loosen the 2 screws until the groove along the screw circumference catches on the screw case.
| *1 | Screw Case |
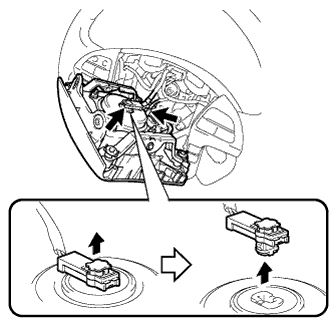 |
Pull out the steering pad from the steering wheel as shown in the illustration. Then support the steering pad with one hand.
Disconnect the horn connector.
Disconnect the connector and remove the steering pad.
| 4. REMOVE STEERING WHEEL ASSEMBLY |
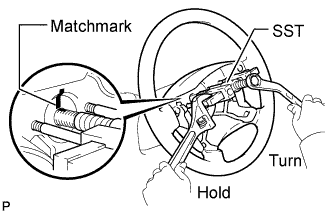 |
Remove the steering wheel set nut.
Place matchmarks on the steering wheel and main shaft.
Using SST, remove the steering wheel.
| 5. REMOVE STEERING COLUMN COVER LOWER |
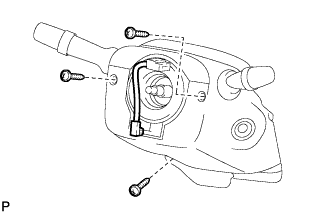 |
Remove the 3 screws and lower cover.
| 6. REMOVE STEERING COLUMN COVER UPPER |
| 7. REMOVE TRANSPONDER KEY AMPLIFIER |
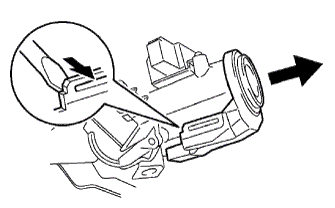 |
Using a screwdriver, widen the claw hanging onto the upper bracket by approximately 1.0 mm (0.039 in.).
Pull out the transponder key amplifier with the claw open.