HEADLIGHT ASSEMBLY (for Halogen Headlight) > ADJUSTMENT |
| 1. VEHICLE PREPARATION FOR HEADLIGHT AIMING ADJUSTMENT |
Prepare the vehicle:
| 2. PREPARATION FOR HEADLIGHT AIMING (Using a screen) |
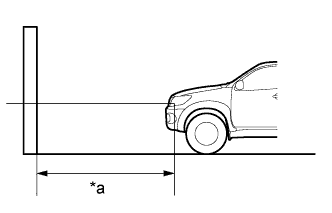
![]() |
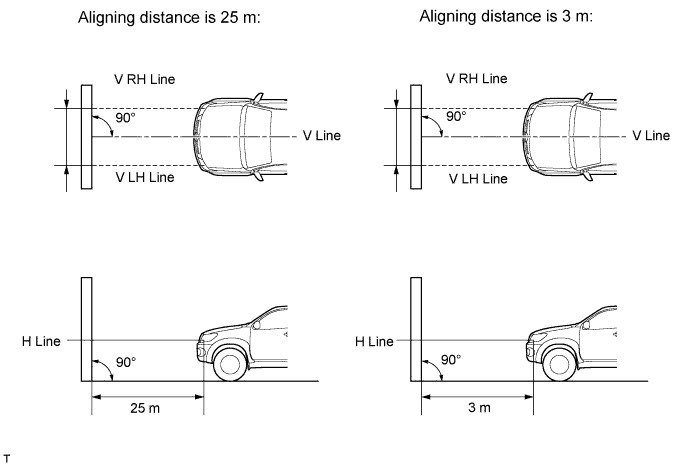
Prepare the vehicle:
| *a | 25 m or 3 m |
Prepare a piece of thick white paper that is approximately 2 m (6.56 ft.) (height) x 4 m (13.1 ft.) (width) to use as a screen.
Draw a vertical line down the center of the screen (V line).
Set the screen as shown in the illustration.

![]() |
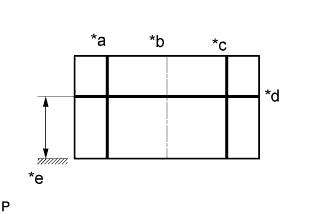
Draw base lines (H, V LH and V RH lines) on the screen as shown in the illustration.
| *a | V LH Line |
| *b | V Line |
| *c | V RH Line |
| *d | H Line |
| *e | Ground |
H line (headlight height):
Draw a horizontal line across the screen so that it passes through the center marks. The H line should be at the same height as the headlight bulb center marks of the low beam headlights.
V LH line, V RH line (center mark position of LH and RH headlights being inspected):
Draw two vertical lines so that they intersect the H line at each center mark (aligned with the center of the low beam headlight bulbs).
| 3. HEADLIGHT AIMING INSPECTION |
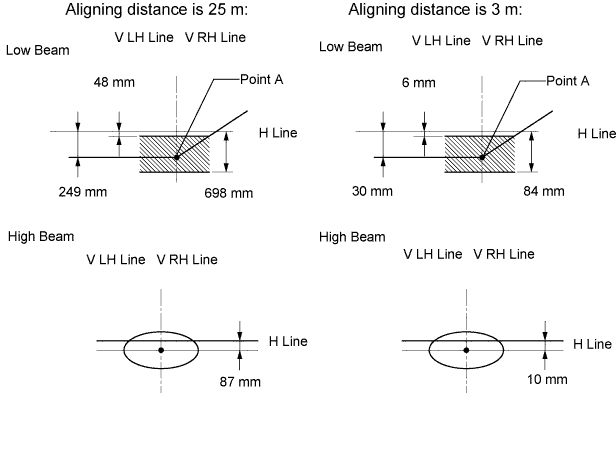
![]() |
Cover the headlight or disconnect the connector of the headlight on the opposite side to prevent light from the headlight that is not being inspected from affecting the headlight aiming.
| *a | 25 m or 3 m |
Start the engine.
Turn on the headlights and make sure that the cutoff line is within the specified area shown in the illustration.

| 4. HEADLIGHT AIMING ADJUSTMENT |
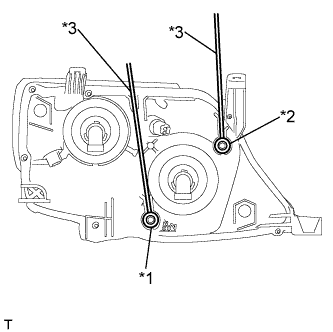
![]() |
Using a screwdriver, adjust the aim.
Adjust the aim of each headlight to the specified range by turning each aiming screw with a screwdriver.
| *1 | Vertical Aiming Screw |
| *2 | Horizontal Aiming Screw |
| *3 | Screwdriver |