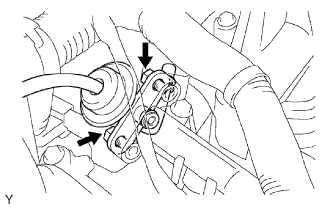
Home › ENGINE ยท 1GR-FE › FUEL › FUEL PRESSURE REGULATOR

FUEL PRESSURE REGULATOR > REMOVAL

for Preparation Click here


1. DISCHARGE FUEL SYSTEM PRESSURE

CAUTION:
  1. Do not disconnect any part of the fuel system until you have discharged the fuel system pressure.
  2. Even after discharging the fuel pressure, place a cloth or equivalent over fittings as you separate them to reduce the risk of fuel spray on yourself or in the engine compartment.

  1. Disconnect the cable from the negative (-) battery terminal.

    CAUTION:
    Wait at least 90 seconds after disconnecting the cable from the negative (-) battery terminal to prevent airbag and seat belt pretensioner activation.


    G038856E01
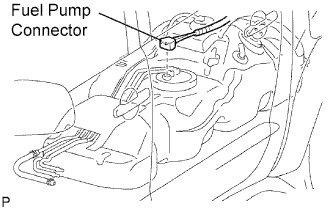
  1. Disconnect the fuel pump connector.

  1. Connect the cable to the negative (-) battery terminal.

  1. Start the engine. After the engine has stopped on its own, turn the ignition switch OFF.

    HINT:
    DTC P0171/25 (system too lean) may be set.

  1. Crank the engine again, and check that the engine does not start.

  1. Loosen the fuel tank cap, then discharge the pressure in the fuel tank completely.

  1. Connect the fuel pump connector.


2. PRECAUTION

NOTICE:
After turning the ignition switch off, waiting time may be required before disconnecting the cable from the battery terminal. Therefore, make sure to read the disconnecting the cable from the battery terminal notice before proceeding with work (Click here).


3. DISCONNECT CABLE FROM NEGATIVE BATTERY TERMINAL

NOTICE:
When disconnecting the cable, some systems need to be initialized after the cable is reconnected (Click here).


4. REMOVE V-BANK COVER
  1. Remove the 2 nuts and cover.


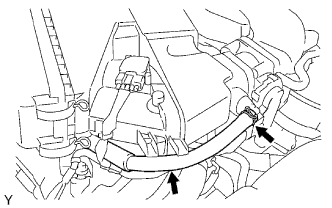
5. REMOVE NO. 2 VENTILATION HOSE


A075594E01


6. REMOVE AIR CLEANER ASSEMBLY


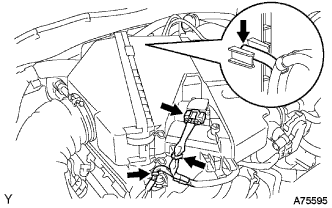
    A075595
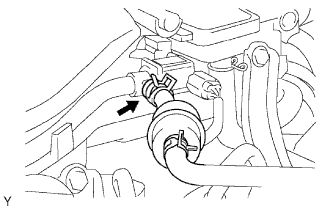
  1. Disconnect the vacuum hose.

  1. Disconnect the MAF meter connector.

  1. Remove the 2 wire harness clamps.


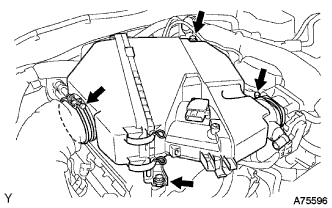
    A075596
  1. Loosen the 2 hose clamps.

  1. Remove the 2 bolts and air cleaner.


7. REMOVE INTAKE AIR SURGE TANK


    A076500E02
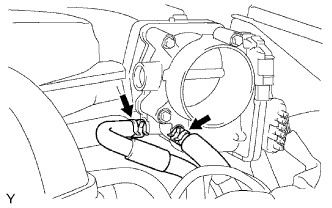
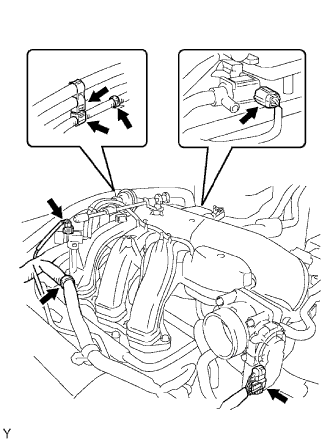
  1. Disconnect the 2 water by-pass hose.


    A075644E01
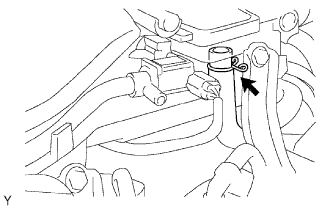
  1. Disconnect the purge line hose.


    A075645E01
  1. Disconnect the ventilation hose.


    A075646E01
  1. Disconnect the 2 VSV connectors.

  1. Disconnect the throttle body with motor connector.

  1. Separate the 3 wire harness clamps and hose clamp.


    A076501E01
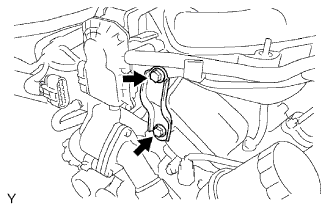
  1. Remove the 2 bolts and throttle body bracket.


    A076502E01
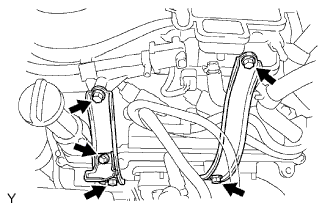
  1. Remove the bolt and oil baffle plate.

  1. Remove the 4 bolts and 2 surge tank stays.
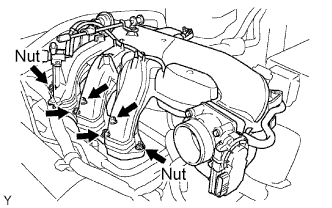


    A075648E01
  1. Remove the 2 nuts.

  1. Using an 8 mm hexagon socket wrench, remove the 4 bolts, intake air surge tank and gasket.


8. DISCONNECT NO. 2 FUEL PIPE SUB-ASSEMBLY


A075651E01
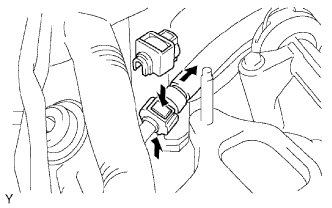
  1. Remove the fuel pipe clamp.

  1. Pinch the tube connector and then pull out the fuel pipe.
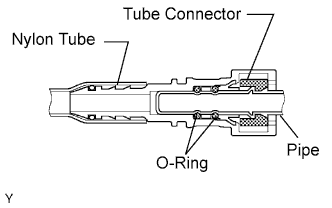
    NOTICE:

    1. A075650E08
    2. Check if there is any dirt or mud around the connector before this procedure. Clean if necessary. Foreign matter can affect the quick connector O-ring's seal between the fuel pipe and fuel delivery pipe.
    3. Do not use any tools in this procedure.
    4. Do not bend or twist the nylon tube.
    5. Keep the plug free from foreign objects.
    6. To protect the fuel pipe, cover it with a plastic bag after checking it.
    7. When the fuel pipe and fuel pressure regulator are stuck, pinch the nylon tube with fingers, turn it carefully to free it and then disconnect the fuel pipe.


9. REMOVE FUEL PRESSURE REGULATOR ASSEMBLY


A075657E02
  1. Remove the 2 bolts and fuel pressure regulator.

  1. Remove the vacuum hose.