FRONT DOOR SPEAKER > INSTALLATION |
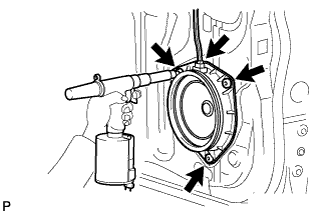
| 1. INSTALL FRONT NO. 1 SPEAKER ASSEMBLY |
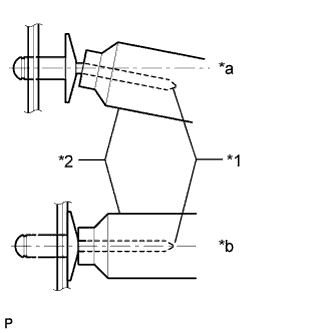
Install a nose piece to an air riveter or hand riveter. Then insert the mandrel part of a new φ4 mm waterproof rivet into the nose piece.
![]() |
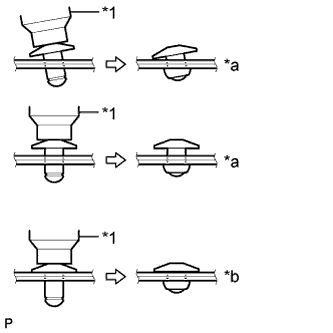
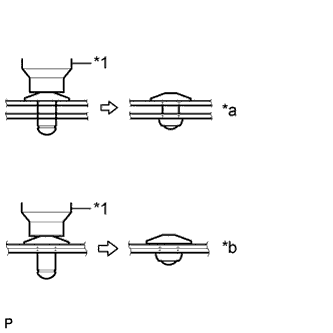
Using an air riveter or hand riveter, install the speaker with 3 new rivets.
![]() |
| *1 | Mandrel |
| *2 | Riveter |
| *a | INCORRECT |
| *b | CORRECT |
![]() |
| *1 | Riveter |
| *a | INCORRECT |
| *b | CORRECT |
![]() |
| *1 | Riveter |
| *a | INCORRECT |
| *b | CORRECT |
Connect the connector.
| 2. INSTALL FRONT DOOR TRIM BOARD SUB-ASSEMBLY LH |
Attach the 8 clips to install the front door trim board.
Install the screw and clip.
| 3. INSTALL POWER WINDOW REGULATOR MASTER SWITCH ASSEMBLY WITH FRONT DOOR ARMREST BASE PANEL |
Connect the connector.
Attach the 4 claws and 2 clips to install the power window regulator switch assembly with front door armrest base panel.
| 4. INSTALL DOOR PULL HANDLE |
Install the door pull handle with the screw.
| 5. INSTALL FRONT NO. 2 SPEAKER ASSEMBLY |
Install the front No. 2 speaker assembly with the screw.
Connect the connector.
| 6. INSTALL FRONT DOOR LOWER FRAME BRACKET GARNISH LH |
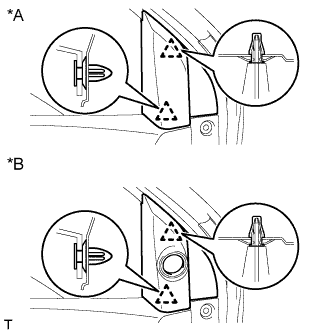
![]() |
Attach the 2 clips to install the front door lower frame bracket garnish.
| *A | w/o Front No. 2 Speaker |
| *B | w/ Front No. 2 Speaker |
| 7. CONNECT CABLE TO NEGATIVE BATTERY TERMINAL |