 |
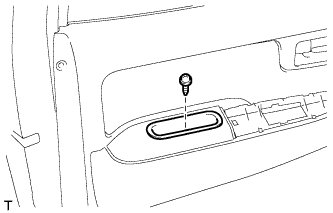
Remove the screw and door pull handle.
REAR DOOR SPEAKER > REMOVAL |
| 1. PRECAUTION |
| 2. DISCONNECT CABLE FROM NEGATIVE BATTERY TERMINAL |
| 3. REMOVE DOOR PULL HANDLE |
|
Remove the screw and door pull handle.
| 4. REMOVE REAR POWER WINDOW REGULATOR SWITCH ASSEMBLY WITH REAR DOOR ARMREST BASE PANEL |
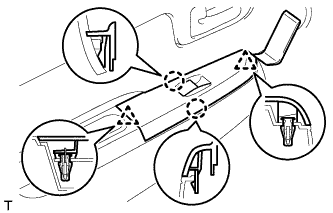 |
Using a moulding remover, detach the 2 clips and 2 claws.
Disconnect the connector and remove the rear power window regulator switch assembly with rear door armrest base panel.
| 5. REMOVE REAR DOOR TRIM BOARD SUB-ASSEMBLY LH |
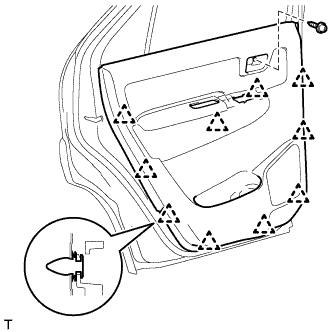 |
Remove the screw.
Detach the 10 clips and remove the rear door trim board.
| 6. REMOVE REAR SPEAKER ASSEMBLY |
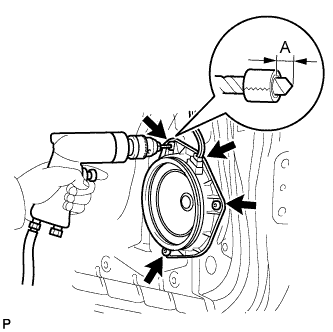 |
Disconnect the connector.
Put a 5 mm (0.197 in.) drill bit into a drill.
Wind tape around the drill bit approximately 4 mm (0.157 in.) from the tip of the drill as shown in the illustration.
| Area | Specified Condition |
| A | 4 mm (0.157 in.) |
Lightly press the drill against the 3 rivets, drill off the flanges of the 3 rivets and remove the front No. 1 speaker assembly.
Continue drilling and push out the remaining rivet fragments.
Using a vacuum cleaner, remove the rivet fragments and shavings from the inside of the door.