TRANSFER ASSEMBLY > REASSEMBLY |
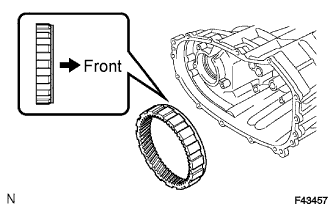
| 1. INSTALL TRANSFER LOW PLANETARY RING GEAR |
|
Install the ring gear to the front case.
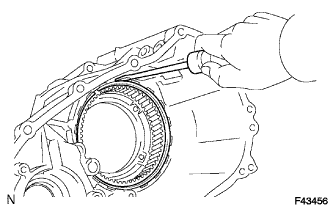 |
Using a screwdriver, install the snap ring.
| 2. INSTALL TRANSFER CASE STRAIGHT PIN |
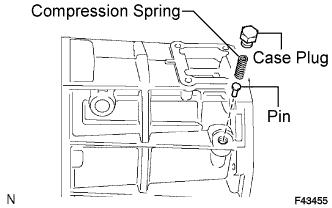 |
| 3. INSTALL COMPRESSION SPRING |
| 4. INSTALL TRANSFER CASE PLUG |
Apply adhesive to the threads of the plug.
Install the case plug.
| 5. INSTALL TRANSFER OUTPUT SHAFT PLATE WASHER |
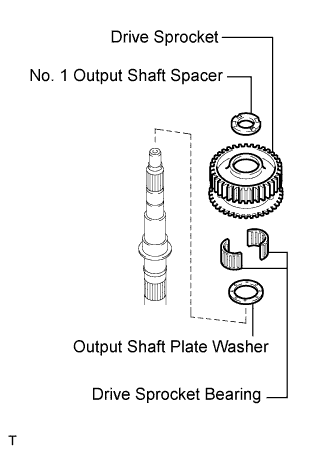 |
| 6. INSTALL TRANSFER DRIVE SPROCKET BEARING |
| 7. INSTALL TRANSFER DRIVE SPROCKET SUB-ASSEMBLY |
| 8. INSTALL NO. 1 TRANSFER OUTPUT SHAFT SPACER |
| 9. INSTALL REAR TRANSFER OUTPUT SHAFT RADIAL BALL BEARING |
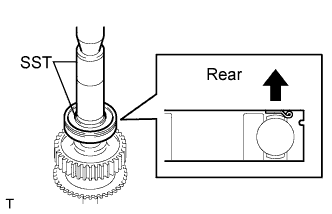 |
Apply gear oil to the connecting areas of the output shaft and bearing.
Using SST and a press, press in a new bearing with the outer race snap ring groove toward the rear.
| 10. INSTALL TRANSFER OUTPUT SHAFT PLATE WASHER |
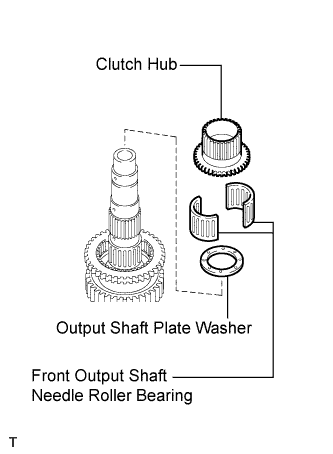 |
| 11. INSTALL FRONT TRANSFER OUTPUT SHAFT NEEDLE ROLLER BEARING |
| 12. INSTALL TRANSFER CLUTCH HUB |
| 13. INSTALL CENTER DIFFERENTIAL CASE |
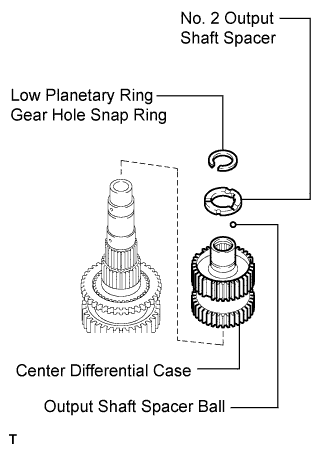 |
| 14. INSTALL TRANSFER OUTPUT SHAFT SPACER BALL |
| 15. INSTALL NO. 2 TRANSFER OUTPUT SHAFT SPACER |
| 16. INSTALL TRANSFER LOW PLANETARY RING GEAR HOLE SNAP RING |
Using a snap ring expander, install the snap ring.
| 17. INSPECT TRANSFER DRIVE SPROCKET RADIAL CLEARANCE |
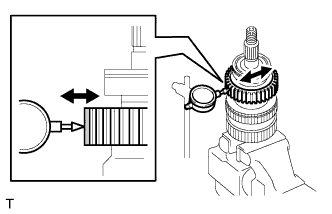 |
Using a dial indicator, measure the radial clearance of the drive sprocket.
| 18. INSPECT TRANSFER DRIVE SPROCKET THRUST CLEARANCE |
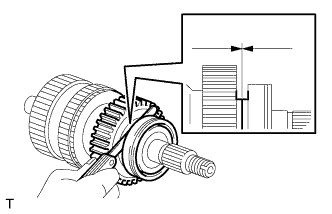 |
Using a feeler gauge, measure the thrust clearance of the drive sprocket.
| 19. INSTALL TRANSFER LOW PLANETARY GEAR BEARING |
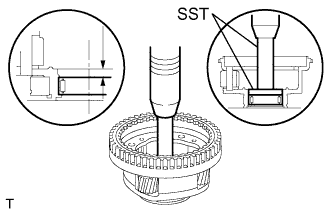 |
Using SST and a press, press in a new bearing.
| 20. INSTALL TRANSFER INPUT SHAFT BEARING |
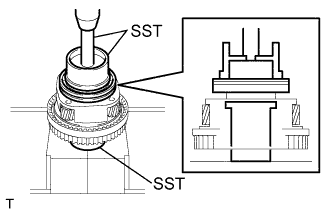 |
Using SST and a press, press in a new bearing with the groove facing forward.
| 21. INSTALL TRANSFER LOW PLANETARY GEAR SPLINE PIECE |
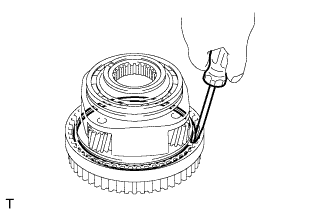 |
Using a screwdriver, install the spline piece and low planetary gear with the snap ring.
| 22. INSTALL TRANSFER INPUT BEARING SHAFT SNAP RING |
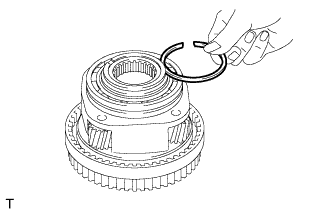 |
Select a new snap ring that allows 0.1 mm (0.0039 in.) or less of axial free play.
| Mark | Thickness |
| 1 | 1.45 to 1.50 mm (0.0571 to 0.0591 in.) |
| 2 | 1.50 to 1.55 mm (0.0591 to 0.0610 in.) |
| 3 | 1.55 to 1.60 mm (0.0610 to 0.0630 in.) |
| 4 | 1.60 to 1.65 mm (0.0630 to 0.0650 in.) |
| 5 | 1.65 to 1.70 mm (0.0650 to 0.0669 in.) |
Using a snap ring expander, install the snap ring.
| 23. INSTALL NO. 1 TRANSFER INPUT SHAFT SEAL RING |
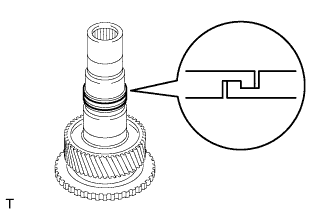 |
Apply gear oil to the 2 seal rings.
Install the 2 seal rings to the input shaft.
| 24. INSTALL TRANSFER LOW PLANETARY GEAR BEARING |
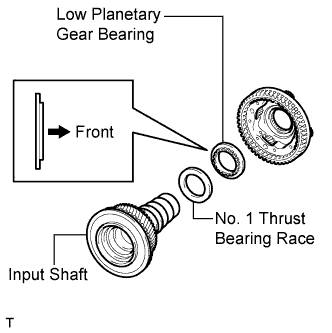 |
Install the bearing to the low planetary gear.
| 25. INSTALL NO. 1 TRANSFER THRUST BEARING RACE |
| 26. INSTALL TRANSFER INPUT SHAFT |
Apply gear oil to the contact surface of the input shaft and low planetary gear.
Install the input shaft to the low planetary gear.
| 27. INSTALL MANUAL TRANSFER PLANETARY CARRIER WASHER |
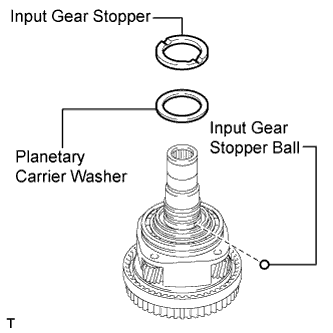 |
Apply gear oil to the washer.
Install the washer to the low planetary gear.
| 28. INSTALL TRANSFER INPUT GEAR STOPPER BALL |
| 29. INSTALL TRANSFER INPUT GEAR STOPPER |
| 30. INSTALL TRANSFER INPUT GEAR STOPPER SHAFT SNAP RING |
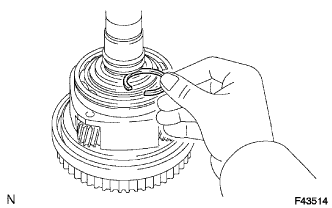 |
Select a new snap ring that allows 0.05 to 0.15 mm (0.0020 to 0.0059 in.) of axial free play.
| Thickness |
| 2.10 to 2.15 mm (0.0827 to 0.0846 in.) |
| 2.15 to 2.20 mm (0.0846 to 0.0866 in.) |
| 2.20 to 2.25 mm (0.0866 to 0.0886 in.) |
| 2.25 to 2.30 mm (0.0886 to 0.0906 in.) |
| 2.30 to 2.35 mm (0.0906 to 0.0925 in.) |
| 2.35 to 2.40 mm (0.0925 to 0.0945 in.) |
| 2.40 to 2.45 mm (0.0945 to 0.0965 in.) |
| 2.45 to 2.50 mm (0.0965 to 0.0984 in.) |
| 2.50 to 2.55 mm (0.0984 to 0.1004 in.) |
| 2.55 to 2.60 mm (0.1004 to 0.1024 in.) |
| 2.60 to 2.65 mm (0.1024 to 0.1043 in.) |
| 2.65 to 2.70 mm (0.1043 to 0.1063 in.) |
| 2.70 to 2.75 mm (0.1063 to 0.1083 in.) |
| 2.75 to 2.80 mm (0.1083 to 0.1102 in.) |
| 2.80 to 2.85 mm (0.1102 to 0.1122 in.) |
| 2.85 to 2.90 mm (0.1122 to 0.1142 in.) |
| 2.90 to 2.95 mm (0.1142 to 0.1161 in.) |
| 2.95 to 3.00 mm (0.1161 to 0.1181 in.) |
| 3.00 to 3.05 mm (0.1181 to 0.1201 in.) |
Using a snap ring expander, install the snap ring.
| 31. INSTALL TRANSFER CASE OIL SEAL |
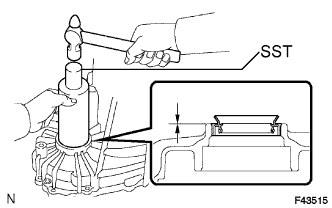 |
Using SST and a hammer, tap in a new oil seal until its surface is flush with the case upper surface (No. 1).
Coat the lip of the oil seal with MP grease.
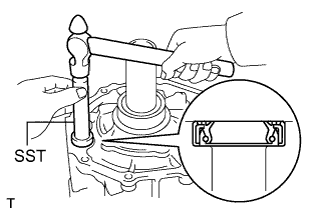 |
Using SST and a hammer, tap in a new oil seal until its surface is flush with the case upper surface (No. 2).
Coat the lip of the oil seal with MP grease.
| 32. INSTALL TRANSFER LOW PLANETARY GEAR ASSEMBLY WITH TRANSFER INPUT SHAFT |
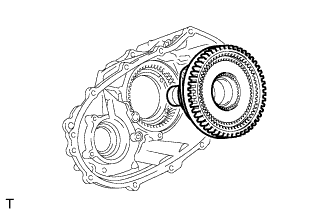 |
Install the low planetary gear with input shaft.
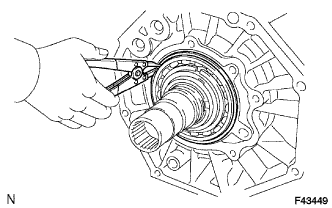 |
Using a snap ring expander, install the snap ring.
| 33. INSTALL TRANSFER OIL PUMP GEAR |
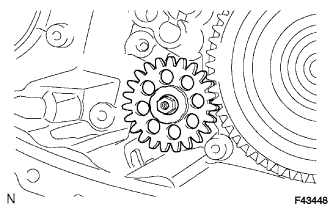 |
Apply gear oil to the sliding surface of the gear.
Install the gear with the nut.
| 34. INSTALL TRANSFER OIL PUMP BODY O-RING |
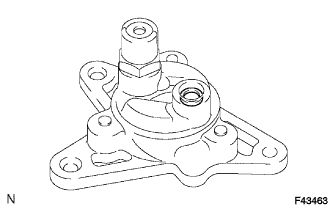 |
Coat a new O-ring with gear oil and install it to the oil pump body.
| 35. INSTALL TRANSFER OIL PUMP BODY SUB-ASSEMBLY |
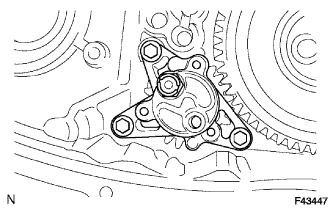 |
Install the pump body with the 3 bolts.
| 36. INSTALL TRANSFER CASE MAGNET |
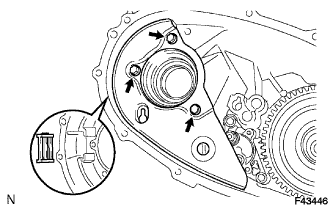 |
| 37. INSTALL TRANSFER OIL SEPARATOR SUB-ASSEMBLY |
Install the oil separator with the 3 bolts.
| 38. INSTALL NO. 1 TRANSFER CASE PLUG (for Filler) |
Install a new gasket and the filler plug.
| 39. INSTALL NO. 1 TRANSFER CASE PLUG (for Drain) |
Install a new gasket and the filler plug.
| 40. INSTALL TRANSFER INPUT GEAR RADIAL BALL BEARING |
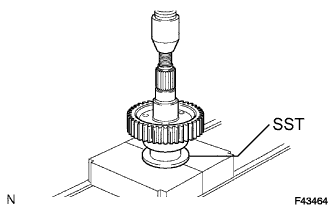 |
Apply gear oil to the contact surface of the bearing and driven sprocket.
Using SST and a press, press in a new bearing.
| 41. INSTALL TRANSFER DRIVEN SPROCKET BEARING |
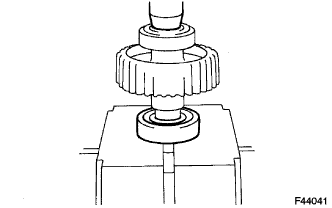 |
Apply gear oil to the contact surfaces of the bearing and driven sprocket.
Using a press, press in a new bearing.
| 42. INSTALL REAR TRANSFER OUTPUT SHAFT, FRONT DRIVE CHAIN AND DRIVEN SPROCKET SUB-ASSEMBLY |
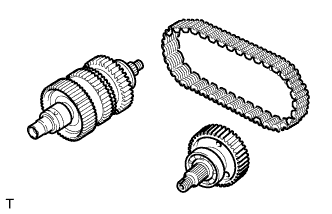 |
Install the output shaft and driven sprocket to the front drive chain.
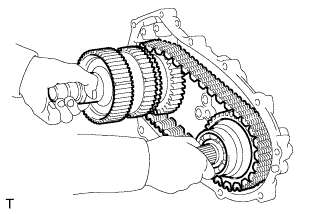 |
Mount the rear case in a vise.
Install the output shaft, front drive chain and driven sprocket to the rear case.
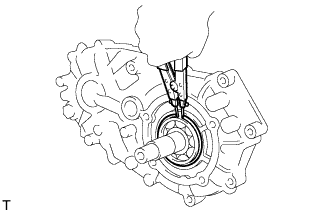 |
Using a snap ring expander, install the snap ring.
| 43. INSTALL CENTER DIFFERENTIAL LOCK FORK WITH FRONT DRIVE CLUTCH SLEEVE |
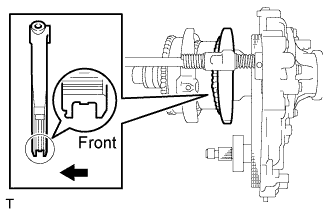 |
Install the clutch sleeve.
Install the front drive shift shaft, center differential lock fork, shift shaft stopper, 2 springs and 3 stoppers.
Install the ball and spring to the hole.
Apply adhesive to the threads of the No. 2 plug.
Install the No. 2 plug to the hole.
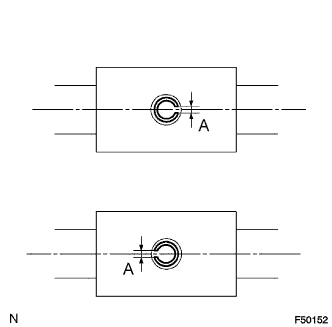 |
Using a pin punch and hammer, tap in the slotted pin.
| 44. INSTALL NO. 2 TRANSFER GEAR SHIFT FORK WITH TRANSFER HIGH AND LOW CLUTCH SLEEVE |
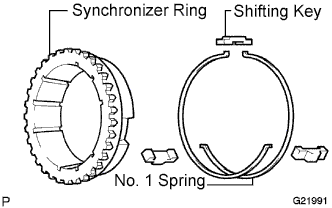 |
Manual transmission:
Install the synchronizer ring, 3 shifting keys and 2 springs.
Install the straight pin to the hole.
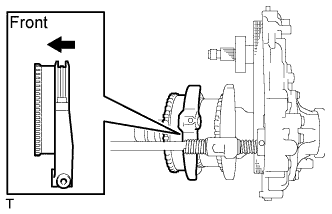 |
Install the No. 2 gear shift fork, high and low shift fork shaft and high and low clutch sleeve.
Install the ball and spring to the hole.
Apply adhesive to the threads of the No. 1 plug.
Install the No. 1 plug to the hole.
|
Using a pin punch and hammer, install the slotted pin.
| 45. INSTALL TRANSFER OUTPUT SHAFT FRONT NEEDLE ROLLER BEARING |
Apply gear oil to the bearing.
Install the bearing to the low planetary gear.
| 46. INSTALL REAR TRANSFER CASE |
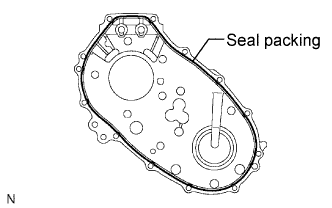 |
Apply seal packing to the rear case as shown in the illustration.
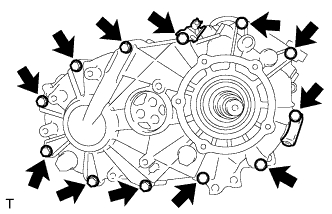 |
Install the clamps and rear case with the 12 bolts.
| 47. INSTALL TRANSFER OUTPUT SHAFT WASHER |
Install the speedometer drive gear and 2 output washers.
| 48. INSTALL TRANSFER EXTENSION HOUSING TYPE T OIL SEAL |
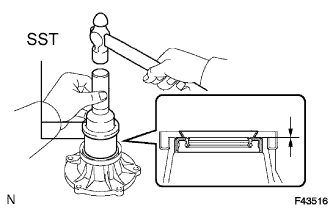 |
Using SST and a hammer, tap in a new oil seal until its surface is flush with the housing upper surface.
Coat the lip of the oil seal with MP grease.
| 49. INSTALL TRANSFER EXTENSION HOUSING SUB-ASSEMBLY |
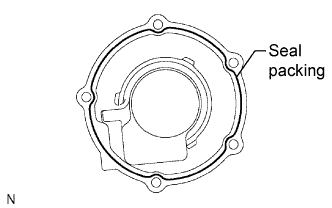 |
Apply seal packing to the extension housing as shown in the illustration.
Apply adhesive to the threads of the bolt.
Install the extension housing with the 5 bolts.
| 50. INSTALL SPEEDOMETER DRIVEN GEAR SUB-ASSEMBLY |
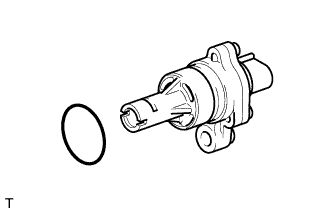 |
Install a new O-ring to the speedometer sensor.
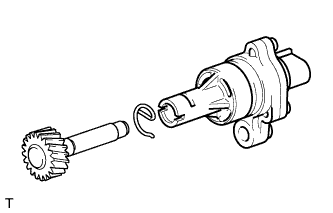 |
Install the speedometer driven gear subassembly to the speedometer sensor with the clip.
| 51. INSTALL SPEEDOMETER DRIVEN GEAR WITH VEHICLE SPEED SENSOR |
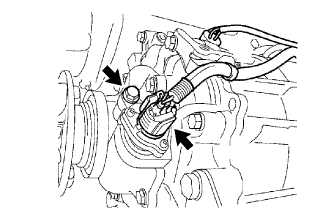 |
Install the speedometer driven gear assembly with vehicle speed sensor with the bolt.
Connect the connector.
| 52. INSTALL TRANSFER OUTPUT SHAFT COMPANION FLANGE OIL SEAL (for Front) |
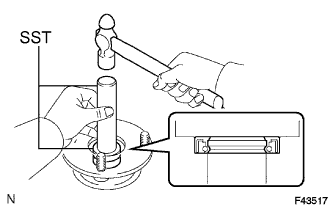 |
Using SST and a hammer, tap in a new oil seal.
Coat the lip of the oil seal with MP grease.
| 53. INSTALL TRANSFER OUTPUT SHAFT COMPANION FLANGE OIL SEAL (for Rear) |
Using SST and a hammer, tap in a new oil seal (for rear) in the same way as the oil seal (for front).
Coat the lip of the oil seal with MP grease.
| 54. INSTALL OUTPUT SHAFT COMPANION FLANGE SUB-ASSEMBLY (for Front) |
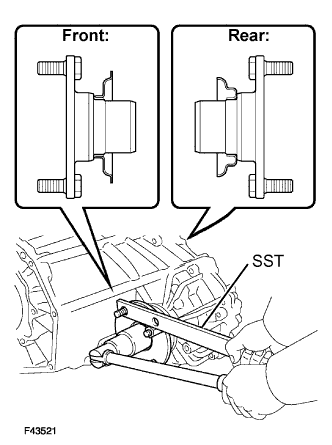 |
Apply gear oil to the connecting areas of the companion flange and driven sprocket.
Install the companion flange to the driven sprocket.
Using SST to hold the companion flange, install a new lock nut.
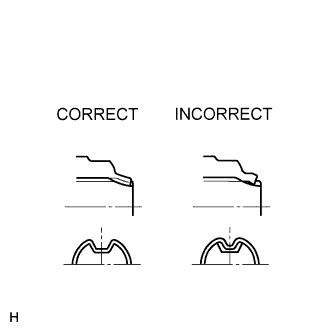 |
Using a chisel and hammer, stake the lock nut to the driven sprocket.
| 55. INSTALL OUTPUT SHAFT COMPANION FLANGE SUB-ASSEMBLY (for Rear) |
Apply gear oil to the connecting area of the companion flange and output shaft.
Install the companion flange to the output shaft.
Using SST to hold the companion flange, install a new lock nut.
| 56. INSTALL BREATHER OIL DEFLECTOR |
| 57. INSTALL TRANSFER CONTROL SHIFT LEVER RETAINER SUB-ASSEMBLY (for Transfer on Type) |
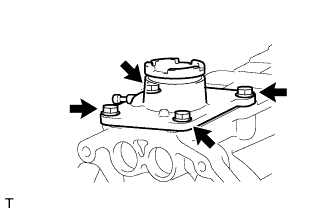 |
Install the retainer with the 4 bolts.
| 58. INSTALL TRANSFER CASE COVER SUB-ASSEMBLY (for Adapter on Type) |
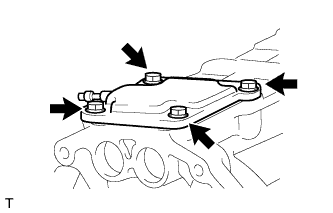 |
Install the case cover with the 4 bolts.
| 59. INSTALL TRANSFER COVER TYPE T OIL SEAL |
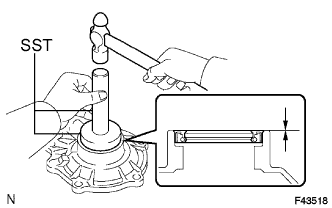 |
Using SST and a hammer, tap in a new oil seal until its surface is flush with the retainer upper surface.
| 60. INSTALL TRANSFER BEARING RETAINER SUB-ASSEMBLY |
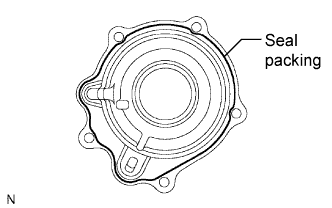 |
Apply seal packing to the bearing retainer as shown in the illustration.
Apply adhesive to the threads of the bolt.
Install the bearing retainer with the 5 bolts.
| 61. INSTALL TRANSFER GEAR SHIFT HEAD |
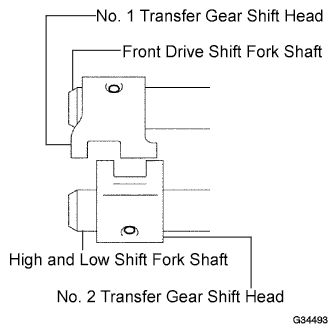 |
Install the No. 1 and No. 2 gear shift heads to the front drive shift fork shaft and high and low shift fork shaft.
|
Using a pin punch and hammer, tap in the 2 slotted pins to the No. 1 and No. 2 gear shift heads.
| 62. INSTALL TRANSFER INDICATOR SWITCH |
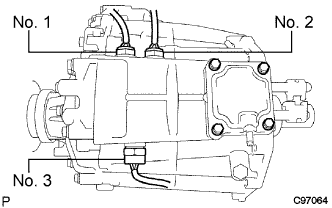 |
Install a new gasket and the indicator switch.
| No. 1 | Indicator switch (neutral position) for automatic transmission |
| No. 2 | Indicator switch (L4 position) |
| No. 3 | Indicator switch (differential lock) |