REAR BRAKE (for TASA Made) > REASSEMBLY |
| 1. INSTALL REAR WHEEL BRAKE CYLINDER CUP |
|
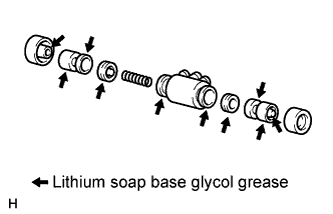
Apply lithium soap base glycol grease to 2 new cups and 2 pistons.
Install the 2 cups to each piston.
Install the compression spring and 2 pistons to the cylinder.
Install 2 new cylinder dust boots to the cylinder.
| 2. TEMPORARILY TIGHTEN REAR BRAKE DRUM BLEEDER PLUG |
Install the bleeder plug to the cylinder.
Install the cap.
| 3. INSTALL REAR WHEEL BRAKE CYLINDER ASSEMBLY LH |
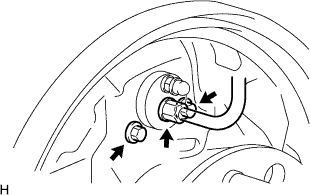 |
Install the cylinder with the 2 bolts.
Using a union nut wrench, connect the brake line.
| 4. APPLY HIGH TEMPERATURE GREASE |
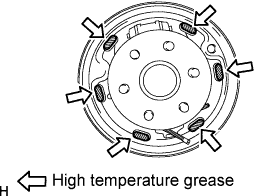 |
Apply high temperature grease to the surface of the backing plate where the shoe will be attached.
Apply high temperature grease to the anchor block plate and cable setting area.
| 5. INSTALL REAR BRAKE PARKING BRAKE SHOE LEVER SUB-ASSEMBLY |
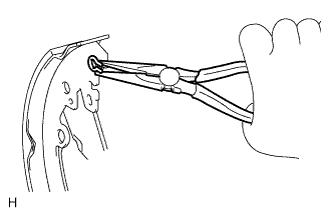 |
Using needle-nose pliers, install the lever with a new C-washer.
| 6. INSTALL BRAKE SHOES |
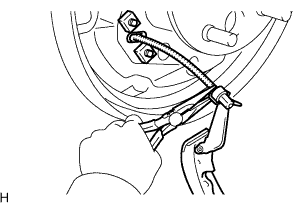 |
Using needle-nose pliers, connect the No. 3 parking brake cable to the parking brake shoe lever.
Install the strut set and return spring to the shoe.
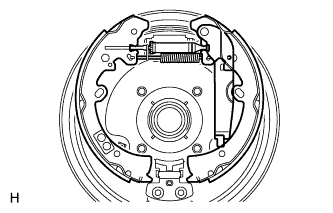 |
Attach the support clip to the exposed threads of the strut set.
Using needle-nose pliers, hook the support clip around the spring.
Install the front and rear brake shoes.
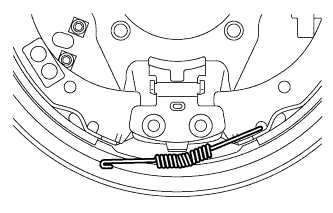 |
Move one of the shoes upward and install the shoe tension spring.
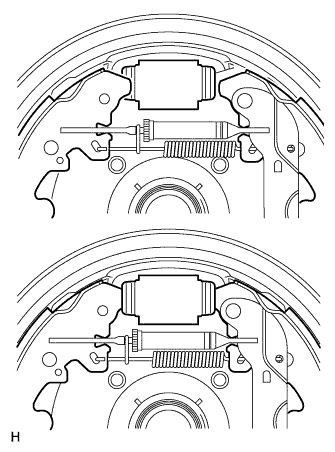 |
Install the shoe front or rear side to the cylinder. Then install the other side of the shoe to the other side of the cylinder.
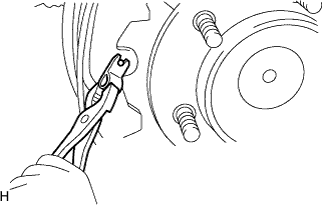 |
Using pliers, install the front brake shoe, rear brake shoe, pins and shoe hold down springs.
| 7. INSTALL REAR BRAKE AUTOMATIC ADJUST LEVER LH |
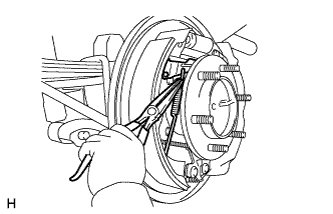 |
Using needle-nose pliers, install the lever and lever tension spring.
| 8. CHECK REAR BRAKE DRUM INSTALLATION |
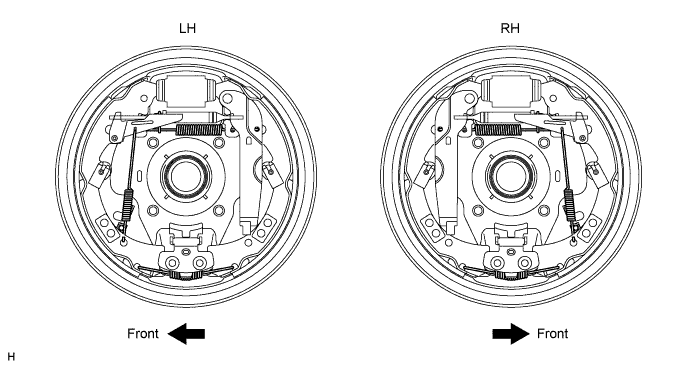
Check that each part is installed properly.
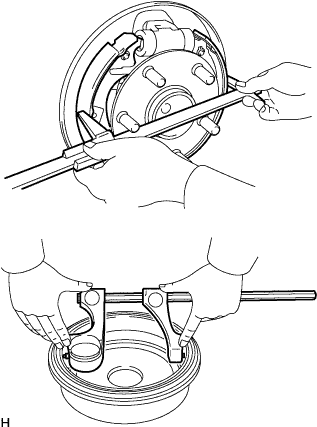 |
Measure the inside diameter of the drum and the diameter of the shoes. Check that the difference between the diameters is the correct shoe clearance.
| 9. INSTALL REAR BRAKE DRUM AND NEW GASKET |
| 10. FILL RESERVOIR WITH BRAKE FLUID (w/ VSC) |
| 11. FILL RESERVOIR WITH BRAKE FLUID (w/o VSC) |
| 12. BLEED AIR FROM BRAKE MASTER CYLINDER (w/ VSC) |
Using a union nut wrench, disconnect the 2 brake lines from the master cylinder.
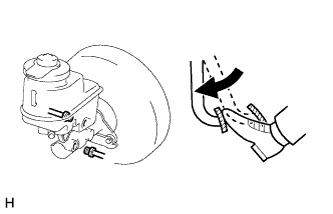 |
Slowly depress and hold the brake pedal.
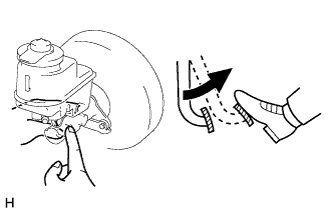 |
Cover the outer holes with your fingers, and release the pedal.
Repeat the 2 previous steps 3 or 4 times.
Using a union nut wrench, connect the 2 brake lines to the master cylinder.
| 13. BLEED AIR FROM BRAKE MASTER CYLINDER (w/o VSC) |
Remove the brake master cylinder reservoir filler cap assembly.
Add brake fluid to keep the level between the MIN and MAX lines of the reservoir while bleeding the brakes.
Using a union nut wrench, disconnect the 2 brake lines from the master cylinder.
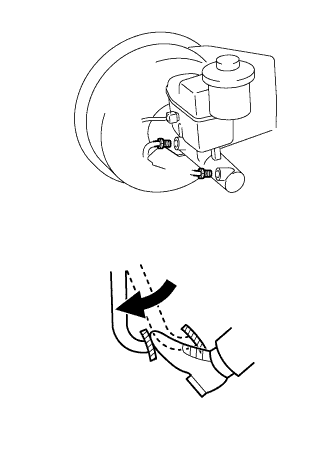 |
Slowly depress and hold the brake pedal.
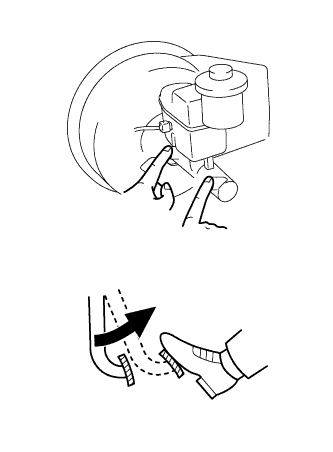 |
Block the tube holes with your fingers, and then release the brake pedal.
Remove the your fingers, slowly depress and hold the brake pedal, block the tube holes with your fingers again, and then release the brake pedal. Repeat this step 3 or 4 times.
Using a union nut wrench, connect the 2 brake tubes to the brake master cylinder assembly.
| 14. BLEED AIR FROM BRAKE LINE (w/ VSC) |
Remove the bleeder plug cap.
Connect a vinyl tube to the bleeder plugs.
Depress the brake pedal several times, and then loosen the bleeder plug with the pedal depressed.
When fluid stops coming out, immediately tighten the bleeder plug. Then release the pedal.
Repeat the 2 previous steps until all the air in the brake fluid is gone.
Tighten the bleeder plug.
Install the cap.
Bleed air from the brake line for each wheel by repeating the above procedures.
| 15. BLEED AIR FROM BRAKE LINE (w/o VSC) |
Remove the bleeder plug cap.
Connect the vinyl tube to the bleeder plugs.
Depress the brake pedal several times, and then loosen the bleeder plug with the pedal depressed.
When fluid stops coming out, immediately tighten the bleeder plug. Then release the pedal.
Repeat the 2 previous steps until all the air in the brake fluid is gone.
Tighten the bleeder plug.
Install the cap.
Bleed air from the brake line for each wheel by repeating the above procedures.
| 16. BLEED AIR FROM CLUTCH LINE (for Manual Transmission) |
Remove the brake master cylinder reservoir filler cap assembly.
Add brake fluid to keep the level between the MIN and MAX lines of the reservoir while bleeding the clutch line.
Remove the bleeder plug cap.
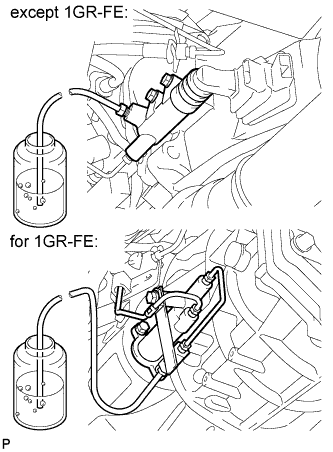 |
Connect a vinyl tube to the bleeder plug.
Depress the clutch pedal several times, and then loosen the bleeder plug with the pedal depressed.
At the point when fluid stops coming out, tighten the bleeder plug, and then release the clutch pedal.
Repeat the previous 2 steps until all the air in the fluid is completely bled out.
Tighten the bleeder plug.
Install the bleeder plug cap.
Check that all the air has been bled out of the clutch line.
Check for brake fluid leaks.
Check the brake fluid level in the reservoir.
w/o VSC:
w/ VSC:
Install the brake master cylinder reservoir filler cap assembly.
| 17. CHECK BRAKE FLUID LEVEL IN RESERVOIR (w/ VSC) |
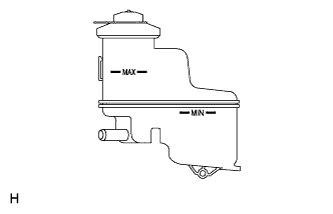 |
Check the fluid level.
If the brake fluid level is lower than the MIN line, check for leaks and inspect the disc pads. If necessary, refill the reservoir with brake fluid to the MAX line after repair or replacement.
| 18. CHECK BRAKE FLUID LEVEL IN RESERVOIR (w/o VSC) |
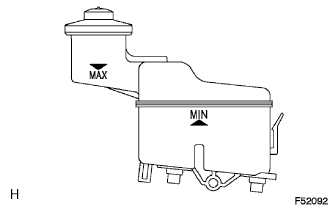 |
Check the fluid level and add fluid if necessary.
| 19. CHECK FOR BRAKE FLUID LEAKAGE |
| 20. INSTALL REAR WHEEL |
| 21. CHECK PARKING BRAKE LEVER TRAVEL |
Pull the parking brake lever to fully engage the parking brake.
Release the lever to disengage the parking brake.
Slowly pull the parking brake lever all the way, and count the number of clicks.
| 22. ADJUST PARKING BRAKE LEVER TRAVEL |
Completely release the parking brake lever.
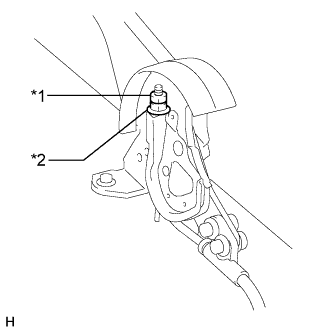 |
Loosen the lock nut.
| *1 | Lock Nut |
| *2 | No. 1 Parking Brake Cable Adjusting Nut |
Turn the No. 1 parking brake cable adjusting nut until the lever travel is correct.
Tighten the lock nut.