STEREO JACK ADAPTER ASSEMBLY > REMOVAL |
| 1. PRECAUTION |
| 2. DISCONNECT CABLE FROM NEGATIVE BATTERY TERMINAL |
| 3. REMOVE GLOVE COMPARTMENT DOOR ASSEMBLY |
|
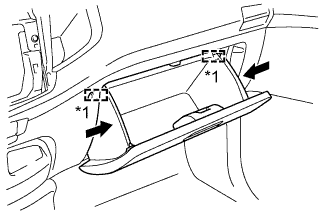
Slightly bend the upper part of the glove compartment door to release the 2 stoppers and open the glove compartment door until it is horizontal.
| *1 | Stopper |
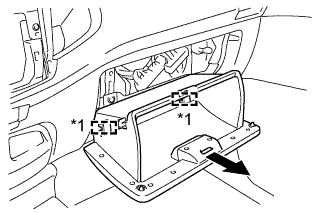 |
Pull the glove compartment door toward the rear of the vehicle to detach the 2 hinges and remove the glove compartment door.
| *1 | Hinge |
| 4. REMOVE LOWER INSTRUMENT PANEL FINISH PANEL SUB-ASSEMBLY |
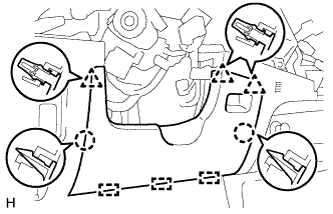 |
Detach the 2 claws, 3 clips and 3 guides and remove the lower instrument panel finish panel.
| 5. REMOVE SWITCH BASE |
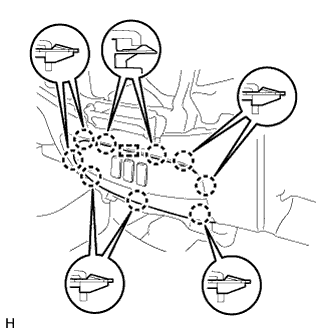 |
Detach the 9 claws and guide.
Disconnect the connectors and remove the switch base.
| 6. REMOVE NO. 1 STEREO JACK ADAPTER ASSEMBLY |
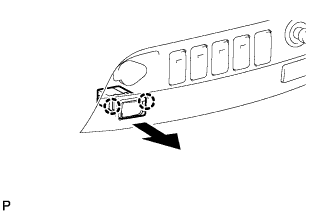 |
Detach the 2 claws and remove the stereo jack adapter.