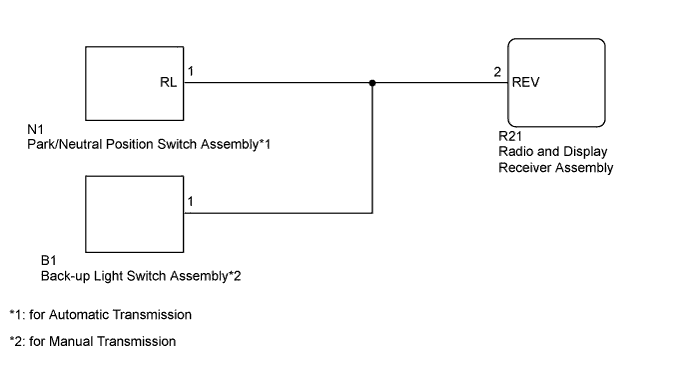
REAR VIEW MONITOR SYSTEM (for Radio and Display Type) > Reverse Signal Circuit |
| 1.CHECK VEHICLE SIGNAL (DISPLAY CHECK MODE) |
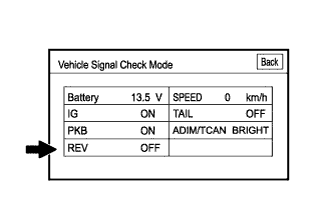 |
Enter the "Function Check/Setting I" mode and select "Vehicle Signal" (Click here).
Check that the display changes between ON and OFF according to the shift lever position.
| Shift Lever Position | Display |
| R | ON |
| Except R | OFF |
|
| ||||
| OK | ||
 | ||
| ||
| 2.CHECK RADIO AND DISPLAY RECEIVER ASSEMBLY |
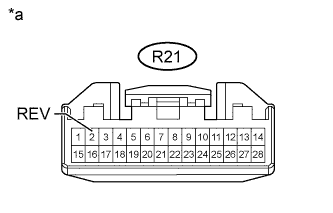 |
Disconnect the R21 radio and display receiver assembly connector.
Measure the voltage according to the value(s) in the table below.
| Tester Connection | Condition | Specified Condition |
| R21-2 (REV) - Body ground | Ignition switch ON, shift lever in R | 7.5 to 14 V |
| R21-2 (REV) - Body ground | Ignition switch ON, shift lever not in R | Below 1 V |
| *a | Front view of wire harness connector (to Radio and Display Receiver Assembly) |
| Result | Proceed to |
| OK | A |
| NG (for Automatic Transmission) | B |
| NG (for Manual Transmission) | C |
|
| ||||
|
| ||||
| A | ||
| ||
| ||
| 3.CHECK HARNESS AND CONNECTOR (RADIO AND DISPLAY RECEIVER ASSEMBLY - PARK/NEUTRAL POSITION SWITCH ASSEMBLY) |
Disconnect the R21 radio and display receiver assembly connector.
Disconnect the N1 park/neutral position switch assembly connector.
Measure the resistance according to the value(s) in the table below.
| Tester Connection | Condition | Specified Condition |
| R21-2 (REV) - N1-1 (RL) | Always | Below 1 Ω |
| R21-2 (REV) - Body ground | Always | 10 kΩ or higher |
| Result | Proceed to |
| OK (for A340F) | A |
| OK (for A750F) | B |
| NG | C |
|
| ||||
|
| ||||
| A | ||
| ||
| ||
| 4.CHECK HARNESS AND CONNECTOR (RADIO AND DISPLAY RECEIVER ASSEMBLY - BACK-UP LIGHT SWITCH ASSEMBLY) |
Disconnect the R21 radio and display receiver assembly connector.
Disconnect the B1 back-up light switch assembly connector.
Measure the resistance according to the value(s) in the table below.
| Tester Connection | Condition | Specified Condition |
| R21-2 (REV) - B1-1 | Always | Below 1 Ω |
| R21-2 (REV) - Body ground | Always | 10 kΩ or higher |
|
| ||||
| OK | ||
| ||
| ||

