 |
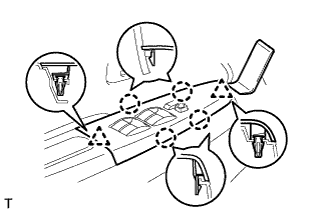
Using a moulding remover, detach the 2 clips and 4 claws.
FRONT DOOR BLACK OUT TAPE > REMOVAL |
| 1. PRECAUTION |
| 2. DISCONNECT CABLE FROM NEGATIVE BATTERY TERMINAL |
| 3. REMOVE POWER WINDOW REGULATOR MASTER SWITCH ASSEMBLY WITH FRONT DOOR ARMREST BASE PANEL |
|
Using a moulding remover, detach the 2 clips and 4 claws.
Disconnect the connector and remove the power window regulator master switch assembly with front door armrest base panel.
| 4. REMOVE FRONT DOOR LOWER FRAME BRACKET GARNISH LH |
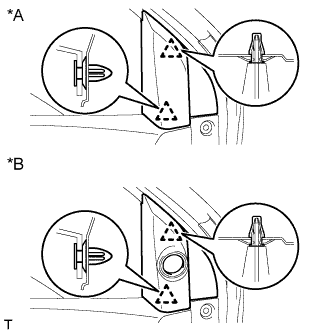 |
Detach the 2 clips and remove the front door lower frame bracket garnish.
| *A | w/o Front No. 2 Speaker |
| *B | w/ Front No. 2 Speaker |
| 5. REMOVE DOOR PULL HANDLE |
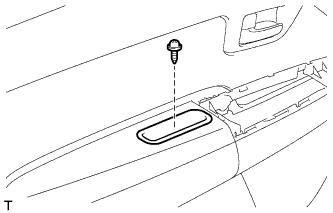 |
Remove the screw and door pull handle.
| 6. REMOVE FRONT DOOR TRIM BOARD SUB-ASSEMBLY LH |
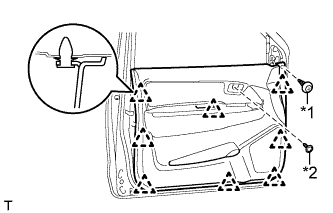 |
Remove the clip and screw.
Detach the 8 clips and remove the front door trim board.
| *1 | Clip |
| *2 | Screw |
| 7. REMOVE OUTER REAR VIEW MIRROR ASSEMBLY LH |
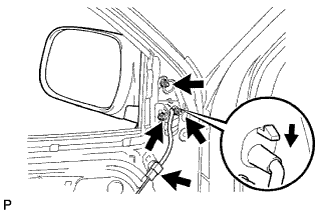 |
Disconnect the mirror connector.
Remove the 3 nuts.
Push down the claw and remove the outer rear view mirror assembly LH.
| 8. REMOVE FRONT DOOR INSIDE HANDLE SUB-ASSEMBLY LH |
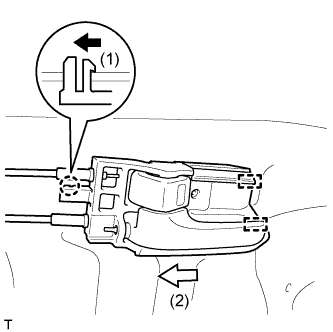 |
Detach the claw and 2 guides as indicated by the arrows in the order shown in the illustration.
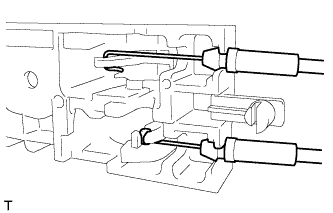 |
Disconnect the front door inside locking cable and front door lock remote control cable and remove the front door inside handle.
| 9. REMOVE FRONT DOOR NO. 1 TRIM BRACKET |
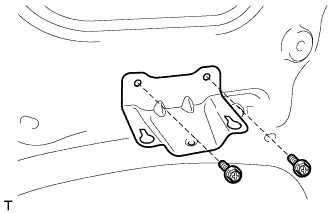 |
Remove the 2 screws and front door No. 1 trim bracket.
| 10. REMOVE FRONT DOOR SERVICE HOLE COVER LH |
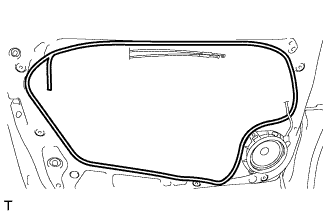 |
Pull out the front door inside locking cable, front door lock remote control cable and wire harness from the front door service hole cover, and then remove the front door service hole cover.
| 11. REMOVE FRONT DOOR GLASS SUB-ASSEMBLY LH |
Temporarily install the power window regulator master switch assembly with front door armrest base panel.
Connect the cable to the negative (-) battery terminal.
Move the front door glass sub-assembly so that the front door glass bolts can be seen.
Disconnect the cable from the negative (-) battery terminal.
Remove the power window regulator master switch assembly with front door armrest base panel.
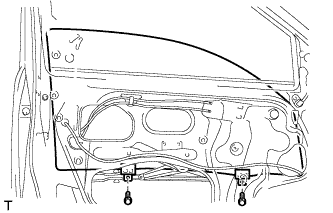 |
Remove the 2 bolts.
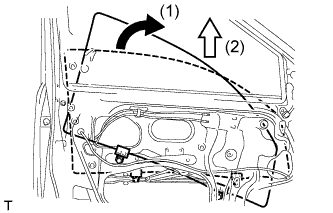 |
Remove the front door glass as indicated by the arrows in the order shown in the illustration.
| 12. REMOVE FRONT DOOR OUTER GLASS WEATHERSTRIP ASSEMBLY LH |
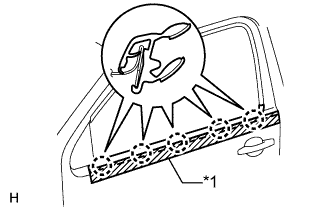 |
Put protective tape around the front door outer glass weatherstrip.
| *1 | Protective Tape |
Detach the 5 claws and remove the front door outer glass weatherstrip.
| 13. REMOVE FRONT DOOR GLASS RUN LH |
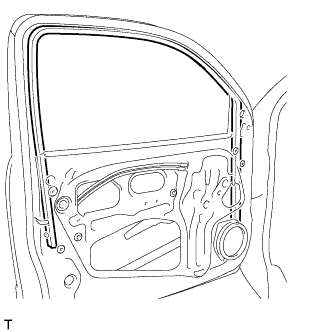 |
Remove the front door glass run.
| 14. REMOVE NO. 1 BLACK OUT TAPE LH |
| Item | Temperature |
| Vehicle Body | 40 to 60°C (104 to 140°F) |
| No. 1 Black Out Tape | 40 to 60°C (104 to 140°F) |
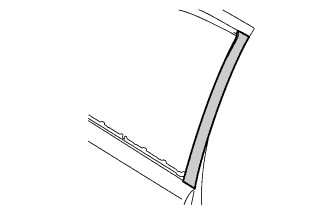 |
Pull back an edge of the No. 1 black out tape and pull it parallel to the vehicle body to remove it.