REAR SUSPENSION REAR COIL SPRING REMOVAL
CAUTION / NOTICE / HINT
The necessary procedures (adjustment, calibration, initialization, or registration) that must be performed after parts are removed, installed, or replaced during the rear coil spring removal/installation are shown below.
- Necessary Procedure After Parts Removed/Installed/Replaced:
Replacement Part or Procedure Necessary Procedures Effects/Inoperative when not Performed Link The vehicle height changes due to replacement of suspension components or after performing such operations as removal and reinstallation Headlight leveling ECU assembly initialization Headlight leveling function (  )
- HINT:
- ·
Use the same procedure for the RH and LH sides.
·The procedure listed below is for the LH side.
PROCEDURE

 1.REMOVE REAR WHEEL
48341B
2.REMOVE REAR NO. 1 SPRING BUMPER LH
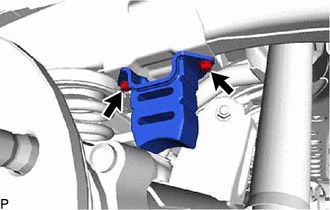
Remove the 2 bolts and rear No. 1 spring bumper LH from the frame.
46430
3.DISCONNECT NO. 3 PARKING BRAKE CABLE ASSEMBLY
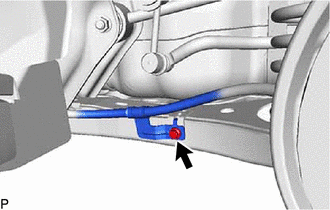
Remove the bolt and disconnect the No. 3 parking brake cable assembly from the lower control arm assembly LH.
48231B
4.REMOVE REAR COIL SPRING LH
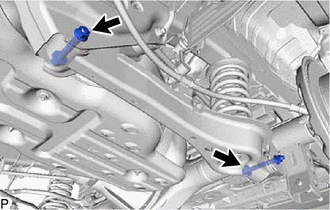
Loosen the 2 bolts of the lower control arm assembly LH.
- NOTICE:
-
Do not remove the bolts.
- HINT:
-
While fixing the nuts in place, loosen the bolts.
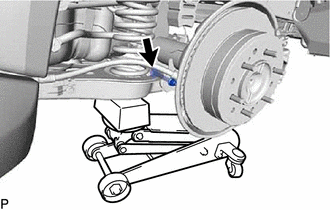
Support the lower control arm assembly LH with a jack.
Remove the bolt and nut.
Lower the lower control arm assembly LH until the coil spring tension is free, and then remove the rear coil spring LH and rear upper coil spring insulator LH.