SEAT REAR NO. 2 SEAT ASSEMBLY REMOVAL
CAUTION / NOTICE / HINT
- CAUTION:
- ·
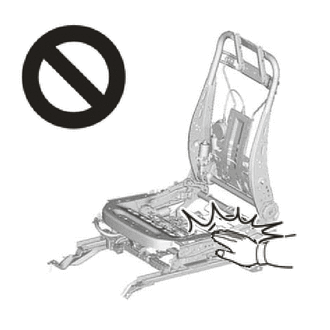
Wear protective gloves. Sharp areas on the parts may injure your hands.
·There is risk of injury.
- HINT:
- ·
Use the same procedure for the RH and LH sides.
·The procedure listed below is for the LH side.
PROCEDURE

 71940E
1.REMOVE NO. 2 SEAT HEADREST ASSEMBLY
Remove the No. 2 seat headrest assembly.
72928
2.REMOVE REAR SEAT CUSHION UNDER COVER LH
Set the rear No. 2 seat assembly LH to the upright position.
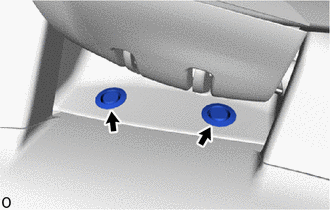
Remove the 2 hole plugs.
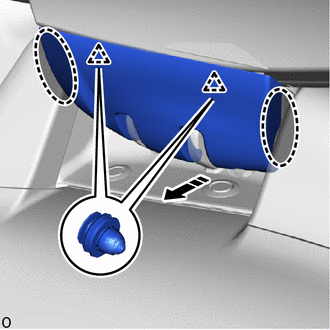

|
Place Hand Here |

|
Remove in this Direction |
Place your hand at the position shown in the illustration and pull in the remove direction to detach the clip to remove the rear seat cushion under cover LH.
71849C
3.REMOVE SEAT ADJUSTER COVER CAP LH
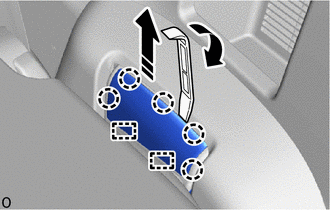
|
|
Remove in this Direction |
Lock the rear No. 2 seat leg assembly LH to the floor striker and set the rear No. 2 seat to the upright position.
Using moulding remover A, lift in the direction indicated by the arrow shown in the illustration and pull in the removal direction to detach the claw and guide to remove seat adjuster cover cap LH.
4.REMOVE REAR NO. 2 SEAT ASSEMBLY LH
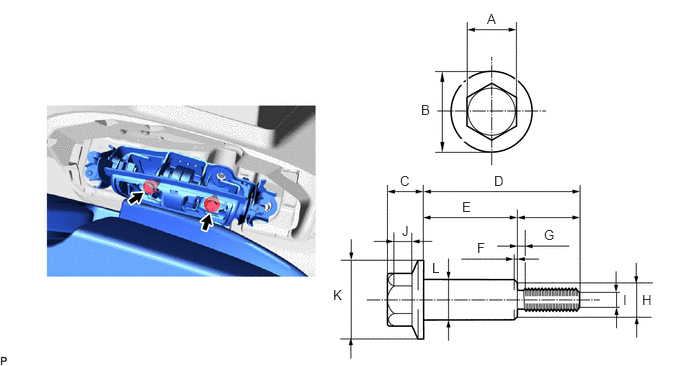
Install stopper bolt in that order, as shown in the illustration.
- Torque:
- 17 N*m (173 kgf*cm, 13 ft.*lbf)
- NOTICE:
-
For the stopper bolts, use replacement parts (72702-0K220) or bolts which conform to the appropriate measurements (M8 x 1.25)
- HINT:
-
The dimensions of each part of the stopper bolt are shown in the following chart.
| Part | Dimension |
|---|---|
| A | 14 mm |
| B | 24 mm or less |
| C | 9 mm or less |
| D | 45.4 mm |
| E | 33.1 mm |
| F | 1 mm or less (all around) |
| G | 2.5 mm or less |
| H | M8 x 1.25 |
| I | 10.5 mm or more |
| J | 4 mm or more |
| K | 22 mm or more |
| L | 12 mm |
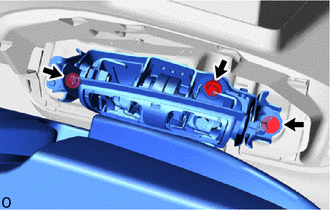
Remove the 3 bolts.
Remove the 2 pop-up prevention bolts and rear No. 2 seat assembly LH.
- NOTICE:
- ·
Protect the front seat legs.
- ·
Do not damage the rear No. 2 seat assembly LH, body exterior or interior parts.