WIPER / WASHER WASHER MOTOR(for Resin Type Bumper) REMOVAL
PROCEDURE

 1.DRAIN WASHER FLUID
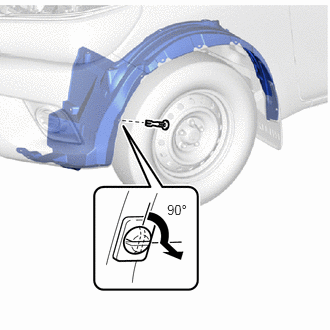

|
Turn in this Direction |
Using a screwdriver, turn the pin hold clip 90° and remove the pin hold clip.
for 2WD Model:
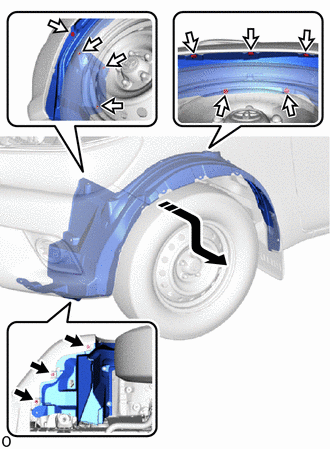
|
|
Screw |

|
Clip |

|
Slide in this Direction |
Remove the 3 screws.
Remove the 9 clips.
Slide the front fender liner LH toward the rear of the vehicle and down to create a clearance as shown in the illustration.
for 4WD Model, for Prerunner Model:
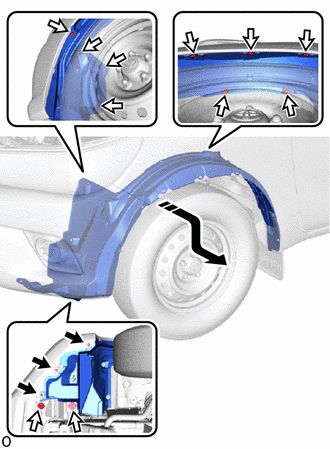
|
|
Screw |
|
|
Clip |
|
|
Slide in this Direction |
Remove the 3 screws.
Remove the 11 clips.
Slide the front fender liner LH toward the rear of the vehicle and down to create a clearance as shown in the illustration.
for 2.5 L Washer Jar:
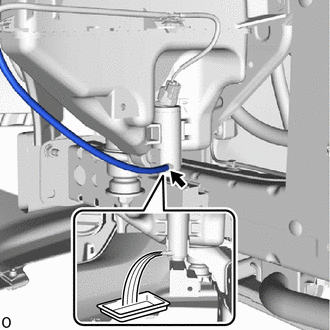
Disconnect the washer hose and drain the washer fluid.
- NOTICE:
-
Prepare a container before performing the procedure.
for 4.5 L Washer Jar:
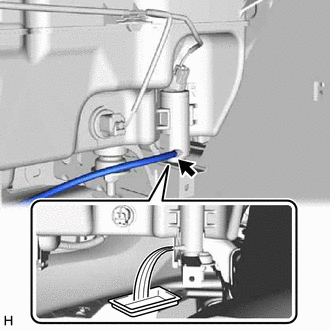
Disconnect the washer hose and drain the washer fluid.
- NOTICE:
-
Prepare a container before performing the procedure.
85310
2.REMOVE WINDSHIELD WASHER MOTOR AND PUMP ASSEMBLY
for 2.5 L Washer Jar:
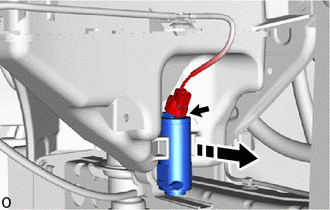
|
|
Remove in this Direction |
Disconnect the connector.
Pull as shown in the illustration to remove the windshield washer motor and pump assembly.
for 4.5 L Washer Jar:
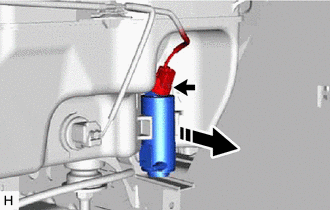
|
|
Remove in this Direction |
Disconnect the connector.
Pull as shown in the illustration to remove the windshield washer motor and pump assembly.
85301
3.REMOVE WASHER INLET SUB-ASSEMBLY
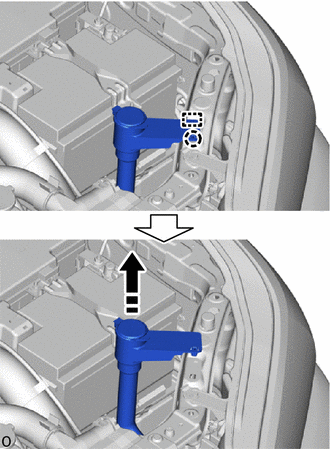
|
|
Remove in this Direction |
Detach the claw and guide and remove the washer inlet sub-assembly.
85330
4.REMOVE WINDSHIELD WASHER JAR ASSEMBLY
for 2.5 L Washer Jar:
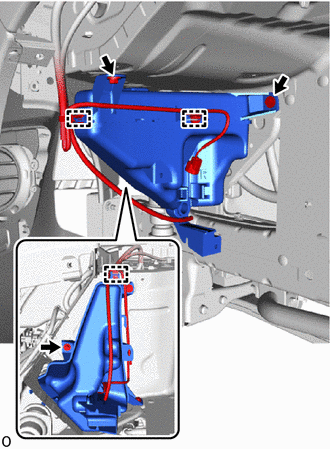
Detach the clamp.
Remove the 3 bolts and windshield washer jar assembly.
for 4.5 L Washer Jar, w/ Headlight Cleaner System:
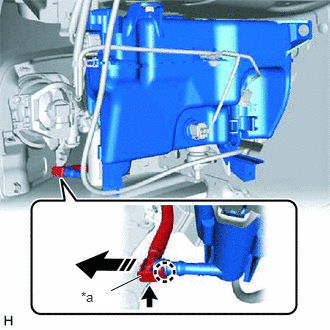
| *a | Tab |
|
|
Push |
|
|
Disconnect in this Direction |
Push the tab to detach the claw and disconnect the headlight cleaner hose as shown in the illustration.
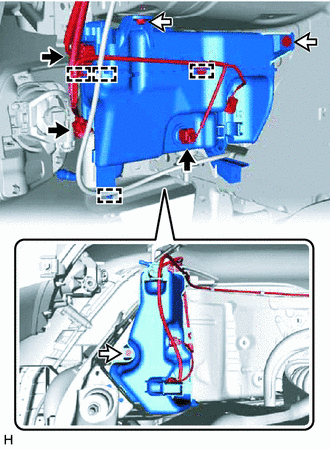
|
|
Connector |
|
|
Bolt |
Disconnect the 3 connectors.
Detach the clamp.
Remove the 3 bolts and windshield washer jar assembly.
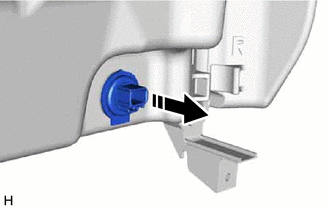
|
|
Remove in this Direction |
Remove the level warning switch assembly.
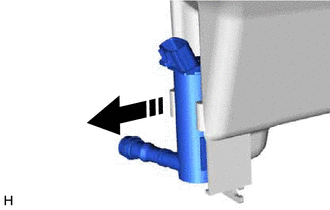
|
|
Remove in this Direction |
Remove the headlight cleaner motor and pump assembly.
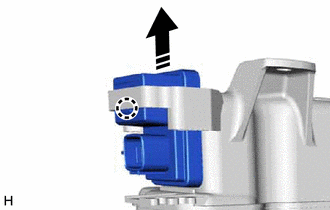
|
|
Remove in this Direction |
Detach the claw and remove the headlight cleaner control relay.
for 4.5 L Washer Jar, w/o Headlight Cleaner System:
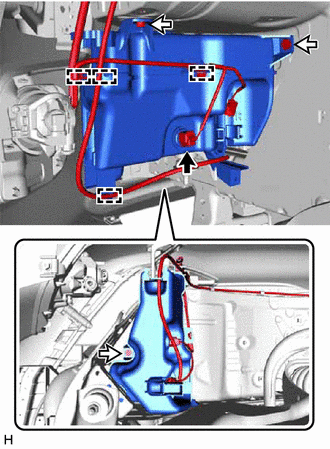
|
|
Connector |
|
|
Bolt |
Disconnect the connector.
Detach the clamp.
Remove the 3 bolts and windshield washer jar assembly.
|
|
Remove in this Direction |
Remove the level warning switch assembly.