DOOR LOCK FRONT DOOR LOCK REMOVAL
CAUTION / NOTICE / HINT
- HINT:
- ·
Use the same procedure for the RH and LH sides.
·The procedure listed below is for the LH side.
·Use the same procedure for RHD and LHD vehicles.
·The procedures listed below are for LHD vehicles.
·Fully open the front door glass sub-assembly LH before proceeding with work.
PROCEDURE

 1. PRECAUTION
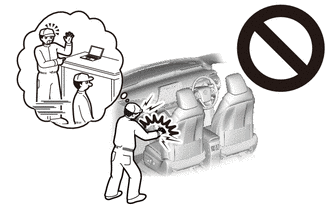
- CAUTION:
- w/ Curtain Shield Airbag:
-
-
Be sure to read Precaution thoroughly before servicing.
-
Click hereVehicle Interior>SUPPLEMENTAL RESTRAINT SYSTEMS>AIRBAG SYSTEM(for Type B)>PRECAUTION
- NOTICE:
-
After turning the ignition switch off, waiting time may be required before disconnecting the cable from the negative (-) battery terminal. Therefore, make sure to read the disconnecting the cable from the negative (-) battery terminal notice before proceeding with work.
-
Click hereGeneral>INTRODUCTION>REPAIR INSTRUCTION>PRECAUTION
2.DISCONNECT CABLE FROM NEGATIVE BATTERY TERMINAL
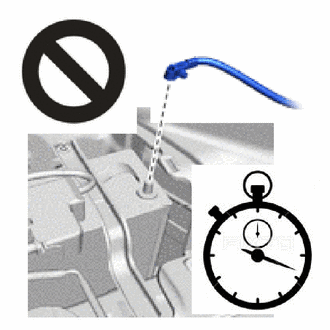
- CAUTION:
- w/ Curtain Shield Airbag:
-
- ·
Wait at least 90 seconds after disconnecting the cable from the negative (-) battery terminal to disable the SRS system.
·If the airbag deploys for any reason, it may cause a serious accident.
- NOTICE:
-
When disconnecting the cable, some systems need to be initialized after the cable is reconnected.
-
Click hereGeneral>INTRODUCTION>REPAIR INSTRUCTION>INITIALIZATION
67492A
3.REMOVE FRONT DOOR LOWER FRAME BRACKET GARNISH LH
74220
4.REMOVE FRONT ARMREST ASSEMBLY LH
5.REMOVE POWER WINDOW REGULATOR MASTER SWITCH ASSEMBLY WITH FRONT DOOR ARMREST BASE PANEL (for Driver Side, w/ Power Window)
6.REMOVE POWER WINDOW REGULATOR SWITCH ASSEMBLY WITH FRONT DOOR ARMREST BASE PANEL (for Front Passenger Side, w/ Power Window)
69260
7.REMOVE FRONT DOOR WINDOW REGULATOR HANDLE ASSEMBLY (w/o Power Window)
69284C
8.REMOVE FRONT DOOR INSIDE HANDLE BEZEL PLUG LH
67602
9.REMOVE FRONT DOOR TRIM BOARD SUB-ASSEMBLY LH
67832
10.REMOVE FRONT DOOR SERVICE HOLE COVER LH
68151C
11.REMOVE FRONT DOOR GLASS RUN LH
68102
12.REMOVE FRONT DOOR GLASS SUB-ASSEMBLY LH
67404F
13.REMOVE FRONT DOOR REAR LOWER FRAME SUB-ASSEMBLY LH
14.REMOVE FRONT DOOR OUTSIDE HANDLE COVER WITH LOCK CYLINDER ASSEMBLY (for Driver Side)
69320
15.REMOVE FRONT DOOR LOCK ASSEMBLY LH
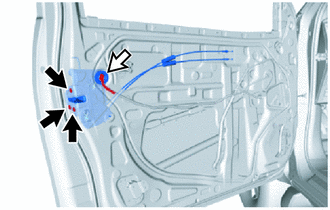

|
"Torx" Screw |

|
Connector |
Disconnect the connector.
Using a T30 "TORX" socket wrench, remove the 3 screws.
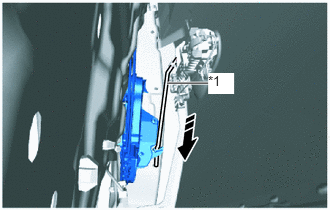
| *1 | front door lock open rod LH |

|
Remove in this Direction |
Disconnect the front door lock open rod LH and remove the front door lock assembly LH as shown in the illustration.
69036A
16.REMOVE FRONT DOOR LOCK COVER SUB-ASSEMBLY LH
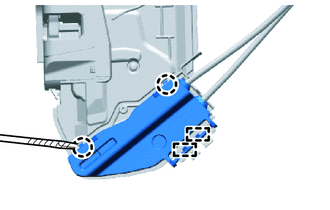

|
Protective Tape |
Using a thin-bladed screwdriver, detach the claw and clamp and remove the front door lock cover sub-assembly LH from the front door lock assembly LH.
- HINT:
-
Tape the thin-bladed screwdriver tip before use.
69760C
17.REMOVE FRONT DOOR INSIDE LOCKING CABLE ASSEMBLY LH
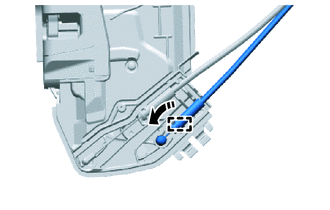
|
|
Remove in this Direction |
Detach the guide and remove the front door inside locking cable assembly LH from the front door lock assembly LH.
69720B
18.REMOVE FRONT DOOR LOCK REMOTE CONTROL CABLE ASSEMBLY LH
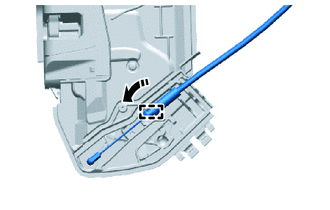
|
|
Remove in this Direction |
Detach the guide and remove the front door lock remote control cable assembly LH from the front door lock assembly LH.
69318C
19.REMOVE DOOR LOCK WIRING HARNESS SEAL
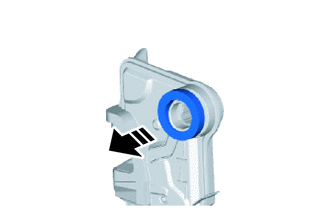
|
|
Remove in this Direction |
Remove the door lock wiring harness seal from the front door lock assembly LH.