INTERIOR PANELS / TRIM LOWER INSTRUMENT PANEL DISASSEMBLY
CAUTION / NOTICE / HINT
- HINT:
- ·
Use the same procedure for RHD and LHD vehicles.
·The procedure listed below is for LHD vehicles.
PROCEDURE

 55620
1.REMOVE INSTRUMENT PANEL CUP HOLDER ASSEMBLY (for Driver Side)
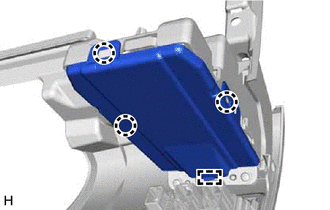
Detach the claw and guide and remove the cover.
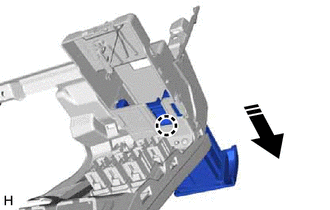

|
Remove in this Direction |
Detach the claw and remove the instrument panel cup holder assembly and instrument panel cup holder tray as shown in the illustration.
55620
2.REMOVE INSTRUMENT PANEL CUP HOLDER ASSEMBLY (for Passenger Side)
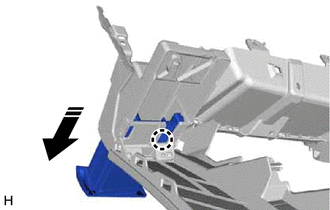
|
|
Remove in this Direction |
Detach the claw and remove the instrument panel cup holder assembly and instrument panel cup holder tray as shown in the illustration.
55618C
3.REMOVE INSTRUMENT PANEL CUP HOLDER (for Driver Side)
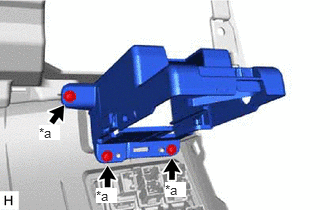
| *a | Screw <A> |
Remove the 3 screws <A>.
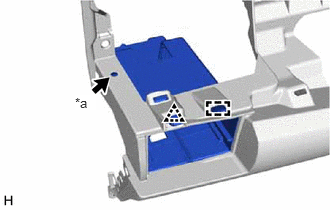
| *a | Clip <E> |
Remove the clip <E>.
Detach the clip and guide and remove the No. 1 instrument panel cup holder.
55618C
4.REMOVE INSTRUMENT PANEL CUP HOLDER (for Passenger Side)
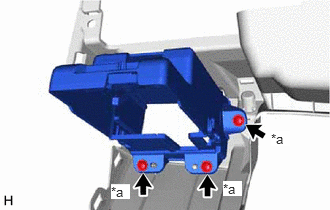
| *a | Screw <A> |
Remove the 3 screws <A>.
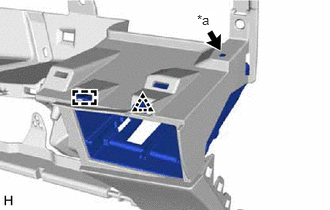
| *a | Clip <E> |
Remove the clip <E>.
Detach the clip and guide and remove the No. 1 instrument panel cup holder.
55446A
5.REMOVE NO. 1 SWITCH HOLE BASE
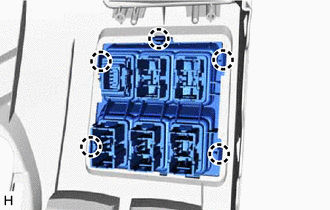
Detach the claw and remove the No. 1 switch hole base.
55557A
6.REMOVE GLOVE COMPARTMENT DOOR CHECK CUSHION
- HINT:
-
Use the same procedure for both glove compartment door check cushions.
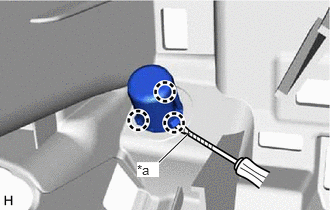
| *a | Protective Tape |
Using a screwdriver, detach the claw and remove the glove compartment door check cushion.
- HINT:
-
Tape the screwdriver tip before use.