BRAKE (REAR) REAR BRAKE(for TMT Made 4WD and Pre-Runner) REASSEMBLY
CAUTION / NOTICE / HINT
- HINT:
- ·
Use the same procedure for the RH and LH sides.
·The procedure listed below is for the LH side.
PROCEDURE

 04474
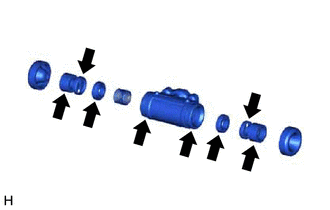
1.INSTALL REAR WHEEL CYLINDER KIT

|
Lithium soap base glycol grease |
Apply a light coat of lithium soap base glycol grease to 2 new rear wheel brake cylinder cups and 2 rear wheel cylinder pistons.
Install the 2 rear wheel brake cylinder cups to the 2 rear wheel cylinder pistons.
Install the rear brake wheel cylinder compression spring and 2 rear wheel cylinder pistons to the rear brake wheel cylinder assembly LH.
Install 2 new rear wheel cylinder dust boots to the rear brake wheel cylinder.
47547R
2.TEMPORARILY INSTALL REAR BRAKE DRUM BLEEDER PLUG
Install the rear brake drum bleeder plug to the rear brake wheel cylinder assembly LH.
- HINT:
-
The rear brake drum bleeder plug will be tightened to the torque specification in the "Bleed Brake Line" procedures.
47548R
3.INSTALL REAR BRAKE DRUM BLEEDER PLUG CAP
47570
4.INSTALL REAR WHEEL BRAKE CYLINDER ASSEMBLY LH
Install the rear brake wheel cylinder assembly to the backing plate with the 2 bolts.
- Torque:
- 11.5 N*m (117 kgf*cm, 8 ft.*lbf)
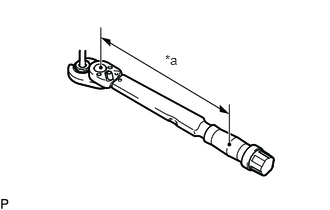
| *a | Torque Wrench Fulcrum Length |
Using a union nut wrench, connect the brake line to the rear wheel brake cylinder assembly LH.
- Torque:
- Specified tightening torque : 15.2 N*m (155 kgf*cm, 11 ft.*lbf)
- HINT:
- ·
Calculate the torque wrench reading when changing the fulcrum length of the torque wrench.
Click hereGeneral>INTRODUCTION>REPAIR INSTRUCTION>PRECAUTION
·When using a union nut wrench (fulcrum length of 22 mm (0.8661 in.)) + torque wrench (fulcrum length of 162 mm (6.3779 in.)): 13.4 N*m (137 kgf*cm, 10 ft.*lbf)
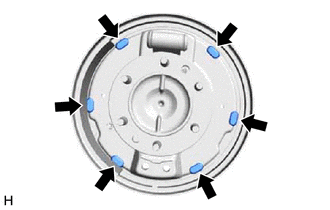
5.APPLY HIGH-TEMPERATURE GREASE
|
|
High-temperature grease |
Apply high-temperature grease to the surface of the backing plate which contacts the shoe.
47602
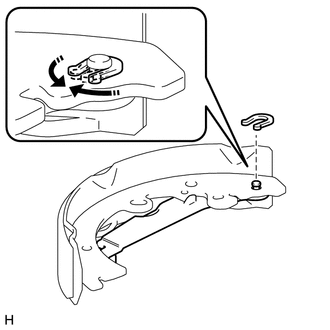
6.INSTALL REAR BRAKE PARKING BRAKE SHOE LEVER SUB-ASSEMBLY

|
Install in this Direction |
Install the rear brake parking brake shoe lever sub-assembly with a new C-washer.
7.INSTALL BRAKE SHOES
Using needle-nose pliers, connect the No. 3 parking brake cable assembly to the rear brake parking brake shoe lever sub-assembly.
Install the parking brake shoe strut set and parking brake shoe return spring to the brake shoe.
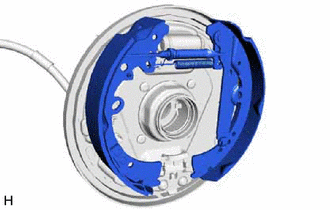
Attach the support clip to exposed threads of the parking brake shoe strut set.
- NOTICE:
-
Make sure the support clip does not contact the adjuster nut.
Using needle-nose pliers, hook the support clip around the parking brake shoe return spring.
- NOTICE:
-
Be careful not to damage the parking brake shoe return spring.
Install the front brake shoe and rear brake shoe.
Move one of the shoes upward and install the shoe tension spring.
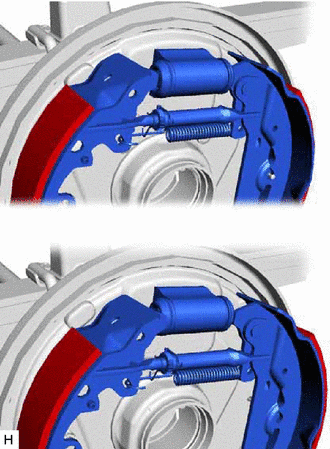
Install the shoe front or rear side to the rear wheel brake cylinder assembly LH. Then install the other side of the shoe to the other side of the rear wheel brake cylinder assembly LH.
- HINT:
-
After one side of the shoe is installed to the cylinder, hold that side of the shoe steady. Then widen the opening of the shoe by pulling the other side of the shoe outward and install it to the other side of the rear wheel brake cylinder assembly LH.
- NOTICE:
-
Be careful not to damage the rear wheel cylinder boot.
Using pliers, install the front brake shoe, rear brake shoe, pins and shoe hold down springs.
47644A
8.INSTALL REAR BRAKE AUTOMATIC ADJUST LEVER LH
Install the rear brake automatic adjust lever LH and rear brake automatic adjust lever tension spring to the front brake shoe.
42403
9.CHECK REAR BRAKE DRUM INSTALLATION
Check that each part is installed properly as shown in the illustration.
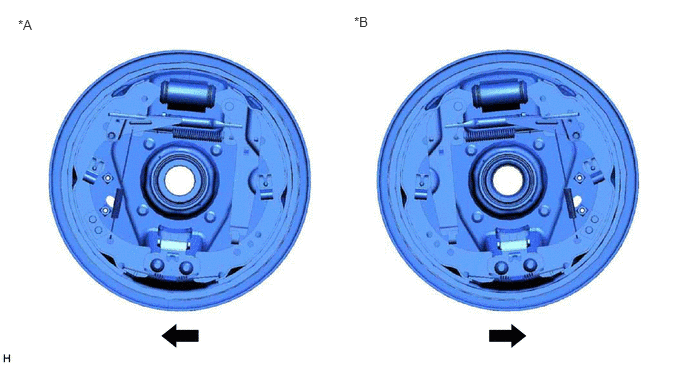
| *A | LH Side | *B | RH side |
|
|
Front | - | - |
- NOTICE:
-
There should be no oil or grease on the contact surfaces of the shoe lining and drum.