POWER DISTRIBUTION MAIN BODY ECU(for RHD) REMOVAL
PROCEDURE

 1. PRECAUTION
- NOTICE:
-
After turning the ignition switch off, waiting time may be required before disconnecting the cable from the negative (-) battery terminal. Therefore, make sure to read the disconnecting the cable from the negative (-) battery terminal notice before proceeding with work.
-
Click hereGeneral>INTRODUCTION>REPAIR INSTRUCTION>PRECAUTION
2.DISCONNECT CABLE FROM NEGATIVE BATTERY TERMINAL
- NOTICE:
-
When disconnecting the cable, some systems need to be initialized after the cable is reconnected.
-
Click hereGeneral>INTRODUCTION>REPAIR INSTRUCTION>INITIALIZATION
55550
3.REMOVE GLOVE COMPARTMENT DOOR ASSEMBLY
55054
4.REMOVE GLOVE COMPARTMENT DOOR STOPPER SUB-ASSEMBLY
55607
5.REMOVE NO. 2 INSTRUMENT PANEL UNDER COVER SUB-ASSEMBLY
82730
6.REMOVE INSTRUMENT PANEL JUNCTION BLOCK ASSEMBLY
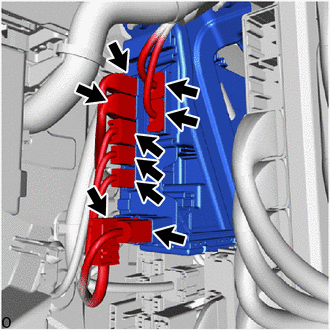
Disconnect the front side of the 9 connectors.
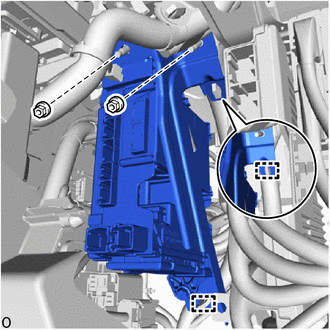
Detach the 2 wire harness clamps.
Remove the 2 nuts and instrument panel junction block assembly.
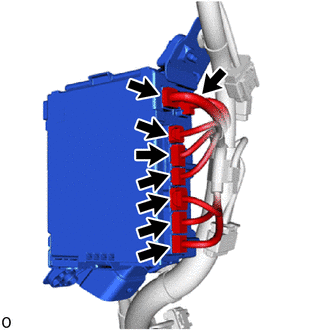
Disconnect the back side of the 8 connectors.
7.REMOVE WIRE HARNESS CLAMP BRACKET
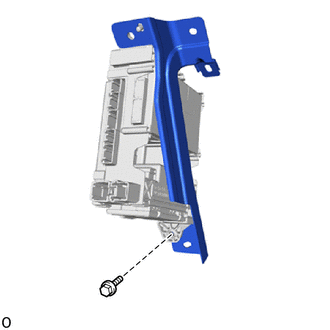
Remove the bolt and wire harness clamp bracket.
89221B
8.REMOVE BODY ECU
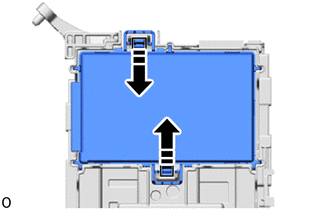

|
Press in this Direction |
Press the 2 levers of the body ECU to release the lock.
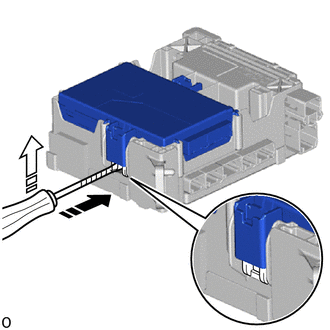
|
|
Insert in this Direction |

|
Raise in this Direction |

|
Protective Tape |
With the body ECU released, insert a screwdriver with its tip wrapped with protective tape horizontally between the body ECU and junction block.
- NOTICE:
- ·
Use a screwdriver with a diameter between 5.0 mm (0.197 in.) and 6.3 mm (0.248 in.) and a length of approximately 90 mm (3.54 in.).
·Do not insert the screwdriver under the connector socket of the body ECU.
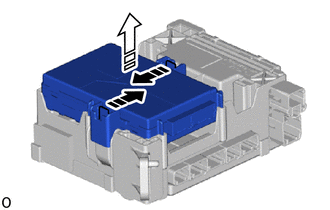
|
|
Press in this Direction |
|
|
Remove in this Direction. |
Press the 2 levers of the body ECU again and pull up the body ECU to remove it.
- NOTICE:
-
Do not touch the ECU connector.