FRONT SUSPENSION FRONT UPPER SUSPENSION ARM(for 2WD) REMOVAL
CAUTION / NOTICE / HINT
The necessary procedures (adjustment, calibration, initialization, or registration) that must be performed after parts are removed, installed, or replaced during the front upper suspension arm removal/installation are shown below.
- Necessary Procedure After Parts Removed/Installed/Replaced:
Replacement Part or Procedure Necessary Procedures Effects/Inoperative when not Performed Link Front wheel alignment adjustment ·Clearing zero point calibration data
·Yaw rate and acceleration sensor zero point calibration
·DTCs are output
·ABS warning light illumination
·Slip indicator light illumination
·VSC disable or malfunctioning
(  )
- HINT:
- ·
Use the same procedure for the RH and LH sides.
·The procedure listed below is for the LH side.
PROCEDURE

 1.REMOVE FRONT WHEEL
47313J
2.DISCONNECT FRONT FLEXIBLE HOSE
48630
3.REMOVE FRONT UPPER SUSPENSION ARM ASSEMBLY LH
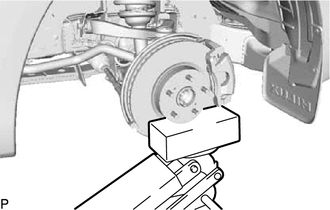
Support the front axle with a jack.
Remove the clip and nut.
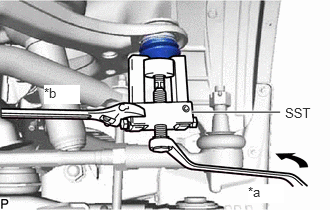
| *a | Turn |
| *b | Hold |
Using SST, disconnect the upper ball joint from the steering knuckle.
- SST
- 09628-62011
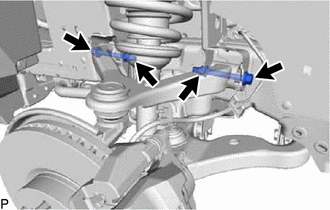
Remove the 2 nuts and 2 bolts.
Remove the front upper suspension arm assembly LH.
48632B
4.REMOVE FRONT UPPER SUSPENSION ARM BUSH LH
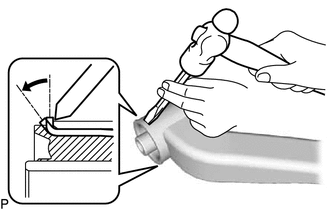
Using a hammer and chisel, strike and bend the entire flange of the front upper suspension arm bush LH as shown in the illustration.
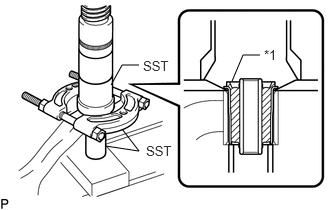
| *1 | Front Upper Suspension Arm Bush LH |
Using SST and a press, press out the front upper suspension arm bush LH.
- SST
- 09613-26010
09632-36010
09950-00020
5.REMOVE UPPER BALL JOINT DUST COVER
Remove the dust cover set ring and upper ball joint dust cover from the front upper suspension arm assembly LH.
- NOTICE:
- ·
Do not damage the upper ball joint dust cover.
·If the upper ball joint dust cover is damaged, replace it.
43360
6.REMOVE FRONT UPPER BALL JOINT
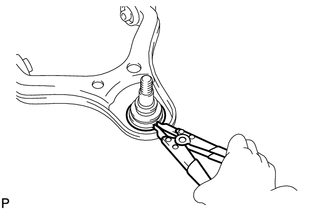
Using a snap ring expander, remove the snap ring.
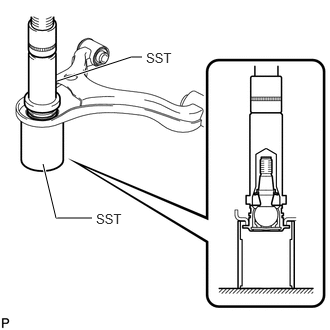
Using SST and a press, press out the front upper ball joint.
- SST
- 09612-30012
09388-40010