HEATING / AIR CONDITIONING FRONT AIR CONDITIONING UNIT DISASSEMBLY
CAUTION / NOTICE / HINT
- HINT:
- ·
Use the same procedure for RHD and LHD vehicles.
·The procedure listed below is for LHD vehicles.
PROCEDURE

 87114B
1.REMOVE HEATER COVER
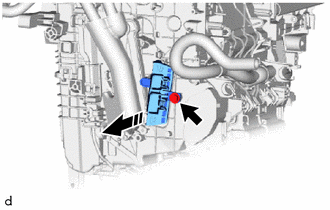

|
Remove in this Direction |
Remove the screw and heater cover.
87130D
2.REMOVE BLOWER ASSEMBLY
88505
3.REMOVE AIR CONDITIONING DUCT SUB-ASSEMBLY (for Automatic Air Conditioning System)
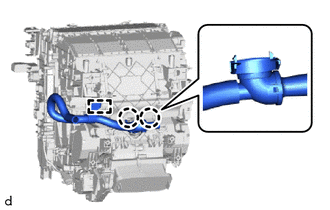
Detach the claw and clamp and remove the air conditioning duct sub-assembly.
82210K
4.REMOVE AIR CONDITIONING HARNESS ASSEMBLY (for Automatic Air Conditioning System)
Disconnect the 3 connectors.
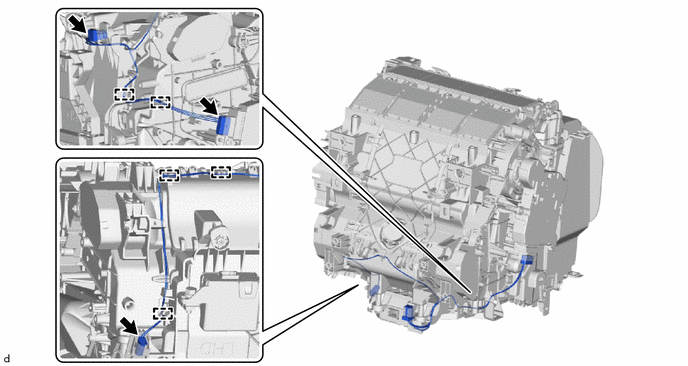
Detach the clamp and remove the air conditioning harness assembly.
88650N
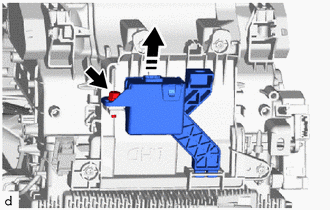
5.REMOVE AIR CONDITIONING AMPLIFIER ASSEMBLY
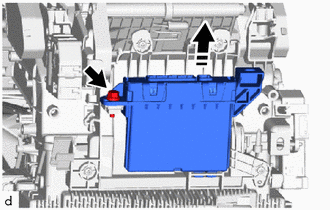
|
|
Remove in this Direction |
for Automatic Air Conditioning System:
Remove the bolt and air conditioning amplifier assembly.
|
|
Remove in this Direction |
for Manual Air Conditioning System:
Remove the bolt and air conditioning amplifier assembly.
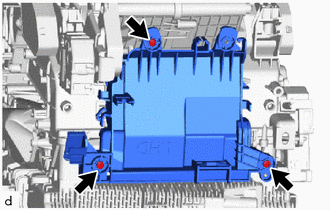
Remove the 3 screws and air conditioning amplifier bracket.
55906A
6.REMOVE DEFROSTER DAMPER CONTROL CABLE SUB-ASSEMBLY (for Manual Air Conditioning System)
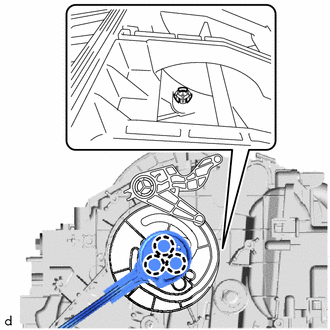
Detach the claw and remove the defroster damper control cable sub-assembly.
55909A
7.REMOVE AIR MIX DAMPER CONTROL CABLE SUB-ASSEMBLY (for Manual Air Conditioning System)
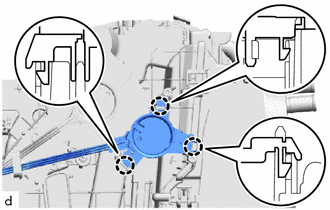
Detach the claw and remove the defroster damper control cable sub-assembly.
87050C
8.REMOVE NO. 1 AIR CONDITIONING RADIATOR DAMPER SERVO SUB-ASSEMBLY (for Automatic Air Conditioning System)
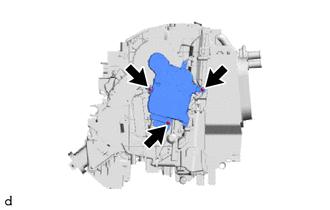
Remove the 3 screws and No. 1 air conditioning radiator damper servo sub-assembly.
87107A
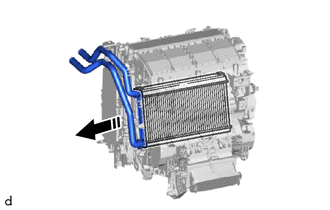
9.REMOVE HEATER RADIATOR UNIT SUB-ASSEMBLY
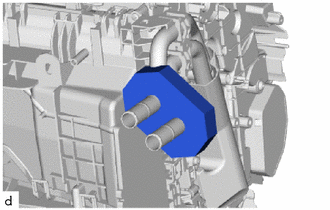
Remove the packing.
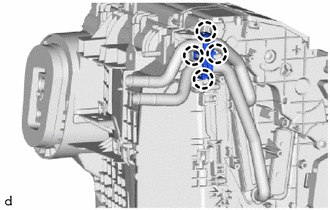
Detach the claw and remove the heater clamp.
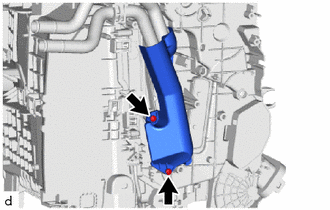
Remove the 2 screws and heater radiator cover.
|
|
Remove in this Direction |
Remove the heater radiator unit sub-assembly as shown in the illustration.
88515
10.REMOVE COOLER EXPANSION VALVE
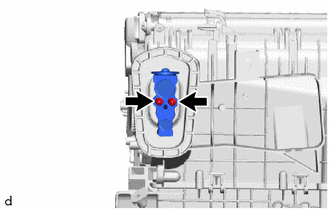
Using a 4 mm hexagon socket wrench, remove the 2 bolts and cooler expansion valve.
Remove the 2 O-rings from the No. 1 cooler evaporator sub-assembly.
88501
11.REMOVE NO. 1 COOLER EVAPORATOR SUB-ASSEMBLY
Remove the 2 screws.
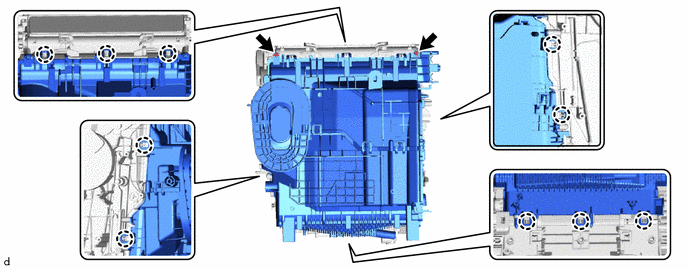
Detach the claw and remove the upper heater case from the lower heater case.
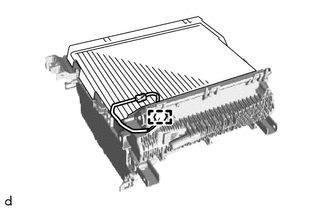
Detach the connector clamp.
Remove the No. 1 cooler evaporator sub-assembly together with the No. 1 cooler thermistor from the upper heater case.
88625
12.REMOVE NO. 1 COOLER THERMISTOR