INTERIOR PANELS / TRIM FRONT CONSOLE BOX(w/ Console Box Lid) INSTALLATION
CAUTION / NOTICE / HINT
- HINT:
- ·
Use the same procedure for RHD and LHD vehicles.
·The procedure listed below is for LHD vehicles.
·A bolt without a torque specification is shown in the standard bolt chart.
Click hereGeneral>SPECIFICATIONS>STANDARD BOLT>SPECIFIED TORQUE FOR STANDARD BOLTS
PROCEDURE

 58810J
1.INSTALL CONSOLE BOX ASSEMBLY
for Automatic Transmission:
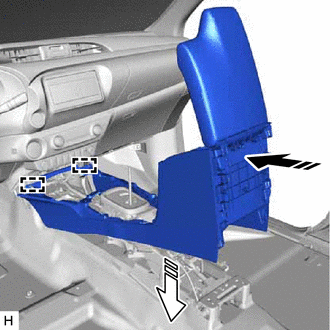

|
Install in this Direction (1) |

|
Install in this Direction (2) |
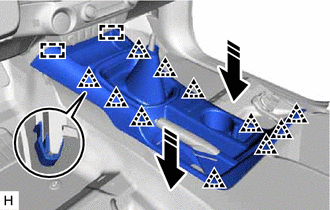
Attach the guide to install the console box assembly as shown in the illustration.
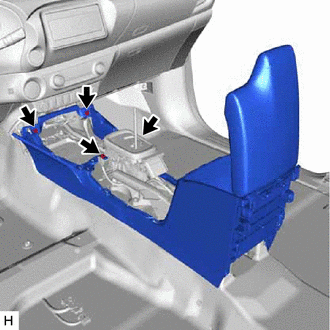
Install the 4 screws.
Connect the connector.
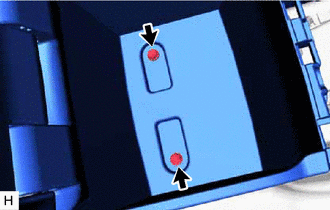
Install the 2 bolts.
for Manual Transmission:
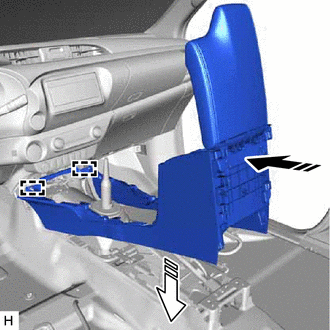
|
|
Install in this Direction (1) |
|
|
Install in this Direction (2) |
Attach the guide to install the console box assembly as shown in the illustration.
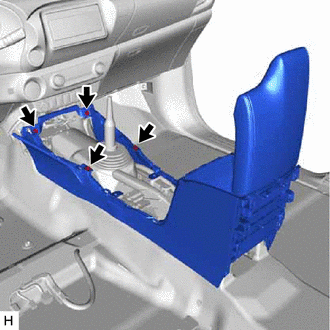
Install the 4 screws.
Connect the connector.
Install the 2 bolts.
58815B
2.INSTALL CONSOLE BOX CARPET
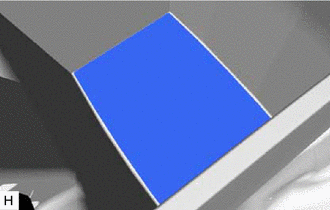
Install the console box carpet.
58903A
3.INSTALL REAR CONSOLE END PANEL SUB-ASSEMBLY
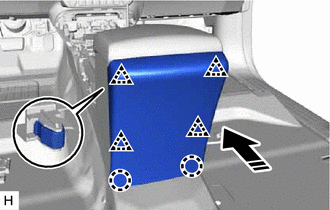
|
|
Install in this Direction |
Attach the claw and clip to install the rear console end panel sub-assembly as shown in the illustration.
58804A
4.INSTALL UPPER CONSOLE PANEL SUB-ASSEMBLY
for Automatic Transmission:
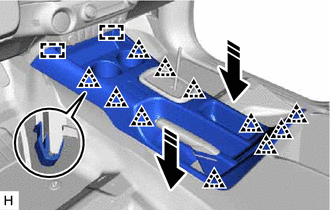
|
|
Install in this Direction |
Connect the connector.
Attach the guide and clip to install the upper console panel sub-assembly as shown in the illustration.
Fasten the zip fastener of the parking brake hole cover sub-assembly.
- HINT:
- ·
Before installing, make sure to move the shift lever to N.
·Make sure that the upper console panel and parking brake hole cover are securely installed.
·Make sure that the parking brake hole cover and parking brake lever are securely installed.
for Manual Transmission:
|
|
Install in this Direction |
Connect the connector.
Attach the guide and clip to install the upper console panel sub-assembly as shown in the illustration.
Fasten the zip fastener of the parking brake hole cover sub-assembly.
- HINT:
- ·
Make sure that the upper console panel and parking brake hole cover are securely installed.
·Make sure that the parking brake hole cover and parking brake lever are securely installed.
33504F
5.INSTALL SHIFT LEVER KNOB SUB-ASSEMBLY
for Automatic Transmission:
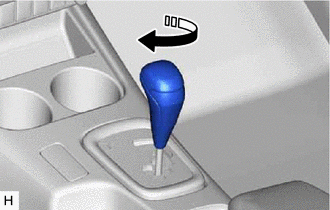
|
|
Install in this Direction |
Install the shift lever knob sub-assembly and twist it as shown in the illustration.
for Manual Transmission:
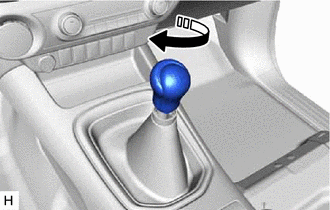
|
|
Install in this Direction |
Install the shift lever knob sub-assembly and twist it as shown in the illustration.
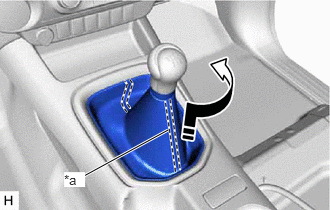
| *a | Double Stitch |
|
|
Install in this Direction |
Connect the shifting hole cover and twist it as shown in the illustration.
- HINT:
-
Make sure that the double stitch is in the position shown in the illustration.