R151F MANUAL TRANSMISSION / TRANSAXLE OUTPUT SHAFT REASSEMBLY
PROCEDURE

 33364
1.INSTALL NO. 2 TRANSMISSION HUB SLEEVE
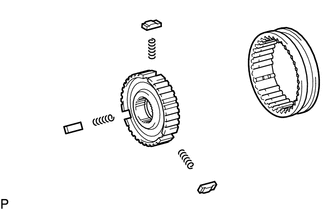
Install the 3 No. 2 synchromesh shifting key springs and 3 No. 2 synchromesh shifting keys to the No. 2 transmission clutch hub.
- NOTICE:
-
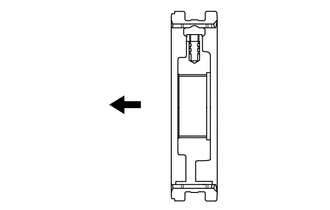 0,0 0,0 false

Front Side
-
Be careful of the direction of the No. 2 transmission hub sleeve and that of the No. 2 transmission clutch hub.
Apply gear oil to the sliding part of the No. 2 transmission hub sleeve, and install it to the No. 2 transmission clutch hub.
33333A
2.INSTALL 3RD GEAR NEEDLE ROLLER BEARING
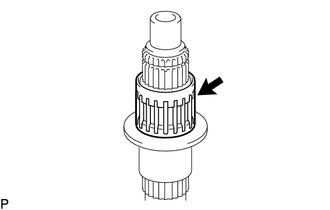
Apply gear oil to the 3rd gear needle roller bearing, and install it to the output shaft.
33333
3.INSTALL 3RD GEAR
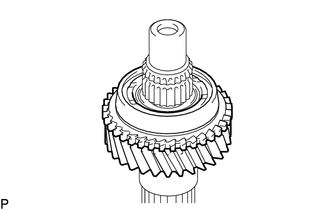
Apply gear oil to the 3rd gear, and install it to the output shaft.
33038E
4.INSTALL NO. 2 SYNCHRONIZER RING SET (FOR 3RD GEAR)
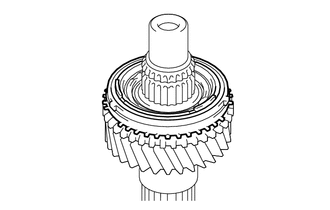
Apply gear oil to the No. 2 synchronizer ring set (for 3rd gear), and install it to the 3rd gear.
33362
5.INSTALL NO. 2 TRANSMISSION CLUTCH HUB
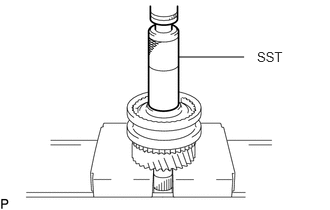
Using SST and a press, press in the No. 2 transmission clutch hub to the output shaft.
- SST
- 09608-06041
- NOTICE:
- ·
Install the hub while aligning the cutout of the transmission clutch hub and the protrusion of the synchronizer ring.
·The 3rd gear should be able to rotate smoothly.
Select a snap ring so that the clearance between the No. 2 transmission clutch hub and clutch hub set shaft snap ring is within the specification.
- NOTICE:
-
Do not damage the sliding surface of the bearing.
- Standard clearance:
0.10 mm (0.00393 in.) or less
- Snap Ring Thickness:
Thickness 1.80 to 1.85 mm (0.0709 to 0.0728 in.) 1.85 to 1.90 mm (0.0729 to 0.0748 in.) 1.90 to 1.95 mm (0.0748 to 0.0767 in.) 1.95 to 2.00 mm (0.0768 to 0.0787 in.) 2.00 to 2.05 mm (0.0788 to 0.0807 in.) 2.05 to 2.10 mm (0.0808 to 0.0826 in.) 2.10 to 2.15 mm (0.0827 to 0.0846 in.)
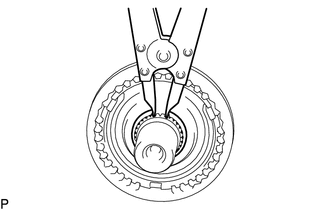
Using a snap ring expander, install the clutch hub set shaft snap ring.
33332B
6.INSTALL 2ND GEAR NEEDLE ROLLER BEARING
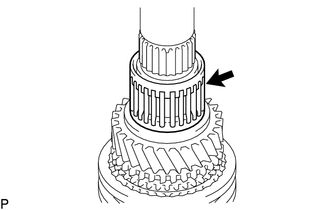
Apply gear oil to the 2nd gear needle roller bearing, and install it to the output shaft.
33332
7.INSTALL 2ND GEAR
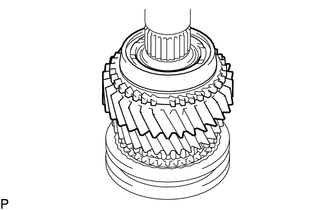
Apply gear oil to the 2nd gear, and install it to the output shaft.
33037B
8.INSTALL NO. 1 SYNCHRONIZER RING SET (FOR 2ND GEAR)
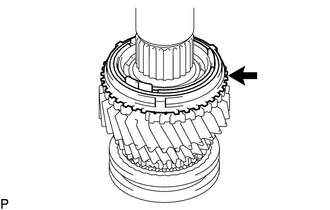
Apply gear oil to the No. 1 synchronizer ring set (for 2nd gear), and install it to the 2nd gear.
33331
9.INSTALL REVERSE GEAR
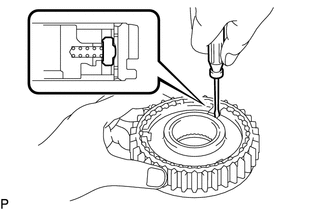
Using a screwdriver, install the 3 No. 1 synchromesh shifting key springs and 3 No. 1 synchromesh shifting keys to the No. 1 transmission clutch hub.
Apply gear oil to the reverse gear, and install it to the No. 1 transmission clutch hub.
- NOTICE:
-
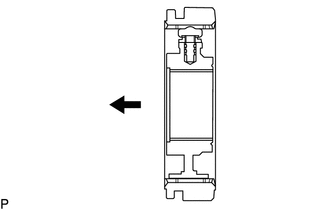 0,0 0,0 false
Front Side
-
Be careful of the direction of the reverse gear and that of the No. 1 transmission clutch hub.
33361
10.INSTALL NO. 1 TRANSMISSION CLUTCH HUB
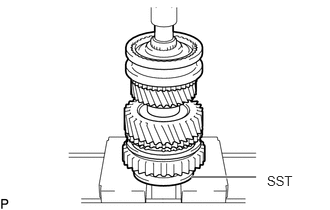
Using SST and a press, press in the No. 1 transmission clutch hub to the output shaft.
- SST
- 09316-60011 (09316-00041)
- NOTICE:
- ·
Install the No. 1 clutch hub while aligning the cutout of the No. 1 clutch hub and the protrusion of synchronizer ring.
·The 1st gear should rotate freely.
Select a bearing shaft snap ring so that the thrust clearance between the No. 1 transmission clutch hub and bearing shaft snap ring is within the specification.
- Standard clearance:
0.1 mm (0.0393 in.) or less
- NOTICE:
-
Do not damage the sliding surface of the bearing.
- Snap Ring Thickness:
Thickness 2.30 to 2.35 mm (0.0906 to 0.0925 in.) 2.35 to 2.40 mm (0.0926 to 0.0944 in.) 2.40 to 2.45 mm (0.0945 to 0.0964 in.) 2.45 to 2.50 mm (0.0965 to 0.0984 in.) 2.50 to 2.55 mm (0.0985 to 0.100 in.) 2.55 to 2.60 mm (0.101 to 0.102 in.) 2.60 to 2.65 mm (0.103 to 0.104 in.)
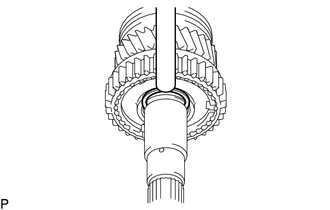
Using a brass bar and hammer, install the bearing shaft snap ring.
33335B
11.INSTALL 1ST GEAR BEARING SPACER
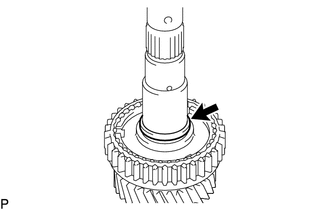
Apply gear oil to the 1st gear bearing spacer, and install it to the output shaft.
33335C
12.INSTALL 1ST GEAR NEEDLE ROLLER BEARING
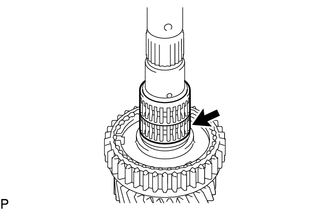
Apply gear oil to the 1st gear needle roller bearing, and install it to the output shaft.
33348A
13.INSTALL 1ST GEAR THRUST WASHER PIN
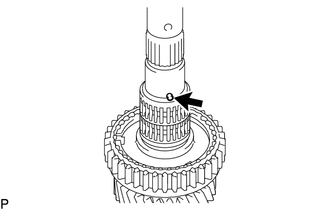
Install the 1st gear thrust washer pin to the output shaft.
33037B
14.INSTALL NO. 1 SYNCHRONIZER RING SET (FOR 1ST GEAR)
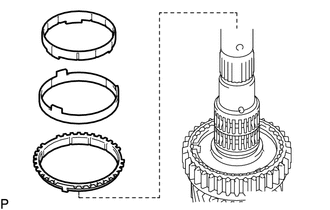
Apply gear oil to the No. 1 synchronizer ring set (for 1st gear), and install it to the output shaft.
33335
15.INSTALL 1ST GEAR
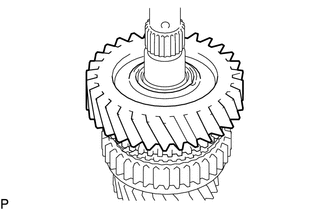
Apply gear oil to the 1st gear, and install it to the output shaft.
33348
16.INSTALL 1ST GEAR THRUST WASHER
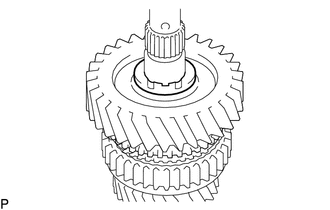
Apply gear oil to the 1st gear thrust washer, and install it to the output shaft.
33321V
17.INSTALL OUTPUT SHAFT CENTER BEARING
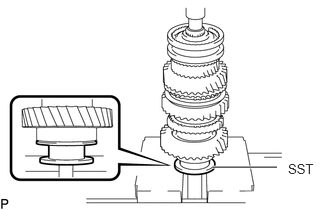
Using SST and a press, press in a new output shaft center bearing to the output shaft.
- SST
- 09316-60011 (09316-00031)
- NOTICE:
-
Install the output shaft center bearing so that the snap ring groove of the bearing is located at the rear.
33336
18.INSTALL 5TH GEAR
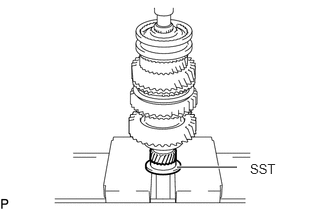
Using SST and a press, press in the 5th gear to the output shaft.
- SST
- 09316-60011 (09316-00031)
- NOTICE:
- ·
Check that the splines of the 5th gear and output shaft properly match before pressing.
·Install the 5th gear so that the convex part of the gear faces forward.
19.INSPECT 1ST GEAR THRUST CLEARANCE
20.INSPECT 2ND GEAR THRUST CLEARANCE
21.INSPECT 3RD GEAR THRUST CLEARANCE
22.INSPECT 1ST GEAR RADIAL CLEARANCE
23.INSPECT 2ND GEAR RADIAL CLEARANCE
24.INSPECT 3RD GEAR RADIAL CLEARANCE