DRIVE SHAFT / PROPELLER SHAFT PROPELLER SHAFT ASSEMBLY(for TASA Made) DISASSEMBLY
PROCEDURE

 37334C
1.REMOVE REAR SLIDING SHAFT BOOT (for 4WD)
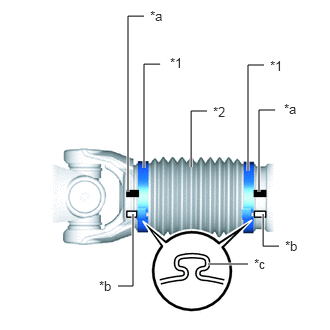
| *1 | Propeller Shaft Boot Clamp |
| *2 | Rear Sliding Shaft Boot |
| *a | Matchmark of Propeller Shaft and Sleeve Yoke |
| *b | Matchmark of Pinching Portion of Propeller Shaft Boot Clamp |
| *c | Pinching Portion |
Place matchmarks on the propeller shaft and sleeve yoke.
Apply matchmarks at the pinching portions of the propeller shaft boot clamps of the propeller shaft and sleeve yoke.
- HINT:
- ·
Make sure to place matchmarks to clearly identify the location of the pinching portions of the propeller shaft boot clamps.
If the pinching portions are installed at different locations than where they were located before disassembly, the rotational balance of the propeller shaft cannot be ensured, which may result in vibrations and noise.
·Make sure that the matchmarks are different enough so that they cannot be confused with each other.
·The location of the pinching portions may differ from the location shown in the illustration, so make sure to confirm and properly place matchmarks according to the vehicle.
Using a side cutter or pliers, disconnect the 2 propeller shaft boot clamps.
Disconnect the 2 propeller shaft boot clamps from the sleeve yoke.
Remove the sleeve yoke, and then remove the rear sliding shaft boot and 2 propeller shaft boot clamps.
2.REMOVE UNIVERSAL JOINT SPIDER ASSEMBLY
- HINT:
-
Use the same procedure for all universal joint spider assemblies.
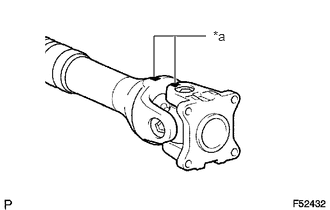
| *a | Matchmark |
Place matchmarks on the flange yoke and propeller shaft.
for Pre-Runner:
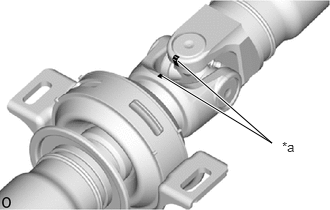
| *a | Matchmark |
Place matchmarks on the center yoke and propeller shaft.
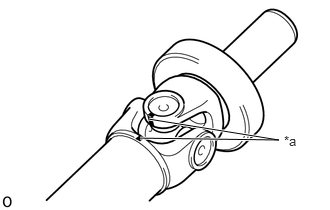
| *a | Matchmark |
Place matchmarks on the sleeve yoke and intermediate shaft.
for 4WD:
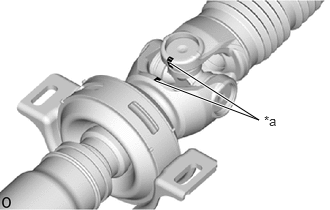
| *a | Matchmark |
Place matchmarks on the center yoke and sleeve yoke.
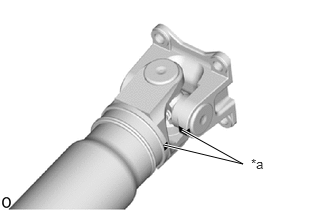
| *a | Matchmark |
Place matchmarks on the flange yoke and intermediate shaft.
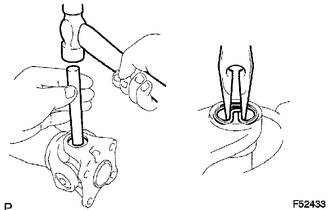
Using a brass bar and hammer, slightly tap in the spider bearing outer races.
Using needle nose pliers, remove the 4 snap rings from the grooves.
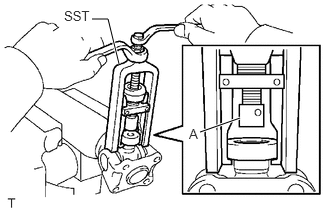
Using SST, push out the spider bearing from the propeller shaft.
- SST
- 09332-25010
- HINT:
-
Before installing SST, sufficiently raise the part labeled A. If part A is too low, SST may be difficult to install.
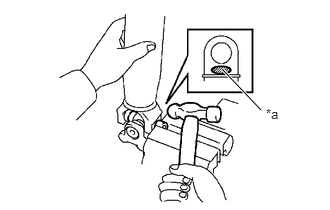
| *a | Hammering Point |
Tap off the propeller shaft to remove the spider bearing.
- NOTICE:
-
Do not tap the shaft.
- HINT:
-
Remove the spider bearing on the opposite side using the same procedure.
Remove the flange yoke from the propeller shaft.
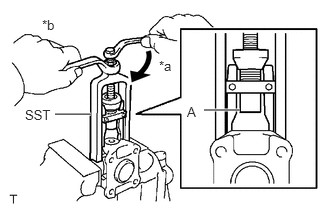
| *a | Turn |
| *b | Hold |
Install the 2 removed spider bearing outer races to the universal joint spider assembly.
Using SST, push out the spider bearing from the flange yoke.
- SST
- 09332-25010
- HINT:
-
Before installing SST, sufficiently raise the part labeled A. If the part labeled A is too low, it may be difficult to install SST.
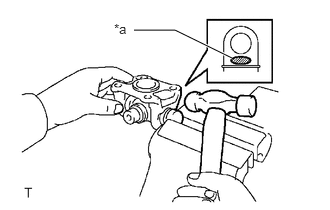
| *a | Hammering Point |
Tap off the spider bearing with a hammer.
Remove the universal joint spider assembly.
37230
3.REMOVE CENTER NO. 1 SUPPORT BEARING ASSEMBLY
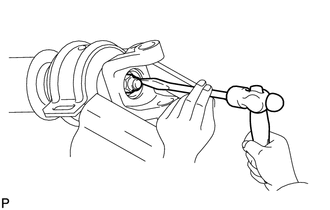
Using a hammer and chisel, loosen the staked part of the lock nut and remove the lock nut and washer.
- NOTICE:
- ·
Completely loosen the staked part of the lock nut when removing it.
·Do not damage the threads of the intermediate shaft.
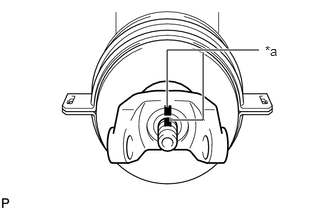
| *a | Matchmark |
Place matchmarks on the intermediate shaft and center yoke.
Using a brass bar and hammer, tap out the center yoke.
Remove the washer and center No. 1 support bearing assembly from the intermediate shaft.