WIPER / WASHER FRONT WIPER MOTOR REMOVAL
PROCEDURE

 85292B
1.REMOVE FRONT WIPER ARM HEAD CAP
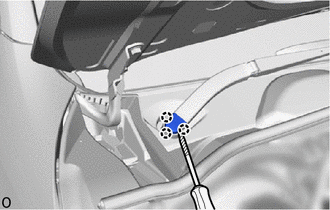

|
Protective Tape |
Using a screwdriver, detach the claw and remove the front wiper arm head cap.
- HINT:
- ·
Tape the screwdriver tip before use.
·Use the same procedure for both front wiper arm head caps.
2.REMOVE FRONT WIPER ARM AND BLADE ASSEMBLY RH
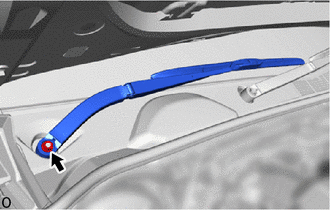
Remove the nut and front wiper arm and blade assembly RH.
3.REMOVE FRONT WIPER ARM AND BLADE ASSEMBLY LH
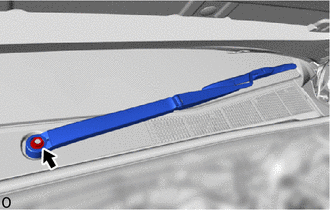
Remove the nut and front wiper arm and blade assembly LH.
53885G
4.REMOVE FENDER APRON MUDGUARD SEAL SUB-ASSEMBLY RH
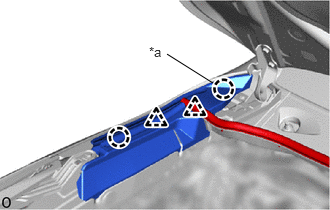
| *a | Claw A |
Detach the clip and disconnect the hood to cowl top seal from the fender apron mudguard seal sub-assembly RH.
Detach claw A by hand from the bottom of the fender apron mudguard seal sub-assembly RH.
Detach the claw and clip and remove the fender apron mudguard seal sub-assembly RH.
53886G
5.REMOVE FENDER APRON MUDGUARD SEAL SUB-ASSEMBLY LH
- HINT:
-
Use the same procedure described for the RH side.
53388D
6.REMOVE HOOD TO FRONT FENDER SEAL RH
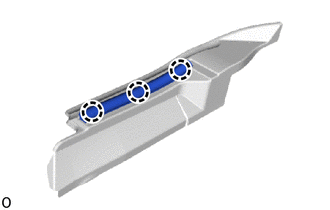
Detach the claw and remove the hood to front fender seal RH.
53389B
7.REMOVE HOOD TO FRONT FENDER SEAL LH
- HINT:
-
Use the same procedure described for the RH side.
53866J
8.REMOVE FRONT FENDER TO COWL SIDE SEAL RH
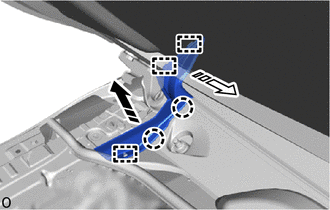

|
Remove in this Direction (1) |

|
Remove in this Direction (2) |
Detach the claw and guide and remove the front fender to cowl side seal RH as shown in the illustration.
53867H
9.REMOVE FRONT FENDER TO COWL SIDE SEAL LH
- HINT:
-
Use the same procedure described for the RH side.
55781E
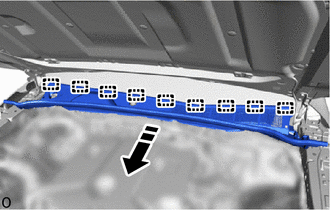
10.REMOVE COWL TOP VENTILATOR LOUVER SUB-ASSEMBLY
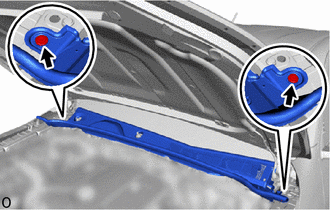
Remove the 2 clips.
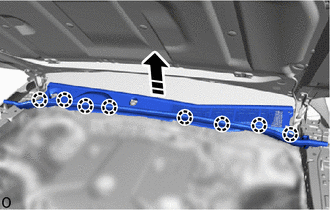
|
|
Remove in this Direction |
Detach the claw.
|
|
Remove in this Direction |
Pull the cowl top ventilator louver sub-assembly in the direction indicated by the arrow in the illustration to detach the guide and remove the cowl top ventilator louver sub-assembly.
53383
11.REMOVE HOOD TO COWL TOP SEAL
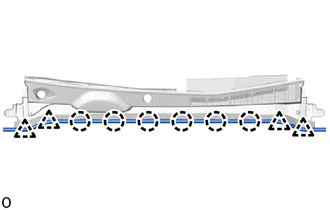
Detach the claw and clip and remove the hood to cowl top seal.
12.REMOVE WINDSHIELD WIPER MOTOR AND LINK ASSEMBLY
- NOTICE:
-
Be careful not to damage the windshield when removing the windshield wiper motor and link assembly.
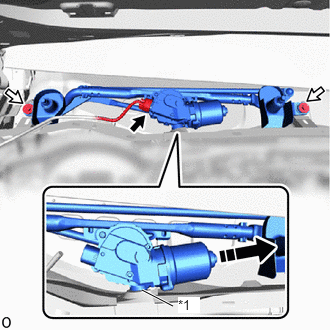
| *1 | Motor Grommet |

|
Connector |

|
Bolt |
|
|
Remove in this Direction |
Disconnect the connector.
Remove the 2 bolts.
Detach the motor grommet as shown in the illustration and remove the windshield wiper motor and link assembly.
85110
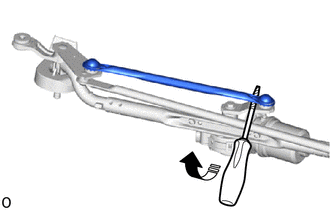
13.REMOVE WINDSHIELD WIPER MOTOR ASSEMBLY
|
|
Protective Tape |
|
|
Remove in this Direction |
Using a screwdriver, disconnect the No. 1 windshield wiper link rod from the front wiper crank pivot.
- HINT:
-
Tape the screwdriver tip before use.
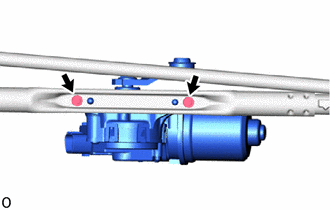
Using a T30 "TORX" socket wrench, remove the 2 bolts and windshield wiper motor assembly.