A343E AUTOMATIC TRANSMISSION / TRANSAXLE AUTOMATIC TRANSMISSION UNIT INSPECTION
PROCEDURE

 1.INSPECT AUTOMATIC TRANSMISSION OIL PAN SUB-ASSEMBLY
Remove the magnets and use them to collect steel particles.
Carefully look at the foreign matter and particles in the pan and on the magnets to anticipate the type of wear you will find in the transmission.
Steel (magnetic): bearing, gear and clutch plate wear.
Brass (non-magnetic): bush wear.
2.INSPECT OVERDRIVE 1-WAY CLUTCH

|
Lock |

|
Free |
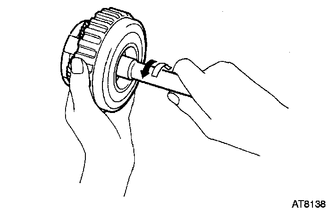
Hold the overdrive direct clutch drum and turn the input shaft. Check that the input shaft can be turned clockwise freely and locks when turned counterclockwise.
3.INSPECT OVERDRIVE DIRECT CLUTCH DISC
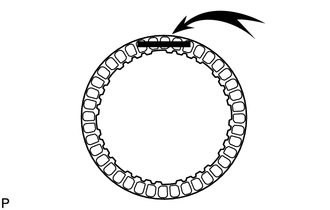
Replace all the discs if one of the following problems is present: 1) a disc, plate or flange is worn or burnt, 2) the lining of a disc is peeled off or discolored, or 3) the grooves or printed numbers have even a little bit of damage.
- NOTICE:
-
When assembling new discs, soak them in ATF for at least 15 minutes.
4.INSPECT OVERDRIVE CLUTCH RETURN SPRING SUB-ASSEMBLY
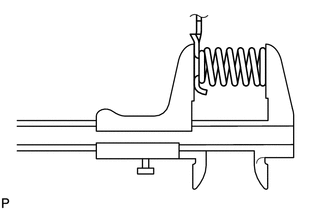
Using a vernier caliper, measure the free length of the spring together with the spring seat.
- Standard free length:
15.8 mm (0.622 in.)
If the length is not as specified, replace the overdrive clutch return spring sub-assembly.
5.INSPECT OVERDRIVE DIRECT CLUTCH PISTON SUB-ASSEMBLY
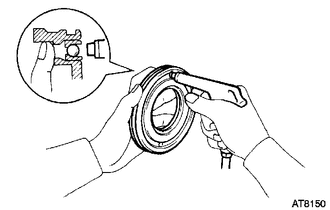
Check that the check ball is free by shaking the piston.
Check that the valve does not have leaks by applying low-pressure compressed air.
If the result is not as specified, replace the overdrive direct clutch piston sub-assembly.
6.INSPECT OVERDRIVE DIRECT CLUTCH DRUM SUB-ASSEMBLY
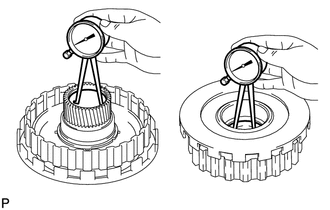
Using a dial indicator, measure the inside diameter of the clutch drum bushes.
- Standard inside diameter:
27.037 to 27.063 mm (1.0645 to 1.0654 in.)
If the inside diameter is not as specified, replace the overdrive direct clutch drum sub-assembly.
7.INSPECT OVERDRIVE PLANETARY GEAR ASSEMBLY
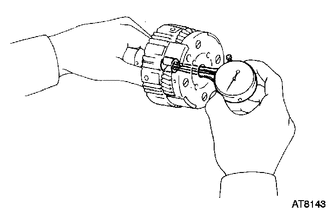
Using a dial indicator, measure the inside diameter of the planetary gear bush.
- Standard inside diameter:
11.200 to 11.221 mm (0.4409 to 0.4417 in.)
If the inside diameter is not as specified, replace the overdrive planetary gear assembly.
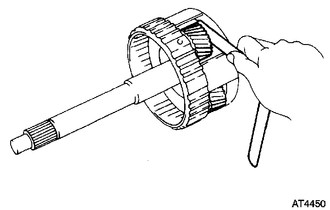
Using a feeler gauge, measure the planetary pinion gear thrust clearance.
- Standard clearance:
0.20 to 0.60 mm (0.00788 to 0.0236 in.)
If the clearance is not as specified, replace the overdrive planetary gear assembly.
8.INSPECT OVERDRIVE BRAKE DISC
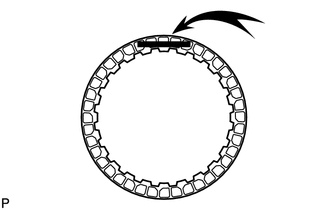
Replace all the discs if one of the following problems is present: 1) a disc, plate or flange is worn or burnt, 2) the lining of a disc is peeled off or discolored, or 3) the grooves or printed numbers have even a little bit of damage.
- NOTICE:
-
When assembling new discs, soak them in ATF for at least 15 minutes.
9.INSPECT PISTON OPERATION OF OVERDRIVE BRAKE
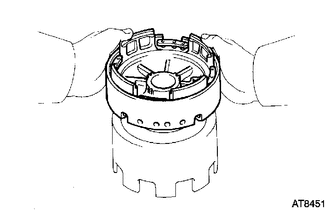
Place the overdrive support assembly onto the direct clutch assembly.
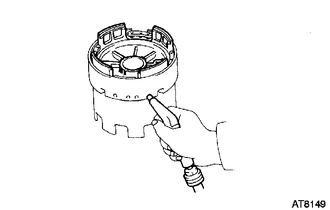
Apply compressed air (392 kPa (4.0 kgf/cm2, 57 psi)) into the oil passage and check that the overdrive brake piston moves smoothly.
10.INSPECT OVERDRIVE BRAKE RETURN SPRING SUB-ASSEMBLY
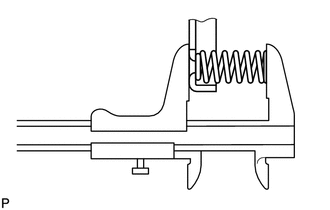
Using a vernier caliper, measure the free length of the spring together with the spring seat.
- Standard free length:
17.03 mm (0.671 in.)
If the length is not as specified, replace the overdrive brake return spring sub-assembly.
11.INSPECT DIRECT CLUTCH DISC
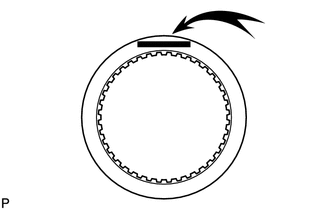
Replace all the discs if one of the following problems is present: 1) a disc, plate or flange is worn or burnt, 2) the lining of a disc is peeled off or discolored, or 3) the grooves or printed numbers have even a little bit of damage.
- NOTICE:
-
When assembling new discs, soak them in ATF for at least 15 minutes.
12.INSPECT DIRECT CLUTCH RETURN SPRING SUB-ASSEMBLY
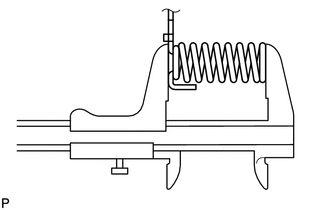
Using a vernier caliper, measure the free length of the spring together with the spring seat.
- Standard free length:
21.32 mm (0.839 in.)
If the length is not as specified, replace the direct clutch return spring sub-assembly.
13.INSPECT DIRECT CLUTCH PISTON SUB-ASSEMBLY
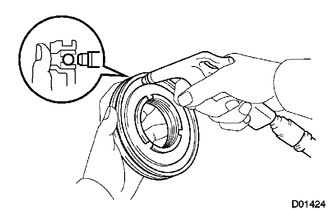
Check that the check ball is free by shaking the piston.
Check that the valve does not have leaks by applying low-pressure compressed air.
14.INSPECT DIRECT CLUTCH DRUM SUB-ASSEMBLY
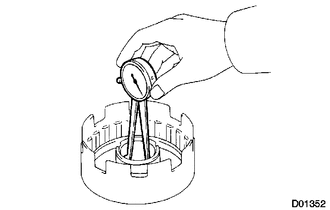
Using a dial indicator, measure the inside diameter of the clutch drum bush.
- Standard inside diameter:
53.915 to 53.94 mm (2.1227 to 2.1236 in.)
If the inside diameter is not as specified, replace the direct clutch drum sub-assembly.
15.INSPECT FORWARD CLUTCH DISC
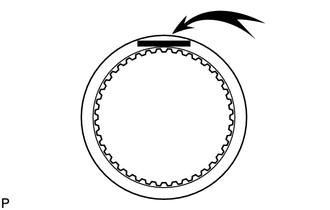
Replace all the discs if one of the following problems is present: 1) a disc, plate or flange is worn or burnt, 2) the lining of a disc is peeled off or discolored, or 3) the grooves or printed numbers have even a little bit of damage.
- NOTICE:
-
When assembling new discs, soak them in ATF for at least 15 minutes.
16.INSPECT FORWARD CLUTCH PISTON SUB-ASSEMBLY
Check that the check ball is free by shaking the piston.
Check that the valve does not have leaks by applying low-pressure compressed air.
17.INSPECT INPUT SHAFT SUB-ASSEMBLY
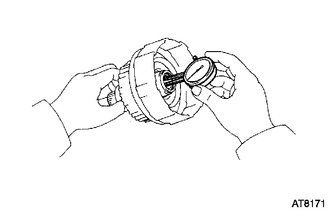
Using a dial indicator, measure the inside diameter of the input shaft bush.
- Standard inside diameter:
24.000 to 24.026 mm (0.9449 to 0.9459 in.)
If the inside diameter is not as specified, replace the input shaft sub-assembly.
18.INSPECT FORWARD CLUTCH RETURN SPRING SUB-ASSEMBLY
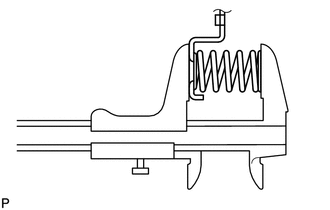
Using a vernier caliper, measure the free length of the spring together with the spring seat.
- Standard free length:
19.47 mm (0.767 in.)
If the length is not as specified, replace the forward clutch return spring sub-assembly.
19.INSPECT SECOND COAST BRAKE PISTON ROD
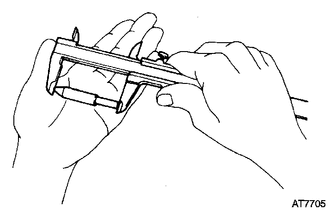
Check the piston rod length.
- HINT:
-
There are 2 different standard lengths for the piston rod.
- Piston Rod Length:
Groove Mark Length Without 78.3 to 78.5 mm (3.083 to 3.090 in.) With 79.8 to 80.0 mm (3.142 to 3.149 in.)
If the length is not as specified, replace the rod with a new one even if the brake band works normally.
20.INSPECT SECOND COAST BRAKE BAND ASSEMBLY
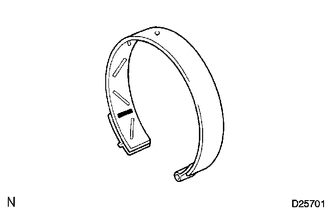
| *1 | Printed Number |
- NOTICE:
- ·
If the lining of the brake band is peeled off or discolored, or if any part of the printed numbers is damaged, replace the brake band.
·When installing a new band, soak it in ATF for at least 15 minutes before installation.
21.INSPECT FRONT PLANETARY RING GEAR SUB-ASSEMBLY
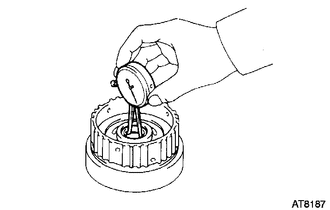
Using a dial indicator, measure the inside diameter of the planetary ring gear bush.
- Standard inside diameter:
24.000 to 24.026 mm (0.9449 to 0.9459 in.)
If the inside diameter is not as specified, replace the front planetary ring gear sub-assembly.
22.INSPECT FRONT PLANETARY GEAR ASSEMBLY
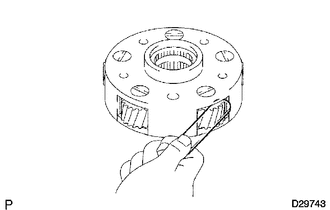
Using a feeler gauge, measure the pinion gear thrust clearance.
- Standard clearance:
0.20 to 0.60 mm (0.00788 to 0.0236 in.)
If the clearance is not as specified, replace the front planetary gear assembly.
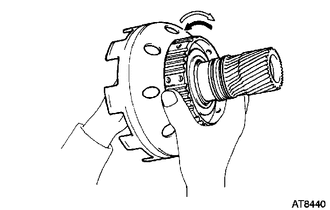
23.INSPECT NO. 1 1-WAY CLUTCH ASSEMBLY
|
|
Lock |
|
|
Free |
Hold the planetary sun gear and turn the 1-way clutch assembly. Check that the 1-way clutch hub can be turned clockwise freely and locks when turned counterclockwise.
24.INSPECT PLANETARY SUN GEAR SUB-ASSEMBLY
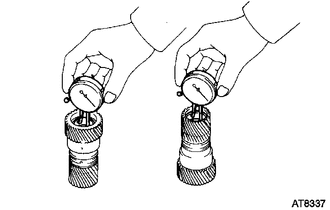
Using a dial indicator, measure the inside diameter of the planetary sun gear bushes.
- Standard inside diameter:
27.000 to 27.026 mm (1.0630 to 1.0640 in.)
If the inside diameter is not as specified, replace the planetary sun gear sub-assembly.
25.INSPECT SECOND BRAKE PISTON
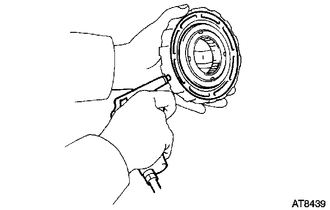
Check that the second brake piston moves smoothly when applying compressed air to and releasing low-pressure compressed air from the second brake drum.
26.INSPECT SECOND BRAKE DISC
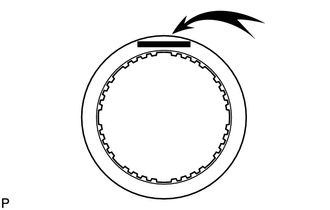
Replace all the discs if one of the following problems is present: 1) a disc, plate or flange is worn or burnt, 2) the lining of a disc is peeled off or discolored, or 3) the grooves or printed numbers have even a little bit of damage.
- NOTICE:
-
When assembling new discs, soak them in ATF for at least 15 minutes.
27.INSPECT SECOND BRAKE PISTON RETURN SPRING SUB-ASSEMBLY
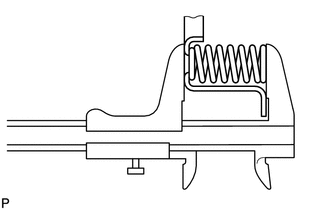
Using a vernier caliper, measure the free length of the spring together with the spring seat.
- Standard free length:
16.05 mm (0.632 in.)
If the length is not as specified, replace the second brake piston return spring sub-assembly.
28.INSPECT FIRST AND REVERSE BRAKE DISC
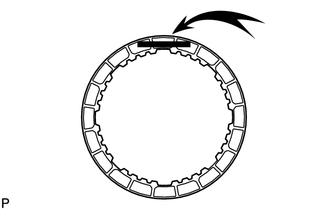
Replace all the discs if one of the following problems is present: 1) a disc, plate or flange is worn or burnt, 2) the lining of a disc is peeled off or discolored, or 3) the grooves or printed numbers have even a little bit of damage.
- NOTICE:
-
When assembling new discs, soak them in ATF for at least 15 minutes.
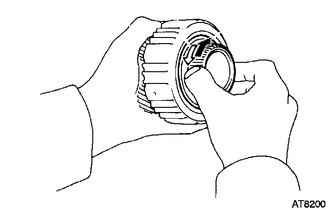
29.INSPECT NO. 2 1-WAY CLUTCH
|
|
Lock |
|
|
Free |
Hold the planetary gear and turn the 1-way clutch inner race. Check that the 1-way clutch inner race can be turned counterclockwise freely and locks when turned clockwise.
30.INSPECT REAR PLANETARY GEAR ASSEMBLY
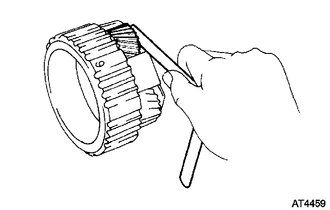
Using a feeler gauge, measure the thrust clearance.
- Standard clearance:
0.20 to 0.60 mm (0.00788 to 0.0236 in.)
If the clearance is not as specified, replace the rear planetary gear assembly.
31.INSPECT FIRST AND REVERSE BRAKE RETURN SPRING SUB-ASSEMBLY
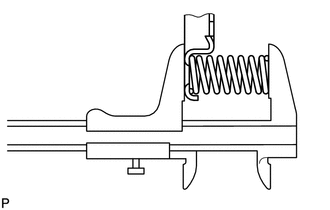
Using a vernier caliper, measure the free length of the spring together with the spring seat.
- Standard free length:
12.902 mm (0.508 in.)
If the length is not as specified, replace the first and reverse brake return spring sub-assembly.
32.INSPECT TRANSMISSION CASE BUSH
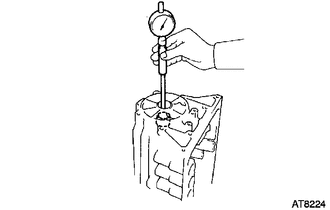
Using a cylinder gauge, measure the inside diameter of the transmission case rear bush.
- Standard inside diameter:
38.113 to 38.138 mm (1.50051 to 1.50149 in.)
If the inside diameter is not as specified, replace the automatic transmission case sub-assembly.
33.INSPECT PISTON OPERATION OF FIRST AND REVERSE BRAKE
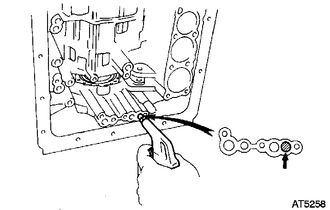
Make sure the first and reverse brake pistons move smoothly when compressed air is applied into the transmission case.
34.INSPECT PISTON OPERATION OF SECOND COAST BRAKE
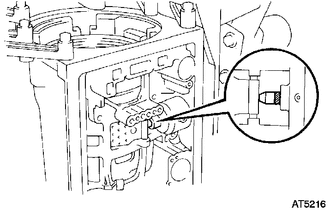
| *1 | Mark |
| *2 | Piston Rod |
Place a mark on the second coast brake piston rod.
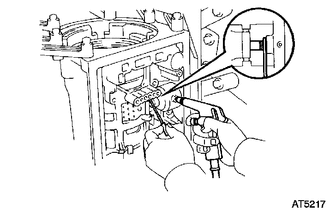
Using SST, measure the stroke while applying and releasing compressed air (392 kPa (4.0 kgf/cm2, 57 psi)).
- SST
- 09240-00020
- Standard piston stroke:
1.5 to 3.0 mm (0.0591 to 0.118 in.)
If the stroke is not as specified, replace the brake band with a new one.
35.INSPECT OUTPUT SHAFT END PLAY
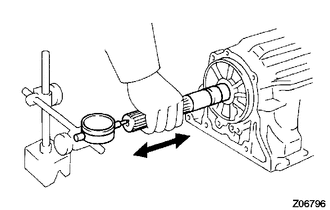
Using a dial indicator, measure the end play of the output shaft while moving it by hand.
- Standard end play:
0.30 to 1.04 mm (0.0119 to 0.0409 in.)
If the end play is not as specified, check for improper installation.
Check that the output shaft rotates smoothly.