THEFT DETERRENT / KEYLESS ENTRY THEFT DETERRENT SYSTEM Driver Side Door Courtesy Switch Circuit
DESCRIPTION
The theft warning ECU assembly detects the condition of the front door courtesy light switch assembly RH.
WIRING DIAGRAM
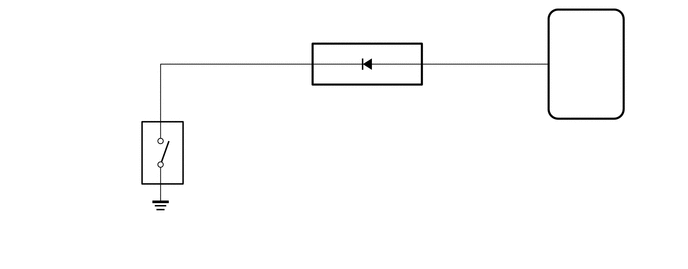
PROCEDURE
When the driver side door is opened/closed, check that the indicator in the combination meter assembly operates normally.
- OK:
Indicator operates normally.
- Result:
Proceed to OK NG
OK
NG
Disconnect the G19 combination meter assembly connector.
Disconnect the G124 theft warning ECU assembly connector.
Measure the resistance according to the value(s) in the table below.
- Standard Resistance:
Tester Connection Condition Specified Condition G19-17 (DOOR) - G124-7 (CTY) Always Below 1 Ω G19-17 (DOOR) or G124-7 (CTY) - Body ground Always 10 kΩ or higher
Measure the voltage according to the value(s) in the table below.
- Standard Voltage:
Tester Connection Condition Specified Condition G19-17 (DOOR) - Body ground Always 11 to 14 V
- Result:
Proceed to OK NG
OK
Click hereVehicle Interior>THEFT DETERRENT / KEYLESS ENTRY>THEFT DETERRENT SYSTEM>PROBLEM SYMPTOMS TABLE
NG
Remove the front door courtesy light switch assembly RH.
Click hereVehicle Interior>LIGHTING (INT)>FRONT DOOR COURTESY SWITCH>REMOVAL
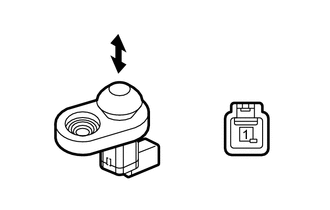
| *a | Not pushed (ON) |
| *b | Pushed (OFF) |
| *c | Body ground |
Measure the resistance according to the value(s) in the table below.
- Standard Resistance:
Tester Connection Switch Condition Specified Condition 1 - Body ground Not pushed (ON) Below 1 Ω Pushed (OFF) 10 kΩ or higher
- Result:
Proceed to OK NG
OK
NG
Disconnect the G19 combination meter assembly connector.
Disconnect the K3 front door courtesy light switch assembly RH connector.
Measure the resistance according to the value(s) in the table below.
- Standard Resistance:
Tester Connection Condition Specified Condition G19-16 (DCTY) - K3-1 Always Below 1 Ω G19-16 (DCTY) or K3-1 - Body ground Always 10 kΩ or higher
- Result:
Proceed to OK NG
OK
NG